
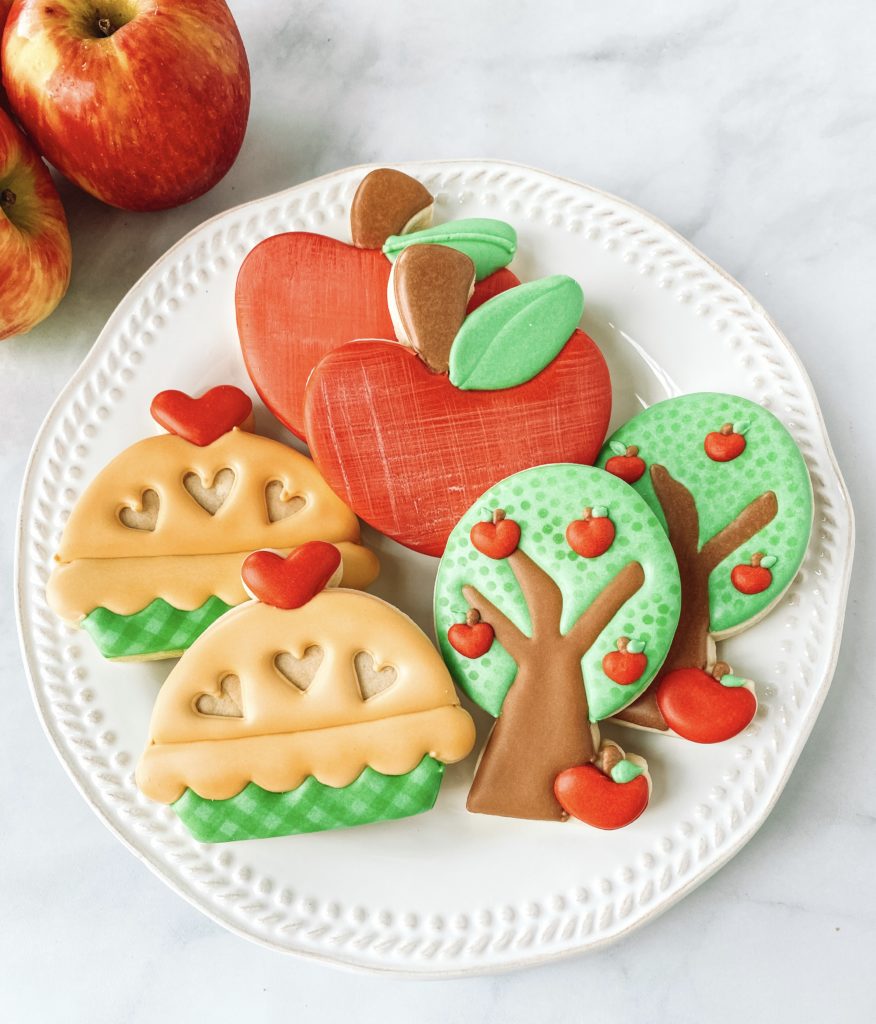
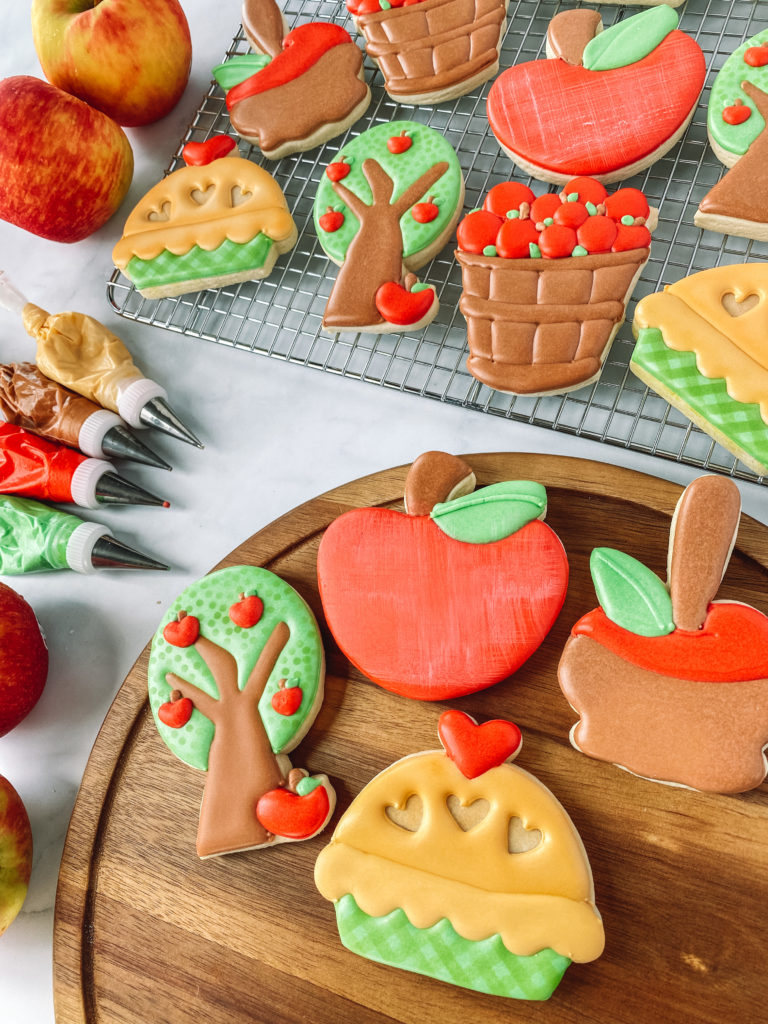
I have been decorating all kinds of Fall Apple Cookies this week, you’re going to “FALL” in love with them for sure!
I am going to show you an apple pie, caramel apple, apple trees, bushels of apples, and beautiful simple sweet apple cookies in this post. I will walk you through everything you need to make them, which cutters I used, and the tools used. You can TOTALLY make these adorable cookies, and if you keep your eye out you will see these same cookies transform into other FALL favorites very soon in upcoming posts and videos. I also love to have some royal icing transfers for some of my projects, if you want to learn all about how to do that (it is easy and adds some fun 3D magic to cookies) check out this post.
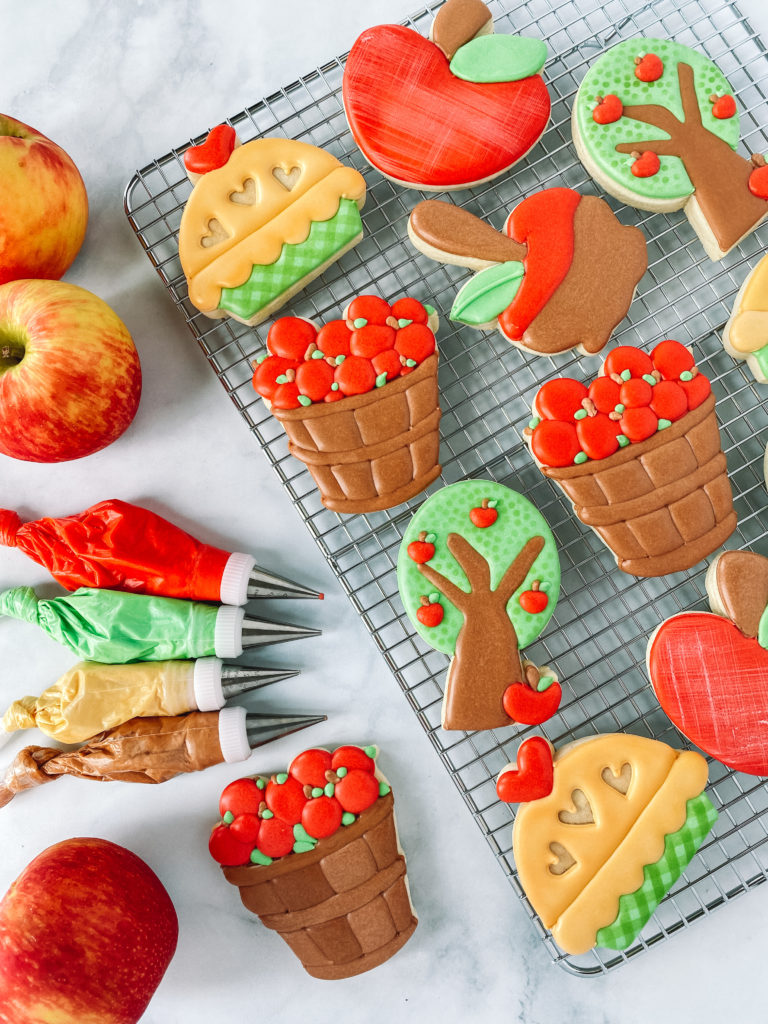
FALL APPLE COOKIE COLLECTION
YOU WILL NEED:
- Cut-out sugar cookie dough
- Royal icing
- Icing colors – I use Americolor brand
CUTTERS:
Fall Apple Collection from Simply Renee Sweets
TOOLS AND TIPS: Check out my supplies page and other options under SHOP on the website if you need to grab anything
- Tips #2 or #2.5
- Couplers
- Icing bags
- Parchment paper
- Cookie sheet
- Toothpick or scribe
- Paint brush
Optional:
- Cookie Countess Air Brush Gun
- Cookie Countess lines stencil
- Cookie Countess Air Brush Color ivory towers, glowing green and whipped white
COLORS YOU WILL NEED:
- White Icing – outline and flood
- Red Icing – outline and flood
- Green Icing – outline and flood
- Brown Icing – outline and flood
- Ivory Icing – outline and flood
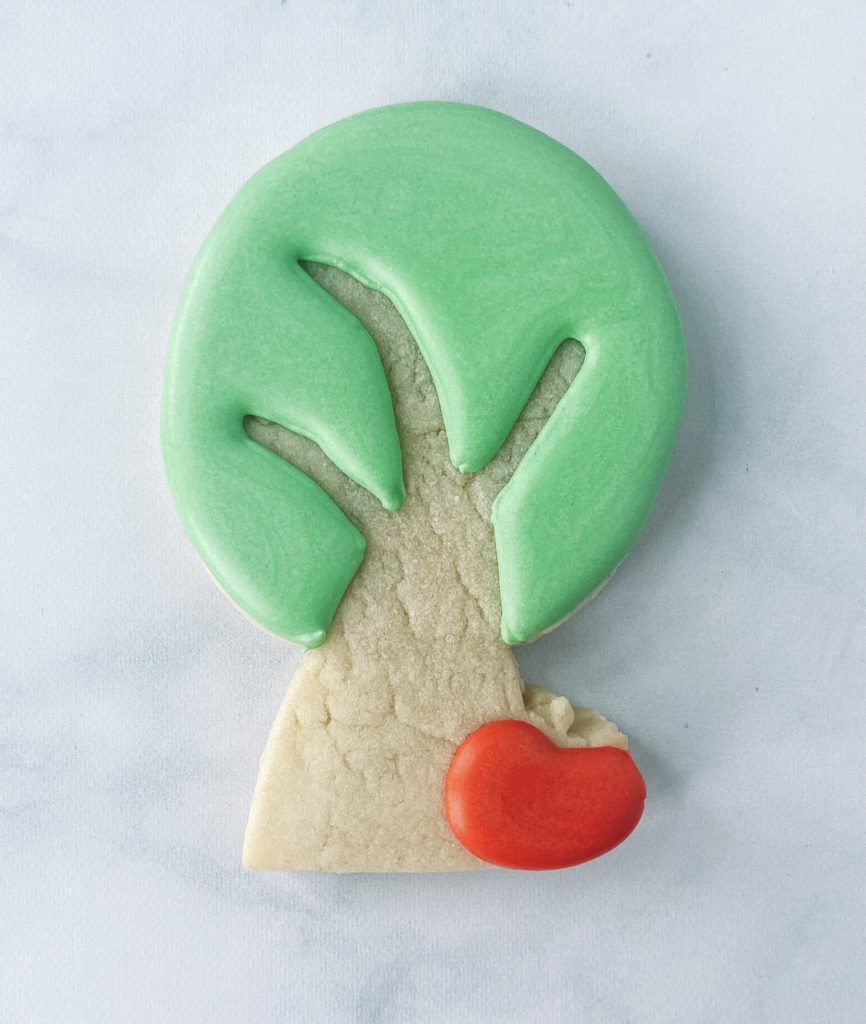
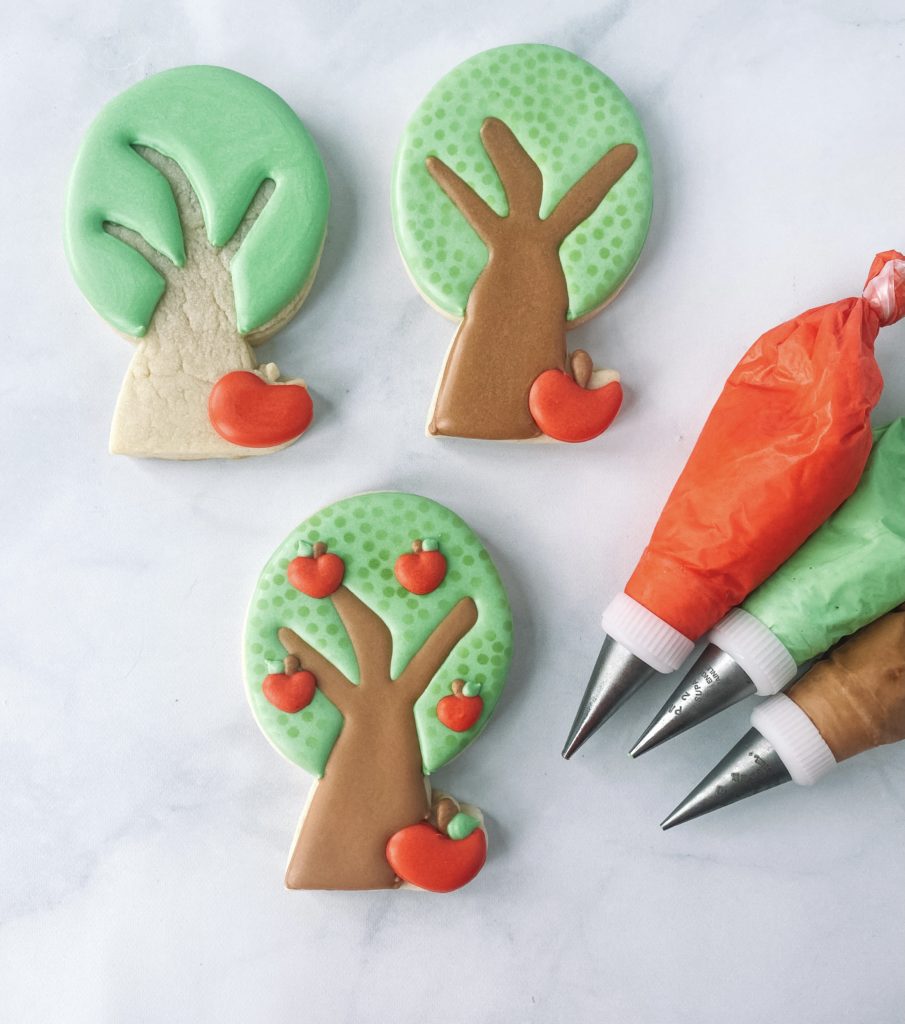
TREE COOKIE
BASE LAYER AND OUTLINE
Step 1: Using green piping icing outline the top portion of the tree making sure to go around the branches. Using red piped icing add the apple to the bottom of the tree. Using brown piping icing, outline the bottom trunk portion of the tree.
FLOODING
Step 2: Fill the top portion of the tree with green flood icing. Start from the outside and work your way toward the middle of the cookie. Fill in the apple with red flood icing.
Stop and allow your cookie to dry in front of a fan for 1-2 hours before flooding the next section.
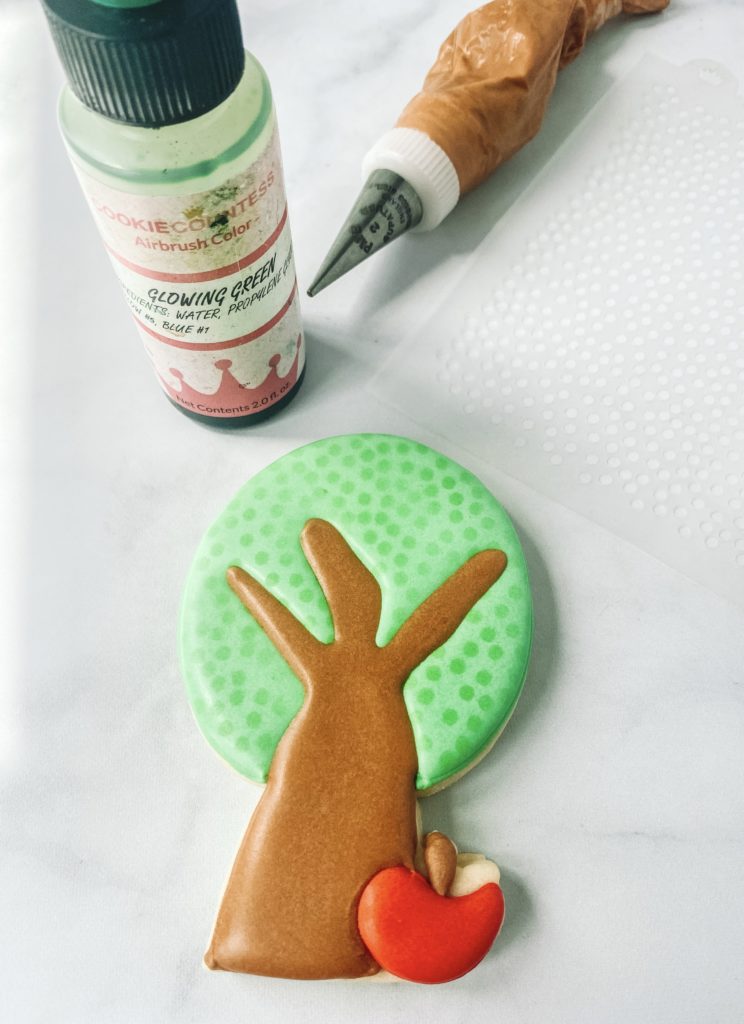
Step 3: Using the small dot stencil from cookie countess and glowing green airbrush color lightly airbrush onto the green part of the tree. Next using brown flood icing fill in the branches and trunk of the tree.
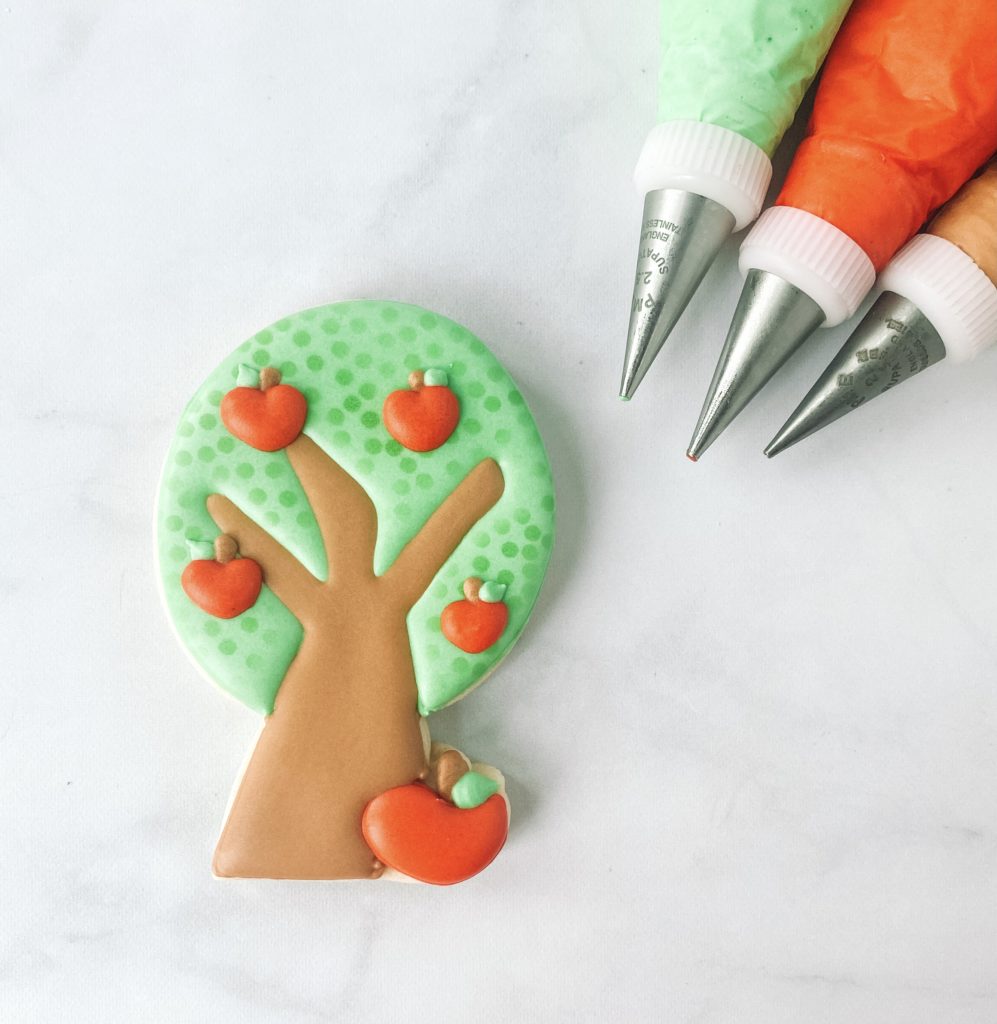
DETAILS
Step 4: Make stems on the green part of the tree with brown outline icing. Next use red outline icing to make a heart (making a teardrop on either side) and use your scribe to round out the bottom portion of the apple. Last use green outline icing to make a leaf next to the stem. To create a leaf with a #2 tip squeeze a dot and pull back away from the dot.
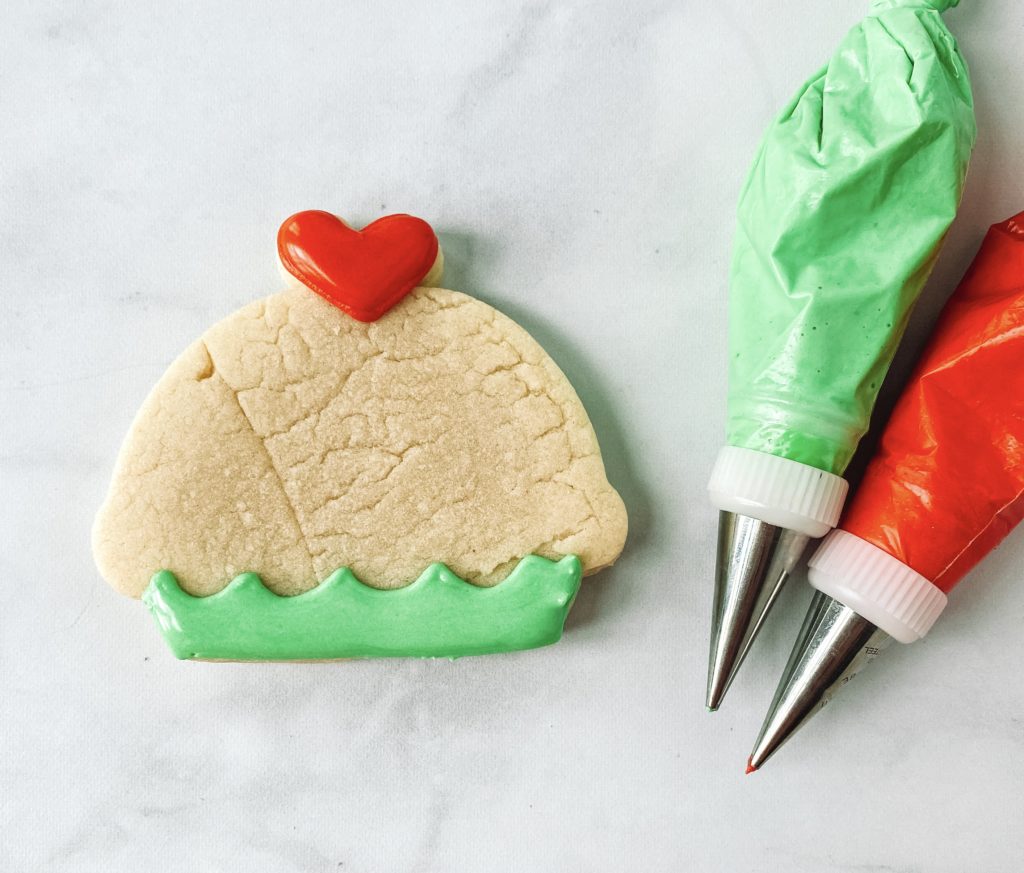
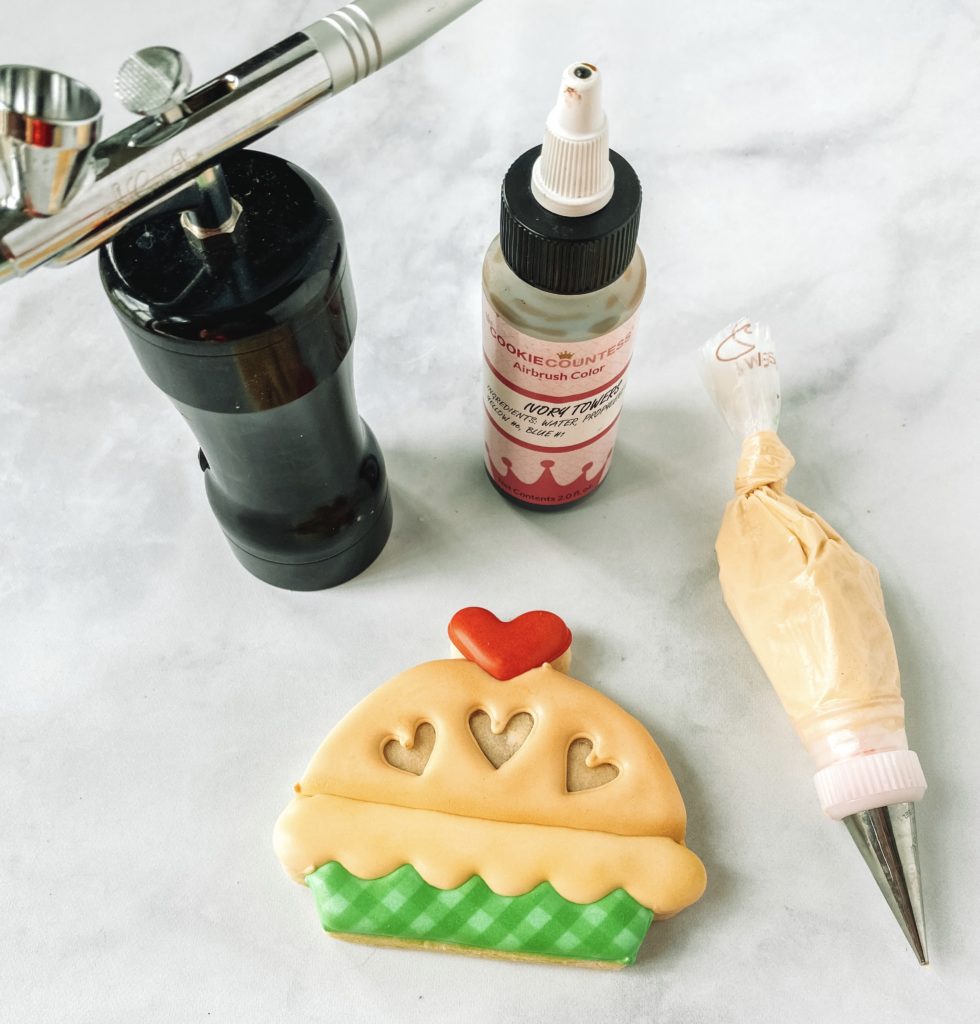
APPLE PIE COOKIE
BASE LAYER AND OUTLINE
Step 1: Using red outline icing outline the top heart of the pie. Use green piping icing to outline the bottom portion of the pie. Next use your ivory piping icing to make hearts in the middle of your pie just below the heart. Make sure to add a line to give dimension to your pie.
FLOODING
Step 2: Fill the heart with red flood icing. Using green flood icing fill in the bottom section of the pie.
Stop and allow your cookie to dry in front of a fan for 1-2 hours before flooding the next section.
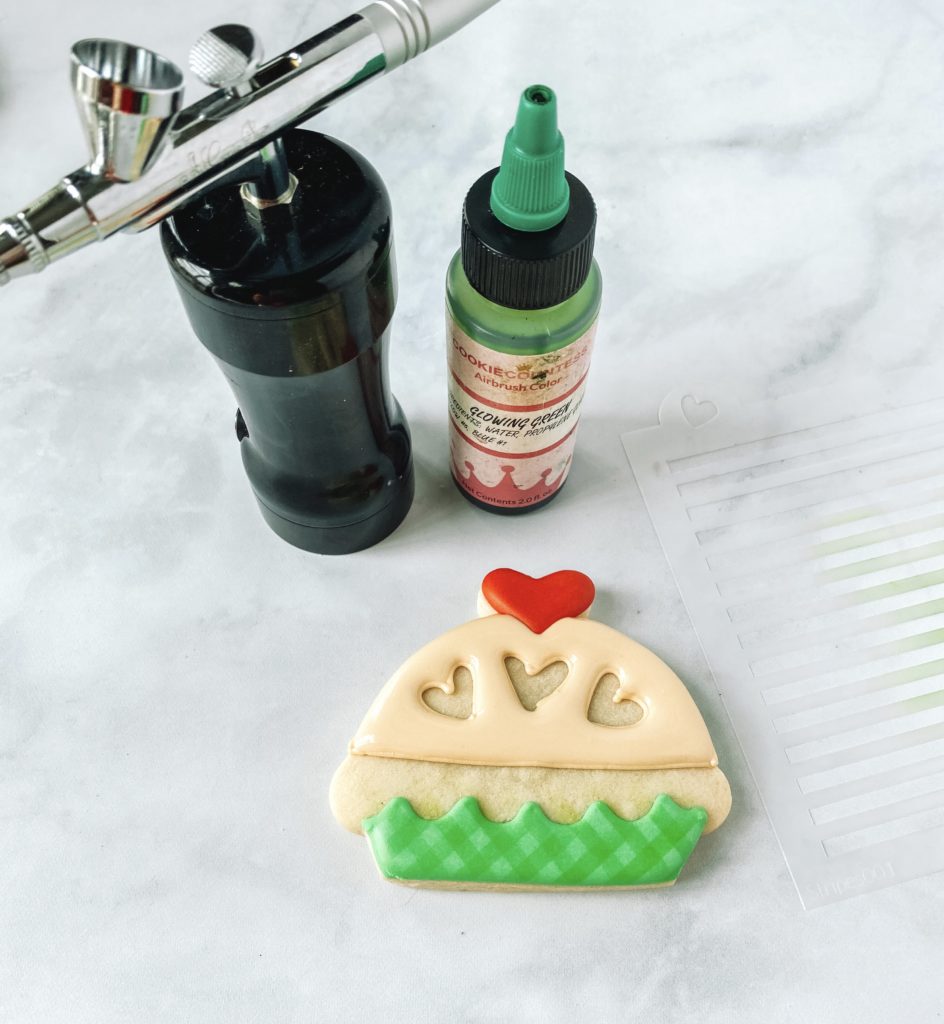
Step 3: Use green airbrush colors and the cookie countess line stencil to make a crisscross pattern on the green icing.
Step 4: Using ivory flood icing fill in the top portion of the pie.
Allow the icing to dry and crust over (about 10-15 minutes) then flood the middle section (the crust) of the pie.
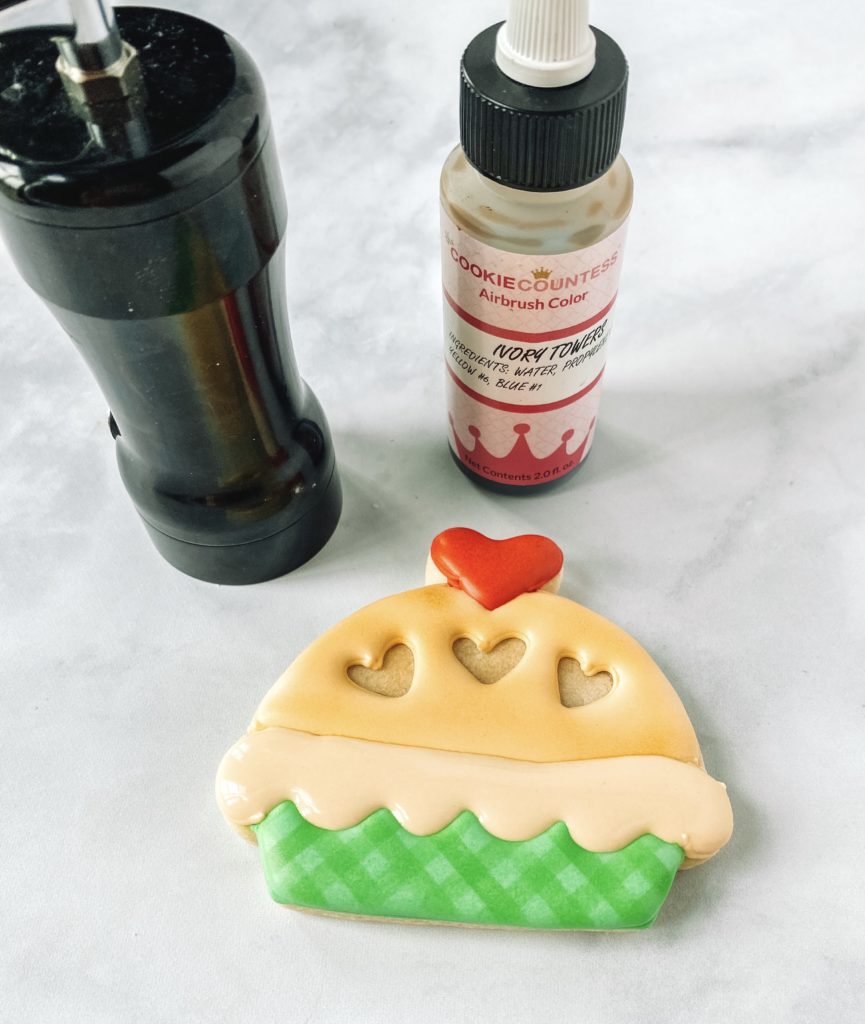
DETAILS
Step 5: Use ivory airbrush color to add dimension to your pie around the edges and around the cutouts.
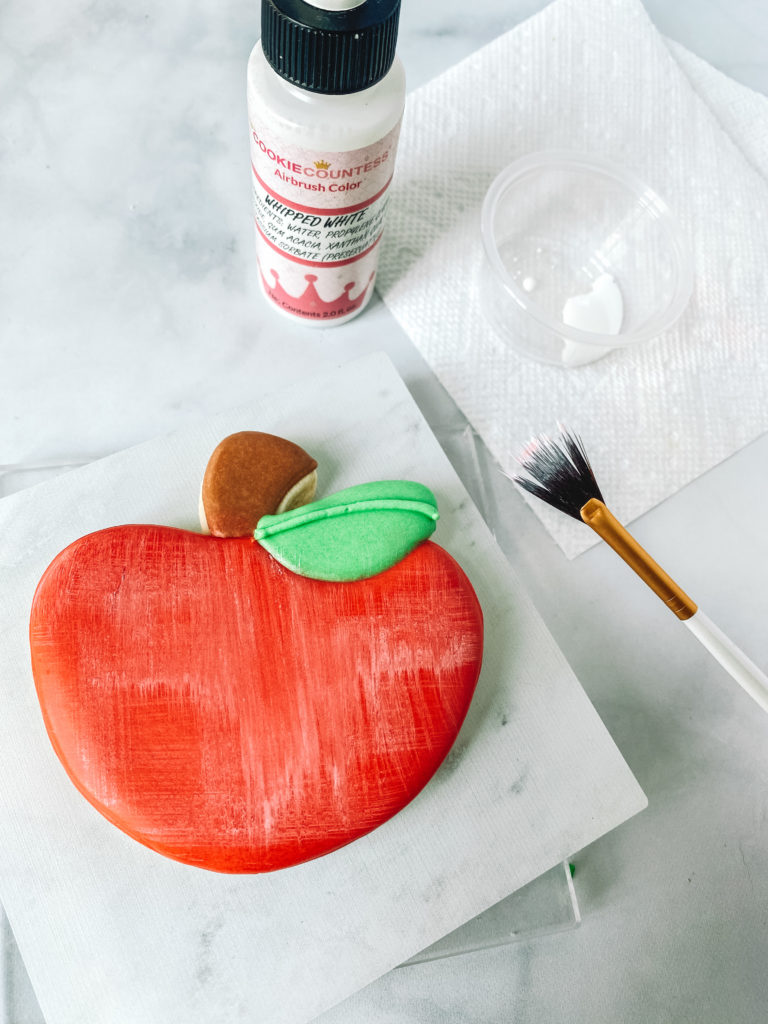
APPLE COOKIE
I outline and flooded this apple cookie and allowed it to dry completely before adding some fun detail. I used the cookie countess whipped white airbrush color and a fan paintbrush to make this fun technique. Dip your paintbrush in white airbrush color then dip on a paper towel. Going one direction, gently swipe the paintbrush over the apple.

Now you have decorated all your beautiful Fall Apple Cookies, can you believe all the different techniques we just used to create this set of delicious cookies? If you want to see some videos of various cookies from this collection just click over to Facebook or Instagram and watch the live videos I did this past week for some of them.
More Resources
Remember to subscribe to my newsletter to stay up to date on everything going on, courses that are opening, and new cookie projects you can be a part of.