
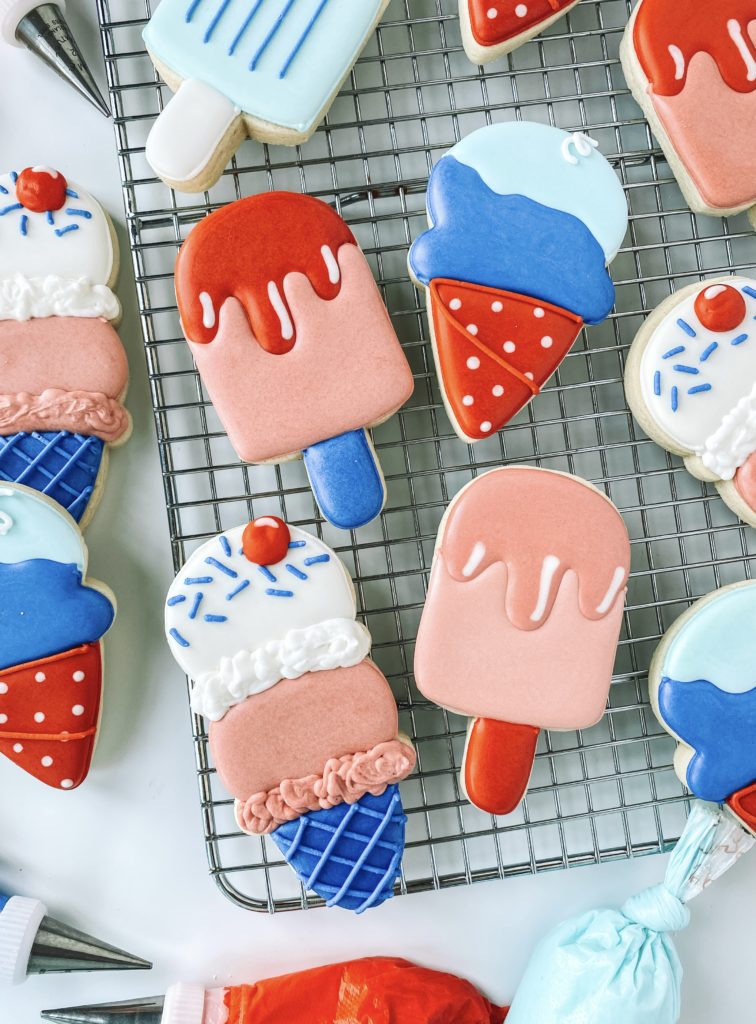
Whoever said Patriotic Cookies have to be all flags and bunting with navy blue white and red? Let’s make a cute set of Patriotic Cookies that are all about the fun of summer ice cream and popsicles! With bright colors, fun designs, and easy enough for even a beginner-level cookie decorator, you’ll love this set of cookies!

For these cookies, I used my exclusive sugar cookie recipe and royal icing recipe. The cookie recipe yielded about 12-15 regular size 3 – 3.5 inch cookies. I like thicker cookies so I roll out my cookies to 3/8″ using my Cookie Countess Precision Rolling Pin. The thickness of your cookie will change the cookie yield.
Check out the step-by-step video tutorial
I show you how to decorate these AWESOME Patriotic cookies!
Check out the video tutorial for tips on how to make and package these cookies!
CUTTERS: DOUBLE ICE CREAM CONE AND POPSICLE FROM THE SWEET DESIGNS SHOPPE, ICE CREAM/SNOW CONE FROM SWEET SUGARBELLE
COLORS YOU WILL NEED:
- White – outline and flood icing
- Red Icing – outline and flood icing
- Light Blue- outline and flood icing
- Royal Blue – outline and flood icing
- Lt. Rose/pink- outline and flood icing
- Dk. Rose/pink – outline and flood icing
Prepping Royal Icing
Patriotic Ice Cream Cookie Guide
This cookie set includes 5 icing colors using white, red, light blue, royal blue, and light rose/dark rose. I made all the colors with Americolor
Helpful Decorating Tips and Tricks
Cookie Timeline
I like to break up the decorating process over a few days. It works better for my stage of life to do a little each day. Here is a sample timeline to show how long each step takes.
DAY 1
Make and bake my cookies. I do not chill my dough so usually, this takes about 1 hour from start to finish. Mix royal icing, color, and prep all the icing bags. I like to color the day before because the colors will deepen over time.
DAY 2
Outline and Flood Cookies. Make sure to allow them to dry in front of a fan for 1-2 hours before adding details. Add final details like airbrushing, piping and stenciling.
Day 3
Always take pictures of your beautiful cookies. Make sure to allow 10-14 hours of drying time before packaging your cookies. I like to store mine on a baking pan with a lid overnight.
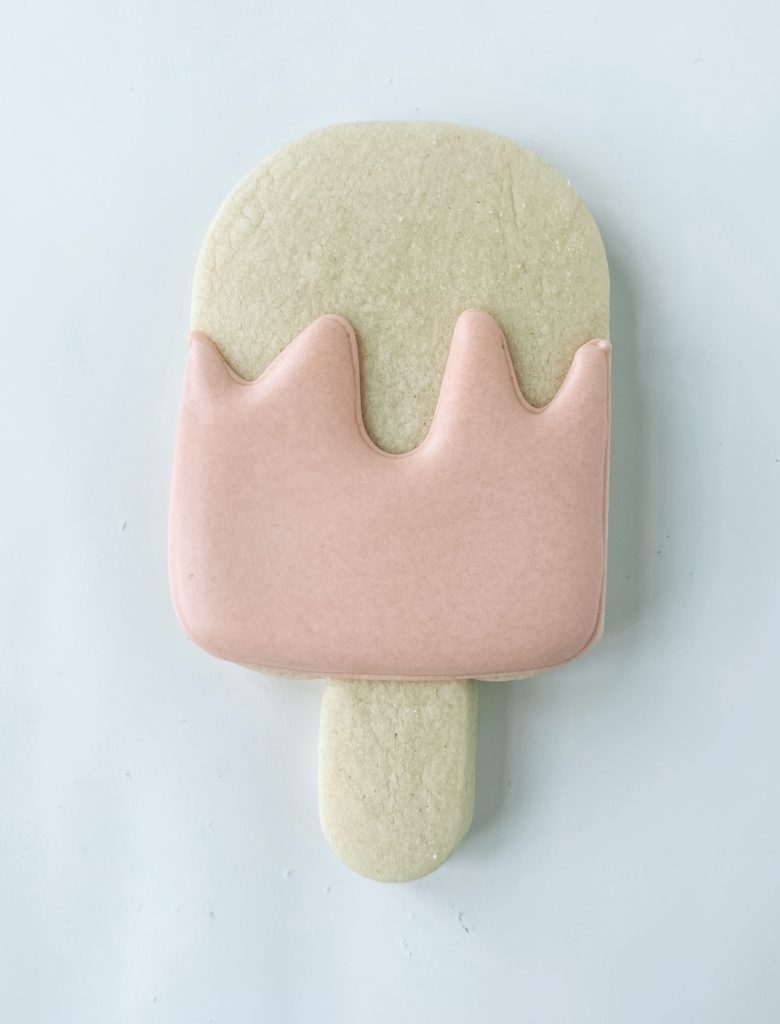
POPSICLE COOKIE
OUTLINE AND FLOODING
Step 1: Outline the bottom section of the popsicle with rose/pink piping icing.
Step 2: Fill the outlined section with rose flood icing. Using white flood icing add lines in your drip to add some detail.
Stop and allow your cookie to dry in front of a fan for 1-2 hours before moving to the next section.
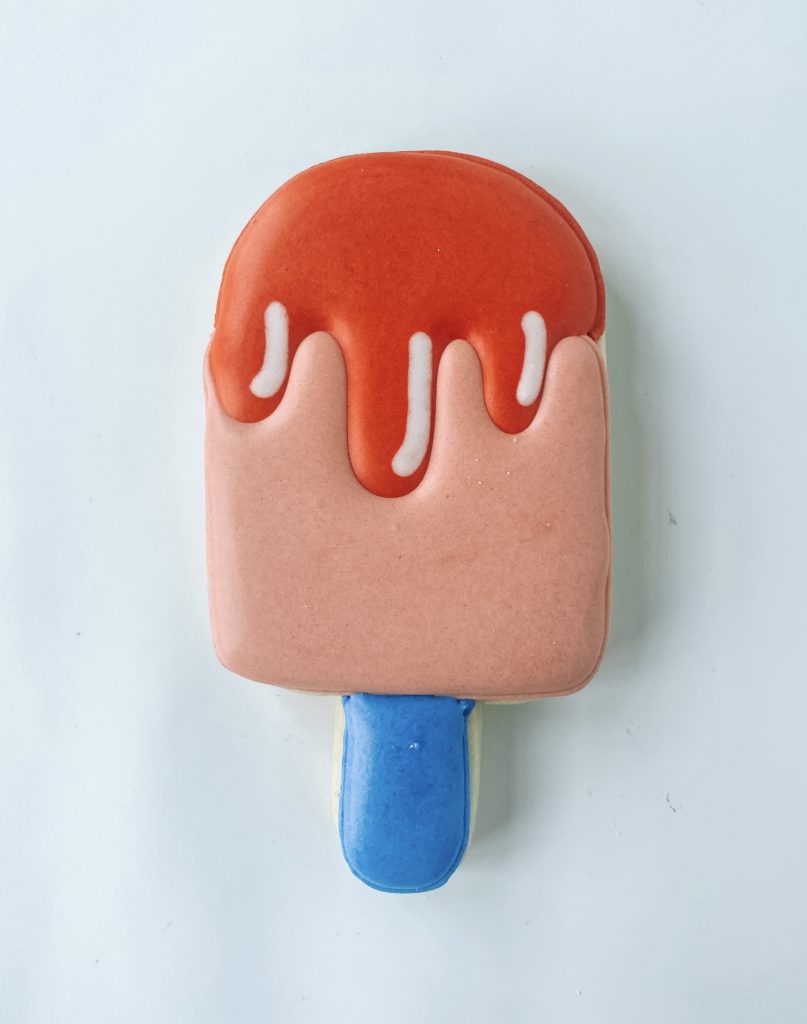
DETAILS
Step 3: Outline the top of the popsicle in red piping icing. Outline the “stick” of the popsicle with blue piping icing. (I like to add a squiggle to the middle to act as extra support for my flood icing to prevent craters).
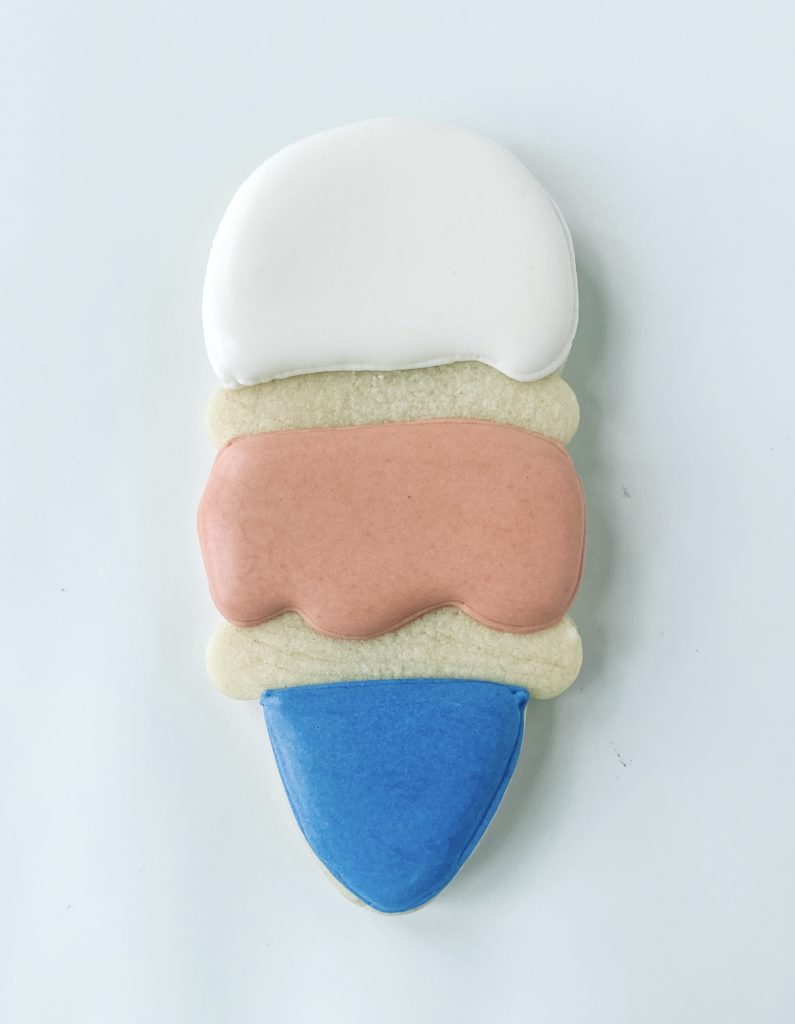
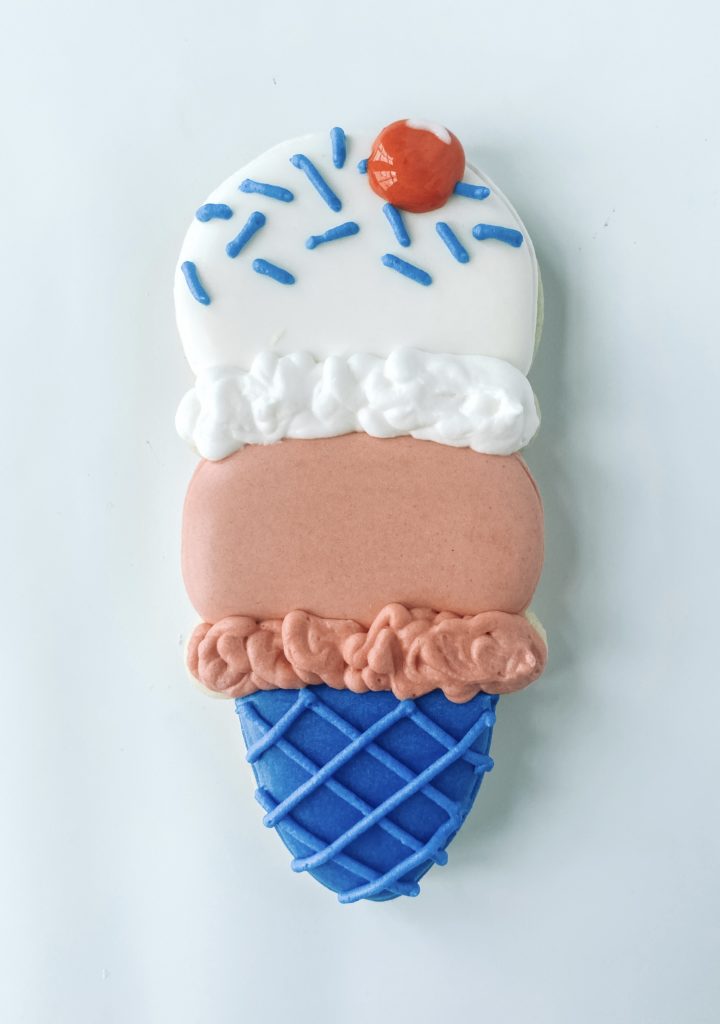
DOUBLE ICE CREAM CONE COOKIE
OUTLINE AND FLOODING
Step 1: Outline the cone with blue piping icing. Outline the top section with white piping icing. Outline the middle section with rose/pink piping icing.
Step 2: Fill in the blue outline with blue flood icing. Fill in the top white outline with white flood icing. Fill in the middle section with rose flood icing.
Stop and allow your cookie to dry in front of a fan for 1-2 hours before moving to the next section.
DETAILS
Step 3: Use white piping icing to apply icing in a squiggle at the base of the outline. You can use your scribe to move the icing around making it look like hand-dipped ice cream. Do the same with the middle section with rose piping icing.
Step 4: Using blue piping icing add diagonal lines to create a cone. Make a circle with your red piping icing and fill it in. I like to add a little white highlight using my white piping icing. Lastly, use the same piping icing to add “sprinkles” to the top of the white scoop.
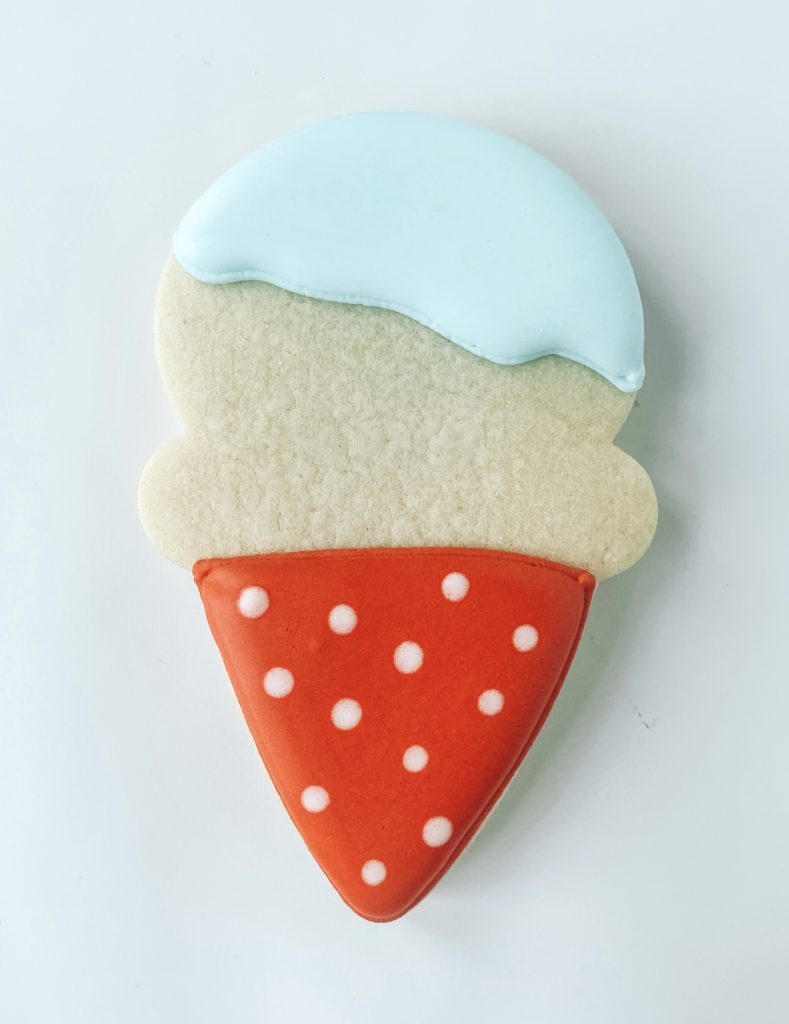
SNOWCONE COOKIE
OUTLINE and FLOODING
Step 1: Outline the bottom section of the cone with red piping icing. Outline a diagonal line with light blue piping icing and then outline the top of the snow cone.
Step: 2: Fill in the bottom section with red flood icing. Add little white polka dots with white flood icing.
Stop and allow your cookie to dry in front of a fan for 1-2 hours before moving to the next section.
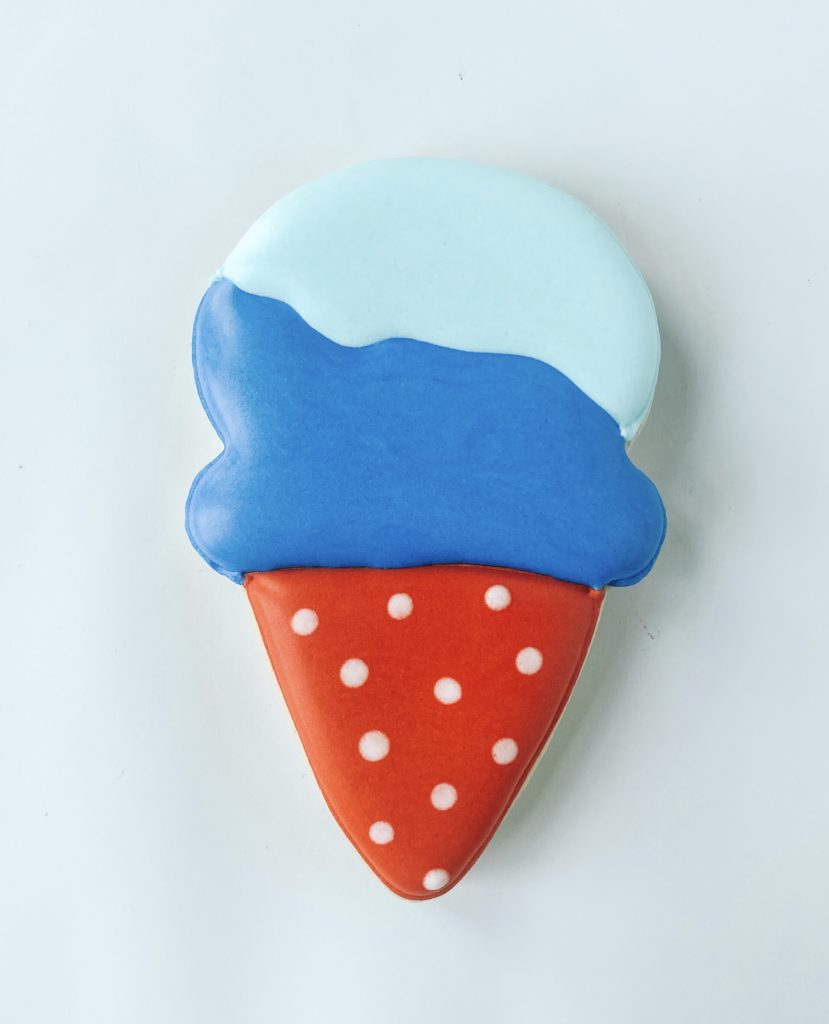
DETAILS
Step 3: Outline the remaining section with blue piping icing. Fill in the section with blue flood icing.
Stop and allow your cookie to dry in front of a fan for 1-2 hours before moving to the next section.
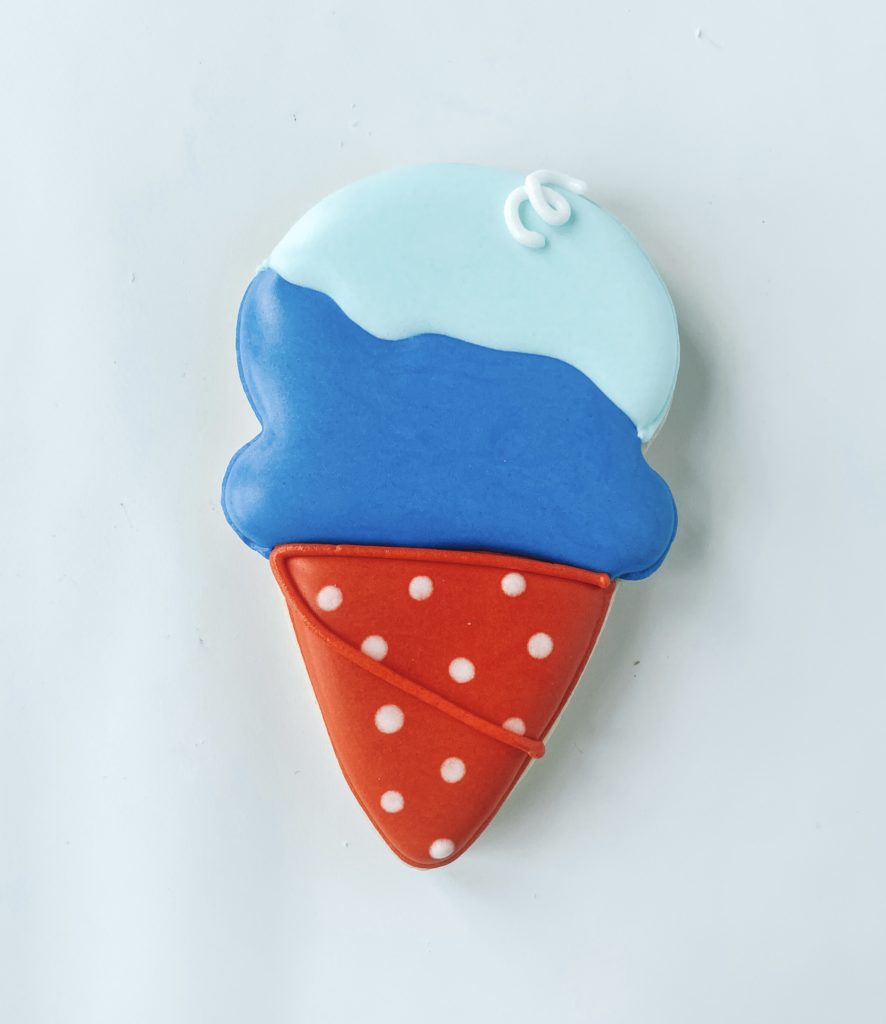
Step 4: Lastly, using piping icing add a line at the top of the red section then make a diagonal line across the cone.


How fun was that?! These easy little patriotic cookies will be a huge hit at your Memorial Day or July 4th BBQ or Picnic, everyone will want to grab one, so make sure you put them in cellophane bags and keep them cool and out of the sun! They would even be fun to serve with a bowl of ice cream or Italian Ice to add a little more color and fun to the dessert table!
You can make this easy set for your next party in any color palette you want, they would be great for summer birthday parties and backyard BBQ’s for sure! Make sure you tag me when you post photos of your cookies online so I can see all your fun ice cream-themed Patriotic Cookies.