
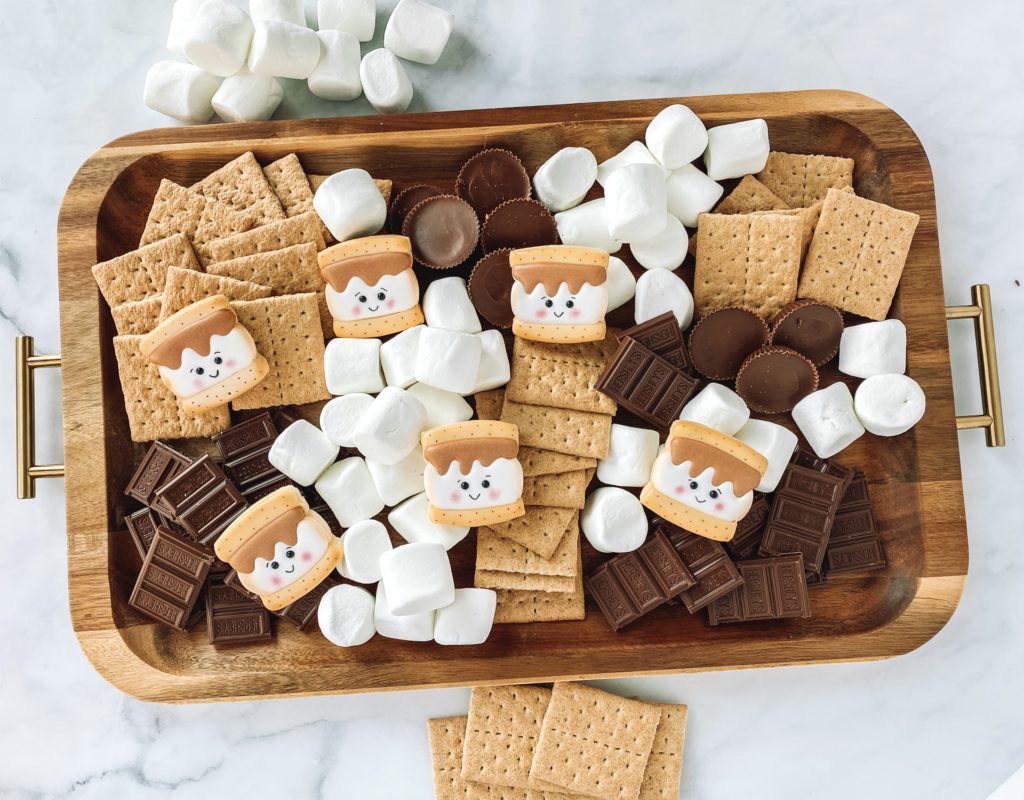
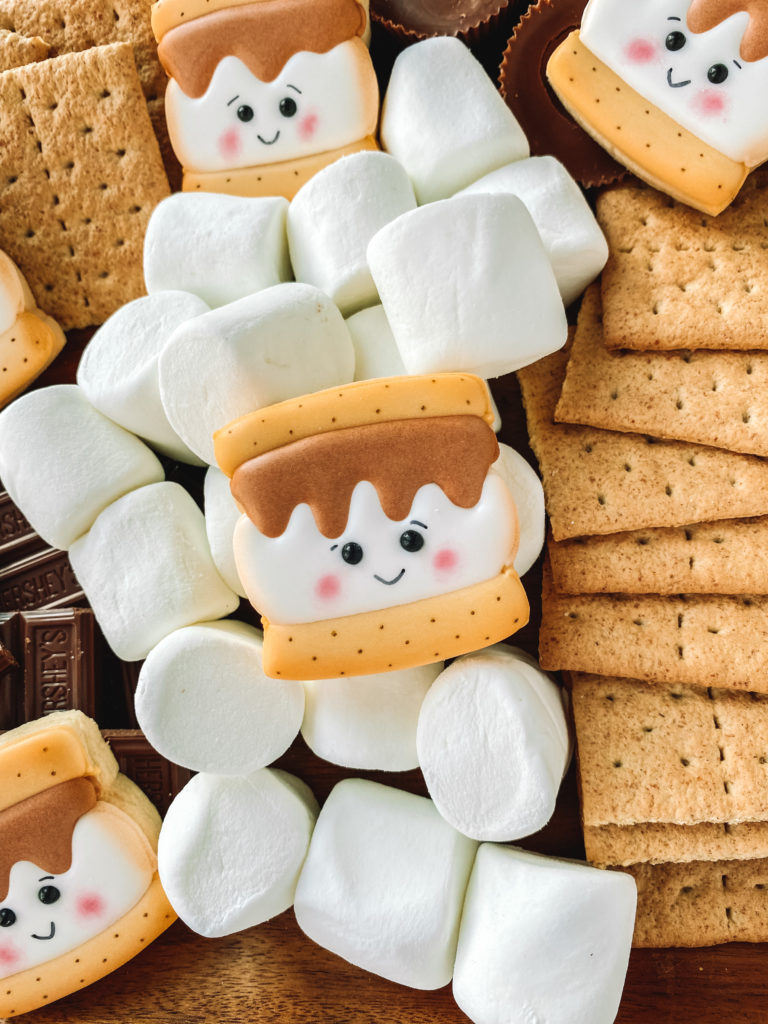
Mini S’more cookies are just as sweet to look at as they are to eat, they will be the hit of your next backyard campfire!
S’mores are a staple of our summer nights, and I was planning this S’mores board with all our favorite variations (if you’re making grown-up s’mores and haven’t tried them with a Peanut Butter Cup you’re seriously missing out!) and thought I needed to make a cookie to go with them. This cutter came to mind and I had to try it.
These cutout sugar cookie S’mores are easy to decorate and you probably have everything already in your kit, they are a great beginner cookie to try. Get the kids and ask them which faces you should make on them, and let them enjoy the fun of cookie decorating too.
I think next time the kids are going to a summer camp I am going to make up a few sets of these for all the chaperones and counselors, maybe adding in a tent and a campfire cookie with them.
MINI S’MORE COOKIE
YOU WILL NEED:
- Cut-out sugar cookie dough
- Royal icing
- Icing colors – I use Americolor brand
- CUTTERS: Mini S’more Cookie Cutter from The Sweet Designs Shoppe
TOOLS AND TIPS:
- Tips #2 or #2.5
- Couplers
- Icing bags
- Parchment paper
- Cookie sheet
- Toothpick or scribe
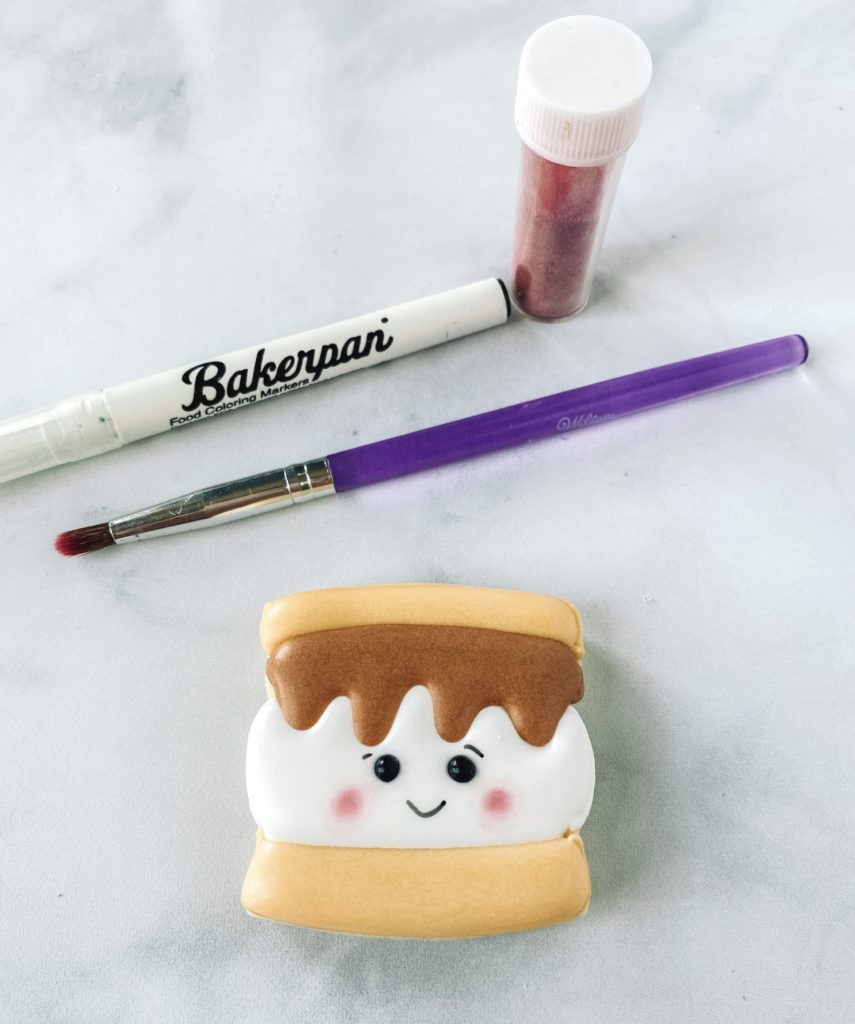
- Paintbrush
OPTIONAL:
- Cookie Countess Air Brush Gun
- Cookie Countess Air Brush Color ivory towers
- PME Black Sugar Pearls
COLORS YOU WILL NEED:
White Icing – outline and flood
Brown Icing – outline and flood
Ivory Icing – outline and flood
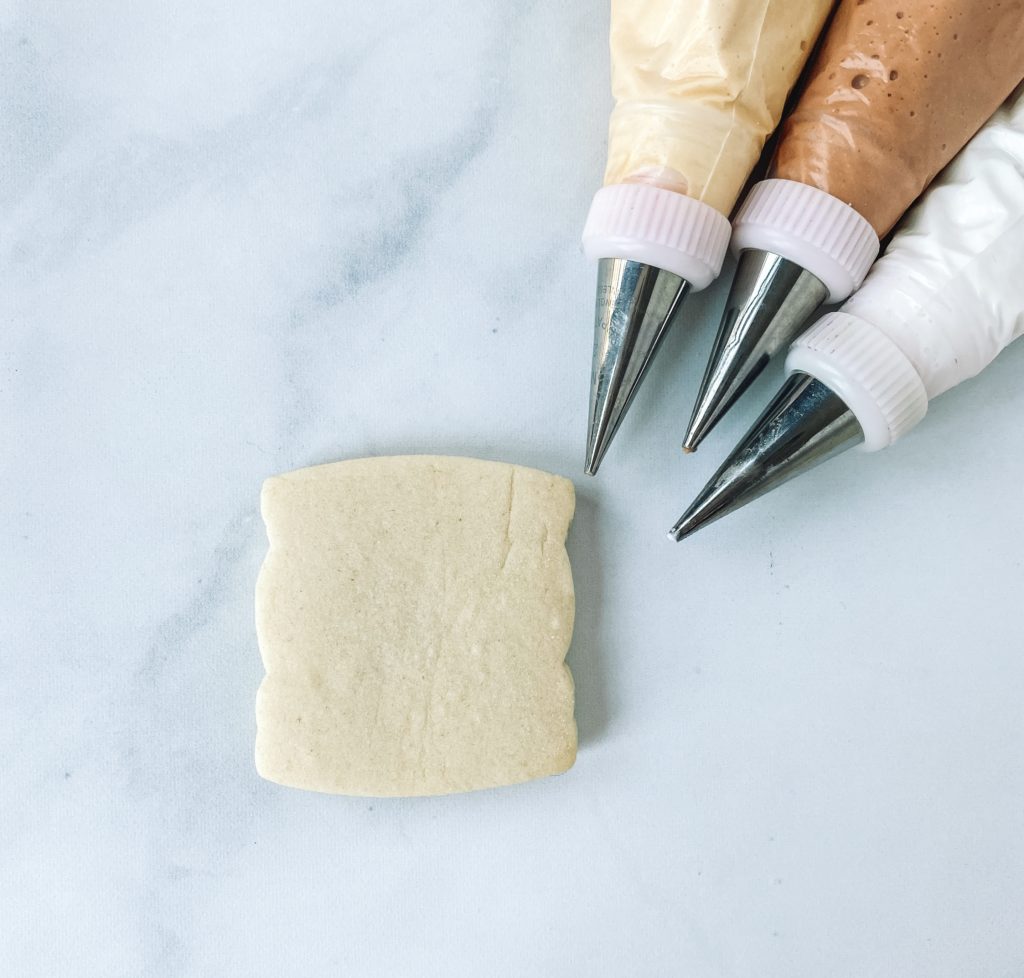
MINI S’MORE COOKIE
BASE LAYER AND OUTLINE
Step 1: Using Ivory piping icing outline the top and bottom portion of the s’more cookie.

FLOODING
Step 2: Fill the top and bottom portion of the s’more cookie with ivory flood icing.
Stop and allow your cookie to dry in front of a fan for 1-2 hours before flooding the next section.
Step 3: Using white piping icing outline the marshmallow section making sure to add in the chocolate ooze. Drop two small PME black sugar pearls for the eyes on your s’more face.
Stop and allow your cookie to dry in front of a fan for 1-2 hours before flooding the next section.
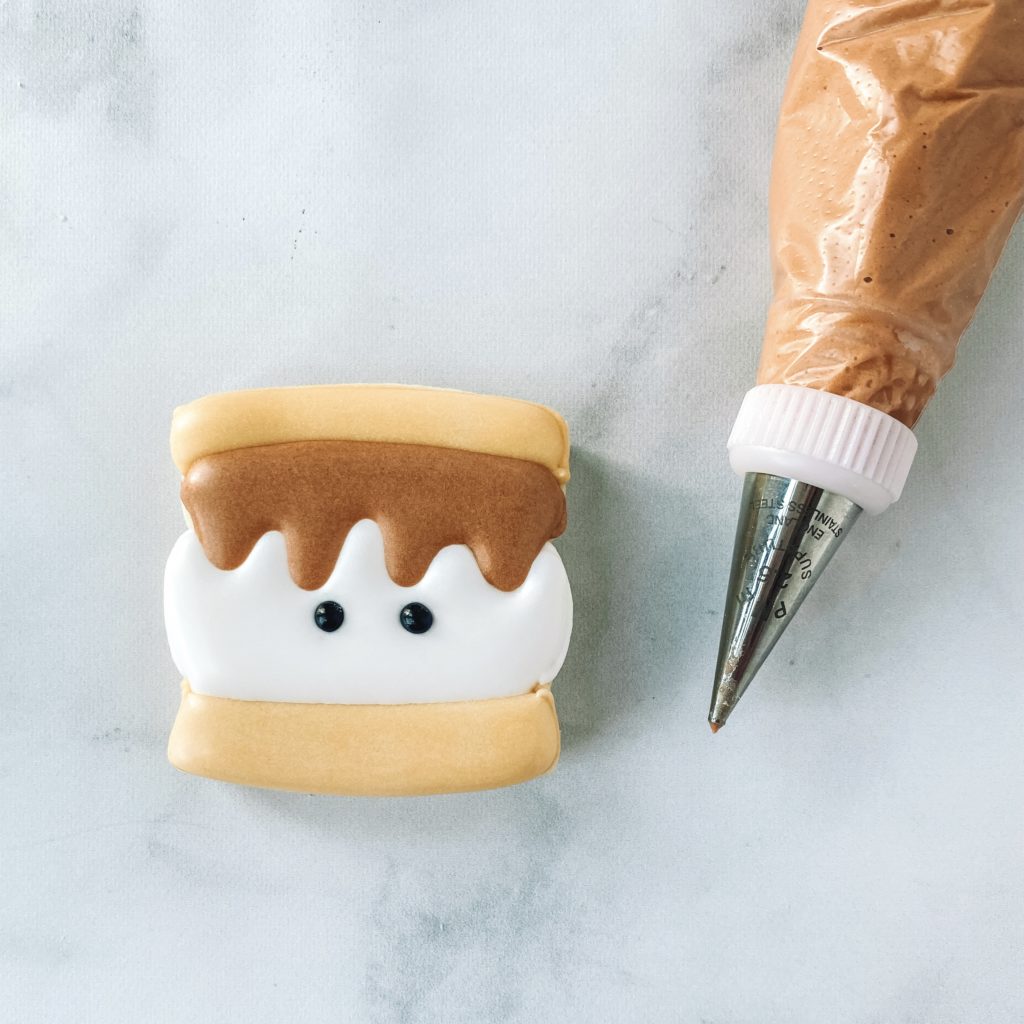
Step 4: Outline the “chocolate” section in brown piped icing, just above the marshmallow, and fill with brown flood icing.
DETAILS
Step 4: Using an edible marker (I recommend Bakerpen or FoodDoodler) make eyebrows and smile. Dip a small round paintbrush in pink luster dust and gently dab on icing to make rosy cheeks.
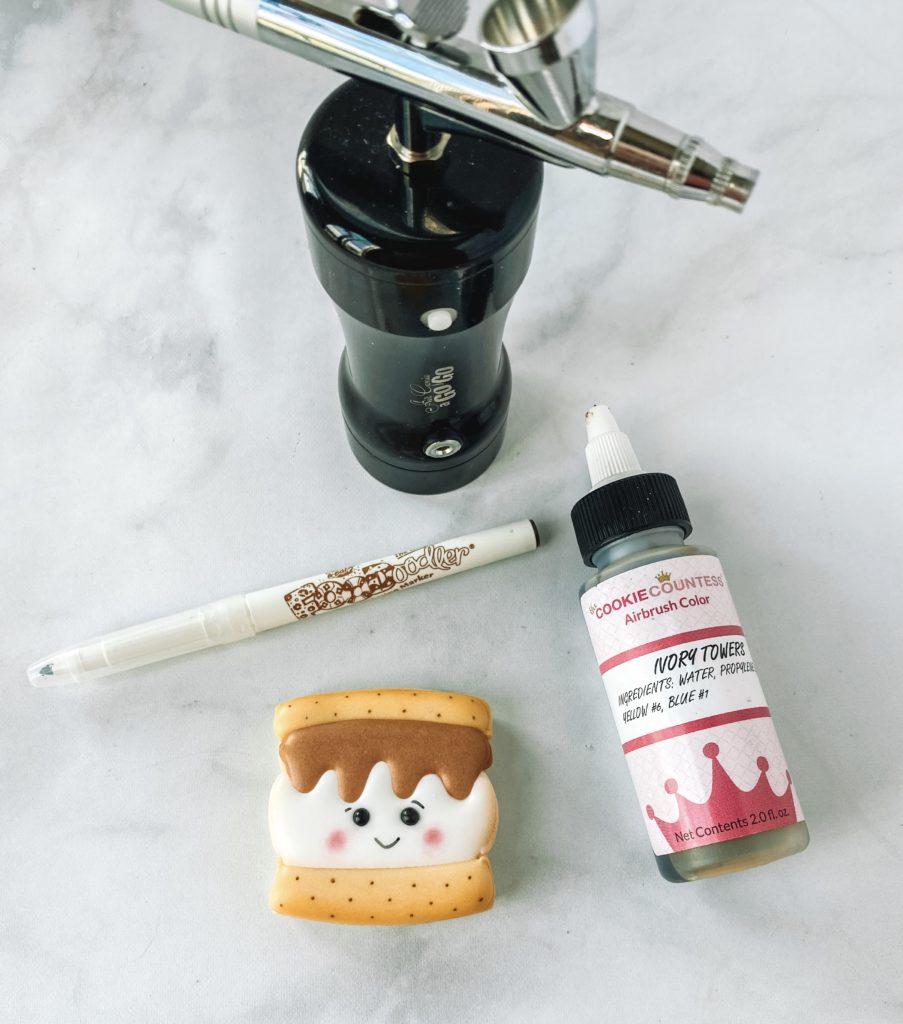
Use a brown edible marker to make dots on the “graham cracker”. Lastly, add a little airbrushing around the outside of the cookie to give it that “toasted” look.
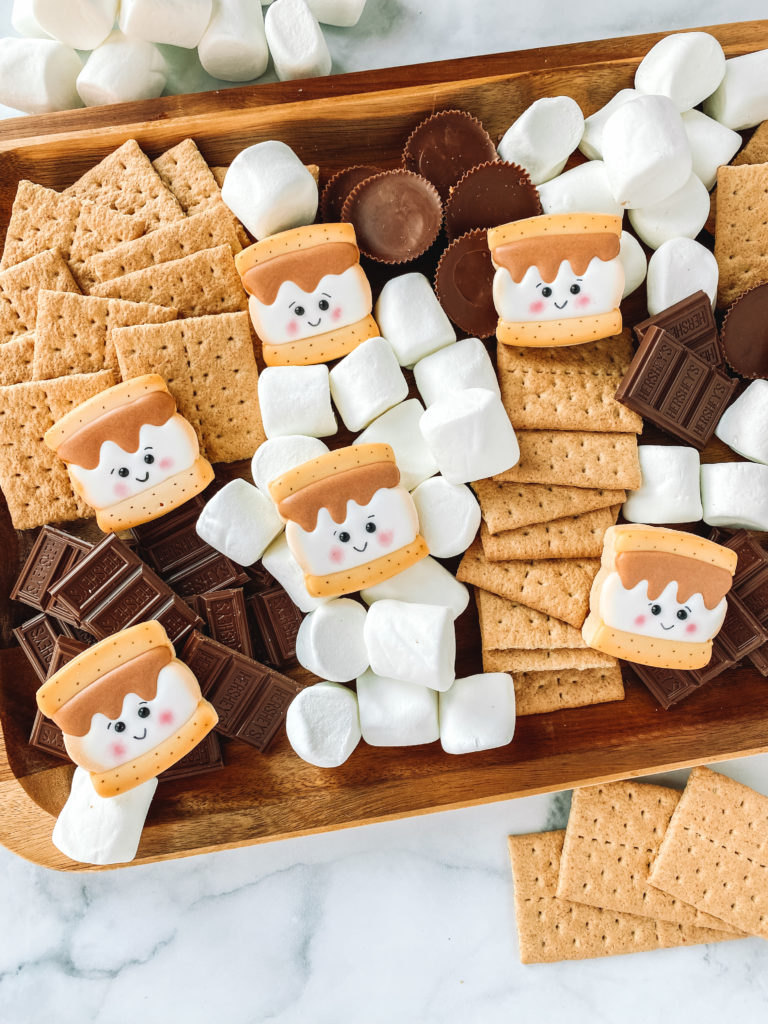
There’s still plenty of time this season to make some s’mores and get some of these cookies ready for your s’more tray. I want to see pictures of your cute little cookies, make sure to post them and tag me on Instagram so I can see your cookie creations!