
Trick or Treat, make these adorable cookies to eat! Who says all the Halloween treats have to be actual candy when you can have delicious sugar cookies that look like candy?!
I like a good Halloween Candy bag just as much as the next person, but I prefer sugar cookies to candy any day, so I decided to combine the two and have a cute and delicious set of cookies to give to the kids’ friends and classmates this year. These candy cookies are also great to make for other holidays and parties because you can change up the colors to match any theme you need to.
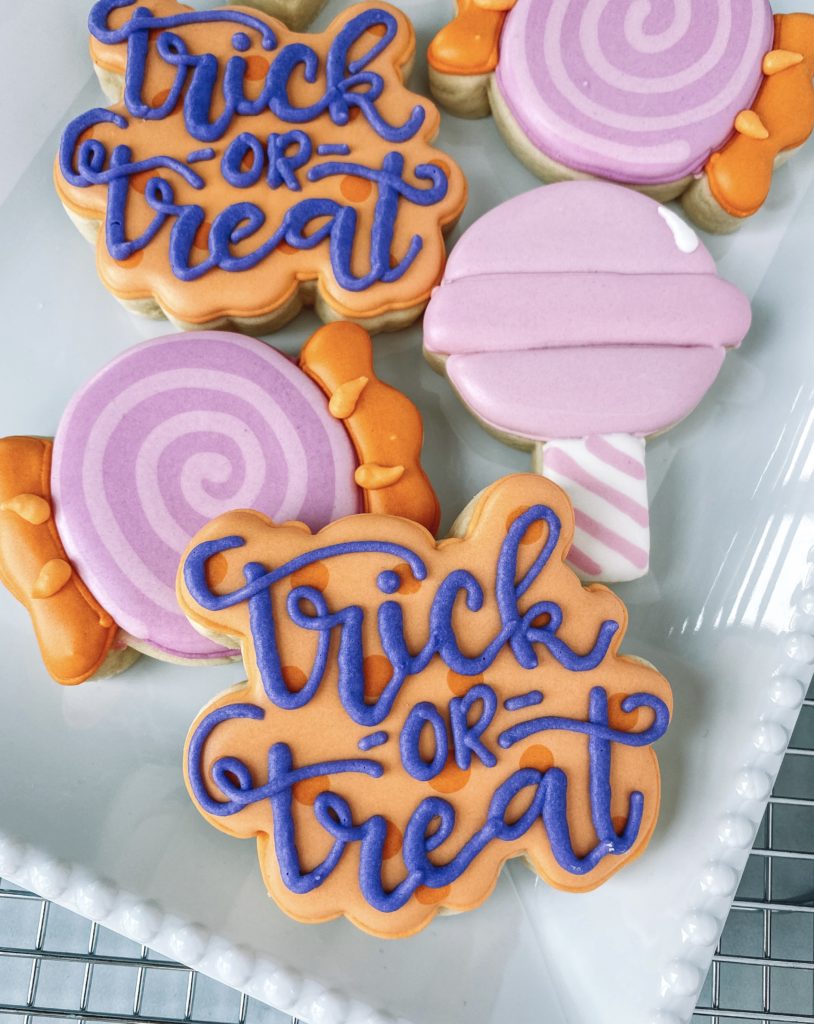
HALLOWEEN CANDY AND TRICK OR TREAT COOKIE
YOU WILL NEED:
- Cut-out sugar cookie dough
- Royal icing
- Icing colors – I use Americolor brand or Cookie Countess Brands
CUTTERS: Halloween Sucker, candy pieces, and trick or treat cutter from The Sweet Designs Shoppe
TOOLS AND TIPS:
Tips #2 or #2.5
Couplers
Icing bags
Parchment paper
Cookie sheet
Toothpick or scribe
COLORS YOU WILL NEED:
Positively Purple Icing – outline and flood (gel color from cookie countess) (I did a light and dark version)
White – outline and flood
Pumpkin – outline, and flood (I did a light and dark version)
Violet – outline
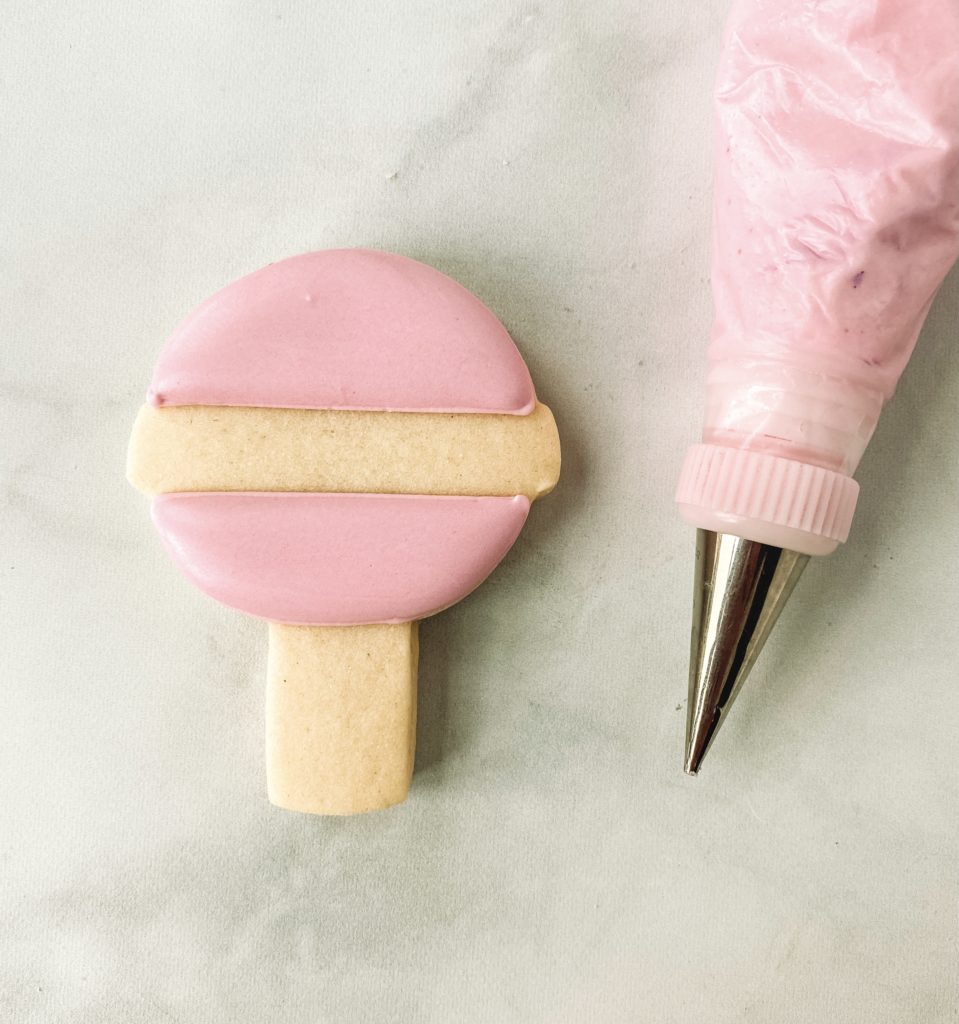
SUCKER
OUTLINE and FLOODING
Step 1: Outline the top and the bottom sections of the lollipop with light positively purple (PP) outline icing!
Step 2: Fill the sections with PP light flood icing
Stop and allow your cookie to dry in front of a fan for 1-2 hours before flooding the next section.
Step 3: Using PP light piping icing outline the sides of the lollipop. Fill in the middle section with PP flood icing.
Stop and allow your cookie to dry in front of a fan for 1-2 hours before flooding the next section.
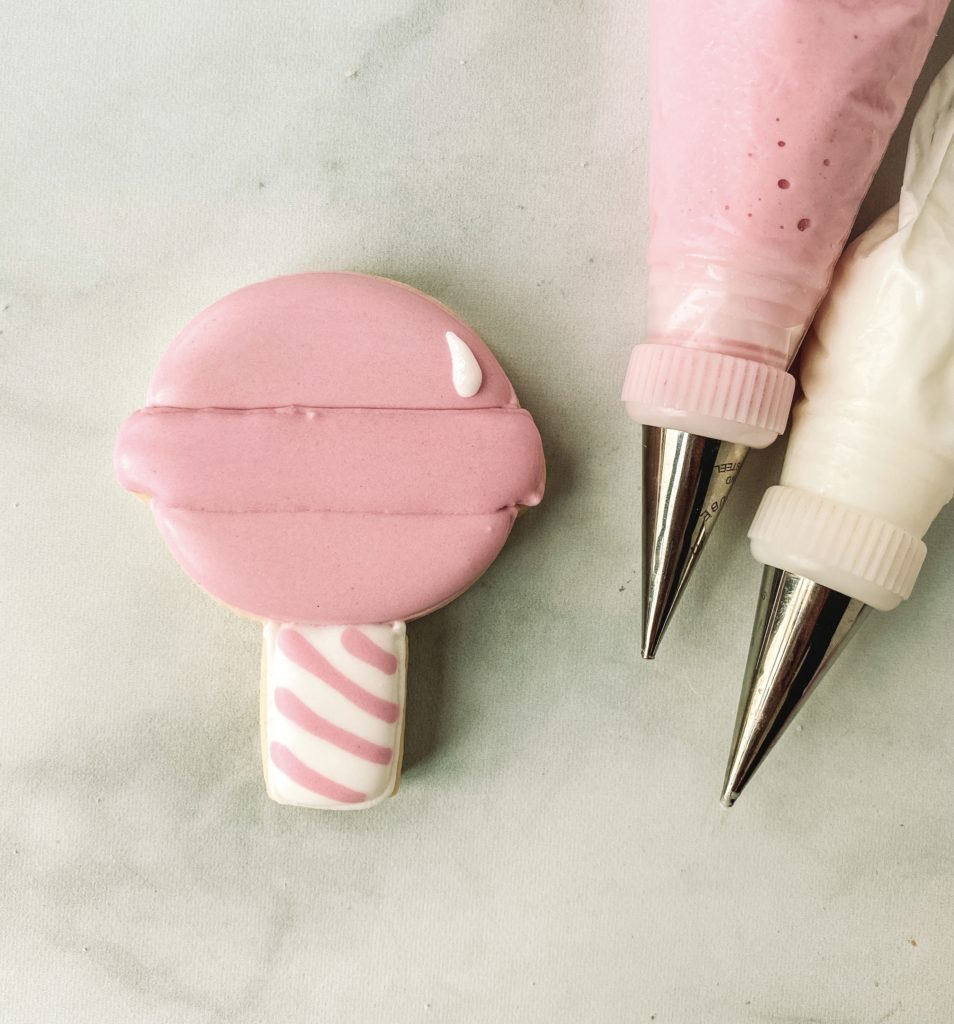
Step 4: Using your white piping icing outline the “stick” of the lollipop. Grab your white flood icing and fill in the section. Use PP light flood icing and add diagonal lines.
DETAILS
Step 4: Using white piping icing to make a white teardrop on the top section of the lollipop
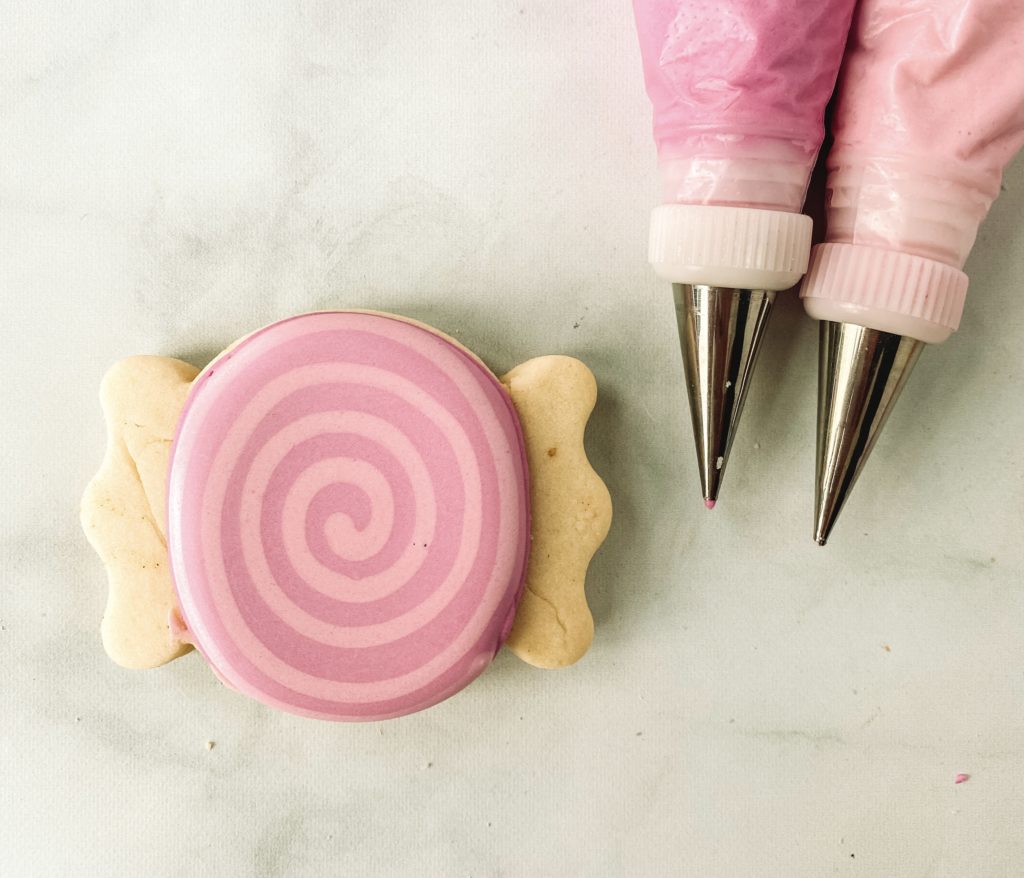
CANDY COOKIE
OUTLINE and FLOODING
Step 1: Outline the middle round section of the cookie in dark PP
Step 2: Fill the outline using dark PP flood icing. Once you have covered the entire cookie with flood icing using light PP flood icing to add a swirl starting in the middle
Stop and allow your cookie to dry in front of a fan for 1-2 hours before flooding the next section.
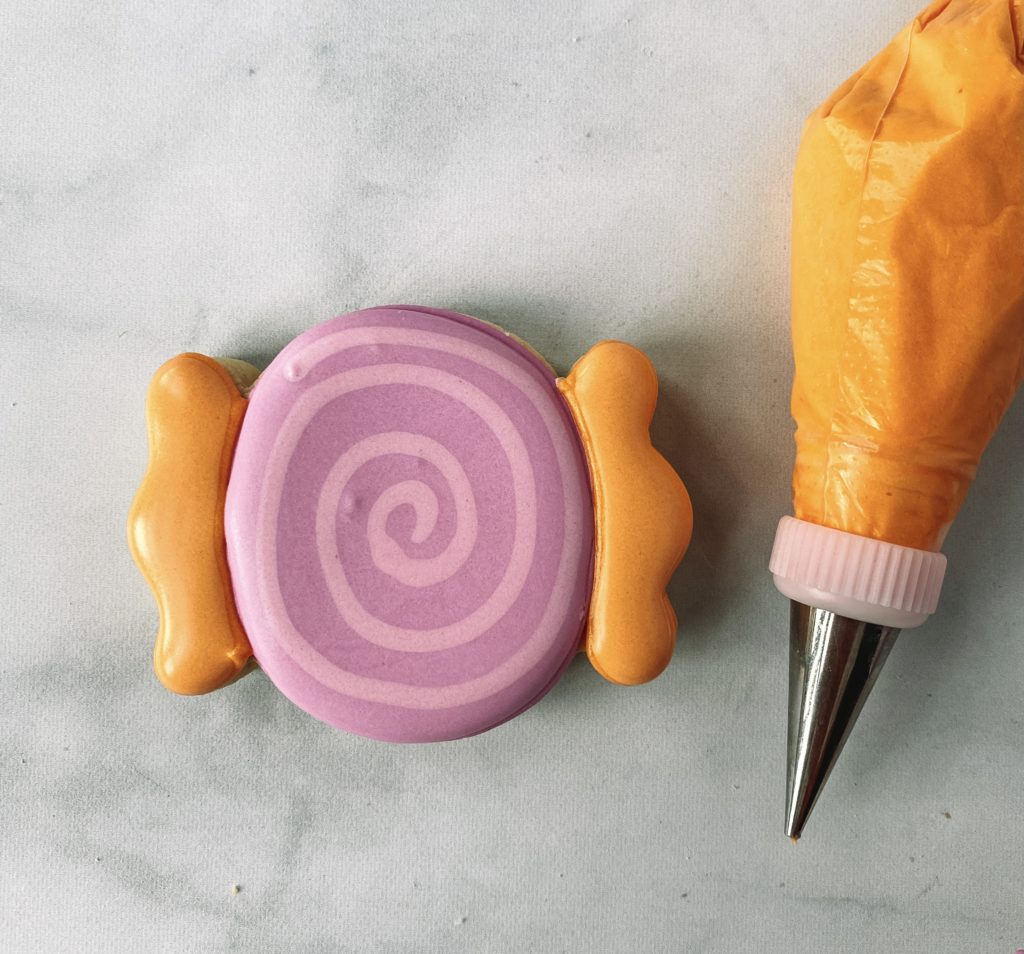
DETAILS
Step 3: Using orange/pumpkin piping icing outline the “wrapper” outside piece of the candy. Fill in the outlined section with orange flood icing.
Stop and allow your cookie to dry in front of a fan for 10-15 min before adding the next detail.
Step 4: Using orange piping icing add 2 teardrops on the orange flooded wrapper.
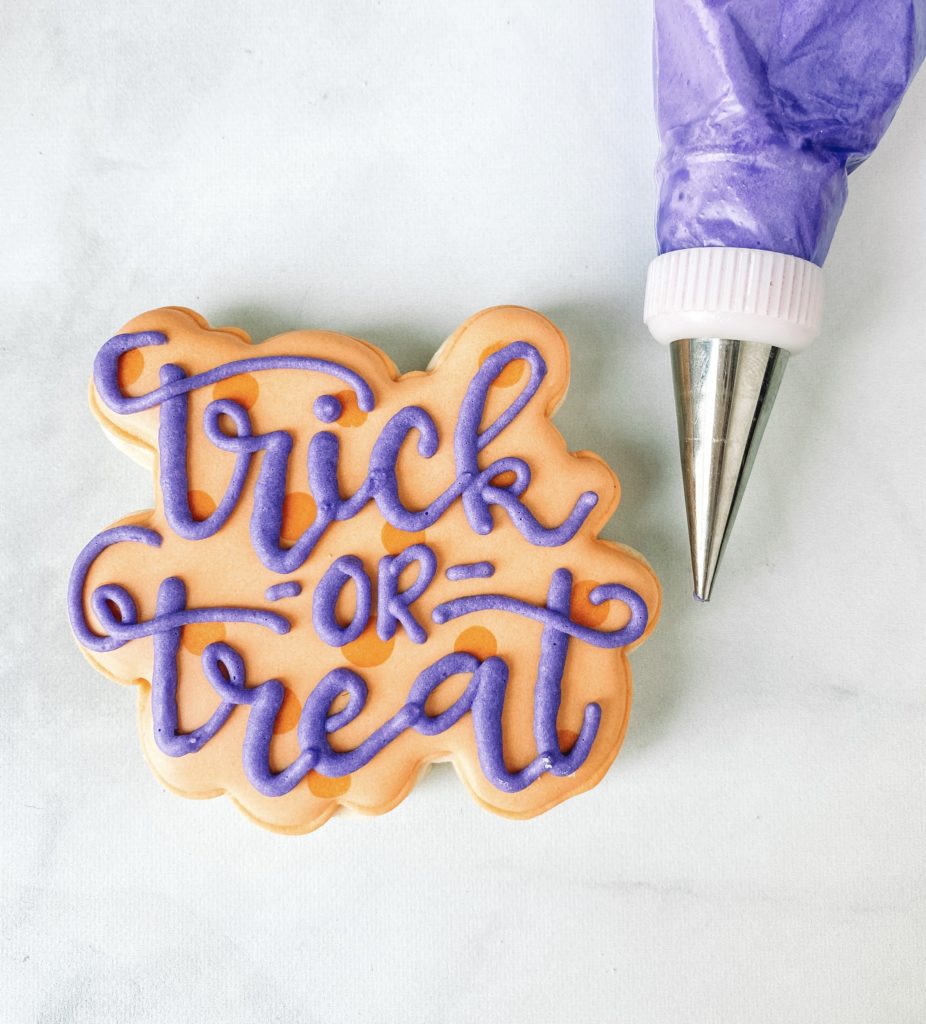
TRICK OR TREAT COOKIE
OUTLINE and FLOODING
Step 1: Outline the cookie with orange piping icing
Step 2: Fill the outline using orange flood icing. Once you have covered the entire cookie with flood icing use light orange to add polka dots to the flooded cookie
Stop and allow your cookie to dry in front of a fan for 1-2 hours before moving on to the details.
Step 3: Using violet piping icing and a PME 1.5 tip letter “Trick or Treat” on your cookie.
When lettering remembers to apply more pressure on your bag on the downward strokes. Practice helps so much!

I included how you can package these adorable cookies for a great giftable. These were bagged using 3×5″ and 4×6″ self-sealing bags from Amazon. Box is 7″ x 10″ x 1.5″ from BRP BoxShop. Paper Shred is from Amazon.
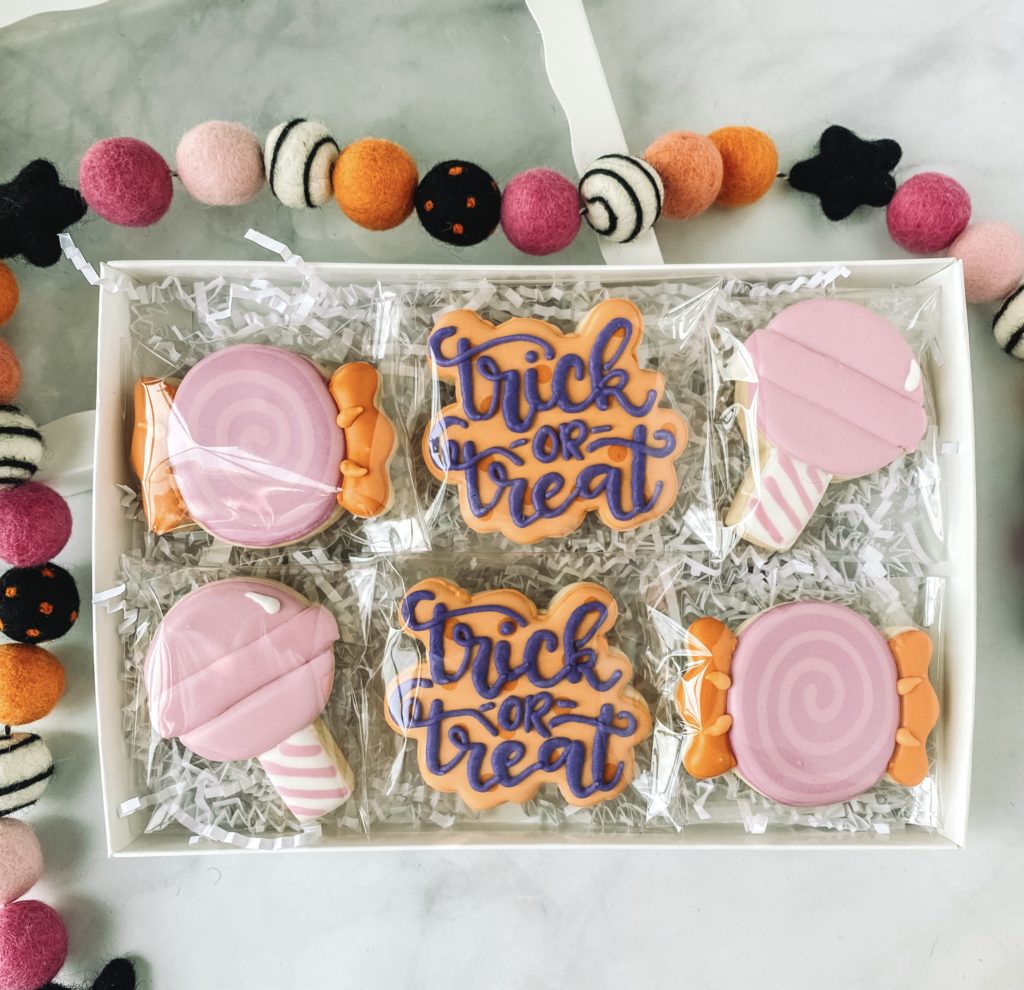
If you have some folks to prepare treats for this year for a Trunk or Treat Party or Halloween party give this a trick instead of making the usual goodie bags with candy. Just package them up individually or even make a cute cookie bouquet by putting them on sticks and arranging them in a jack-o-lantern bucket with tissue paper. Any way you present them, these cookies will be the least scary treats at your party. Make sure to tag me when you post pictures online I always love to see the cookies my followers make!