
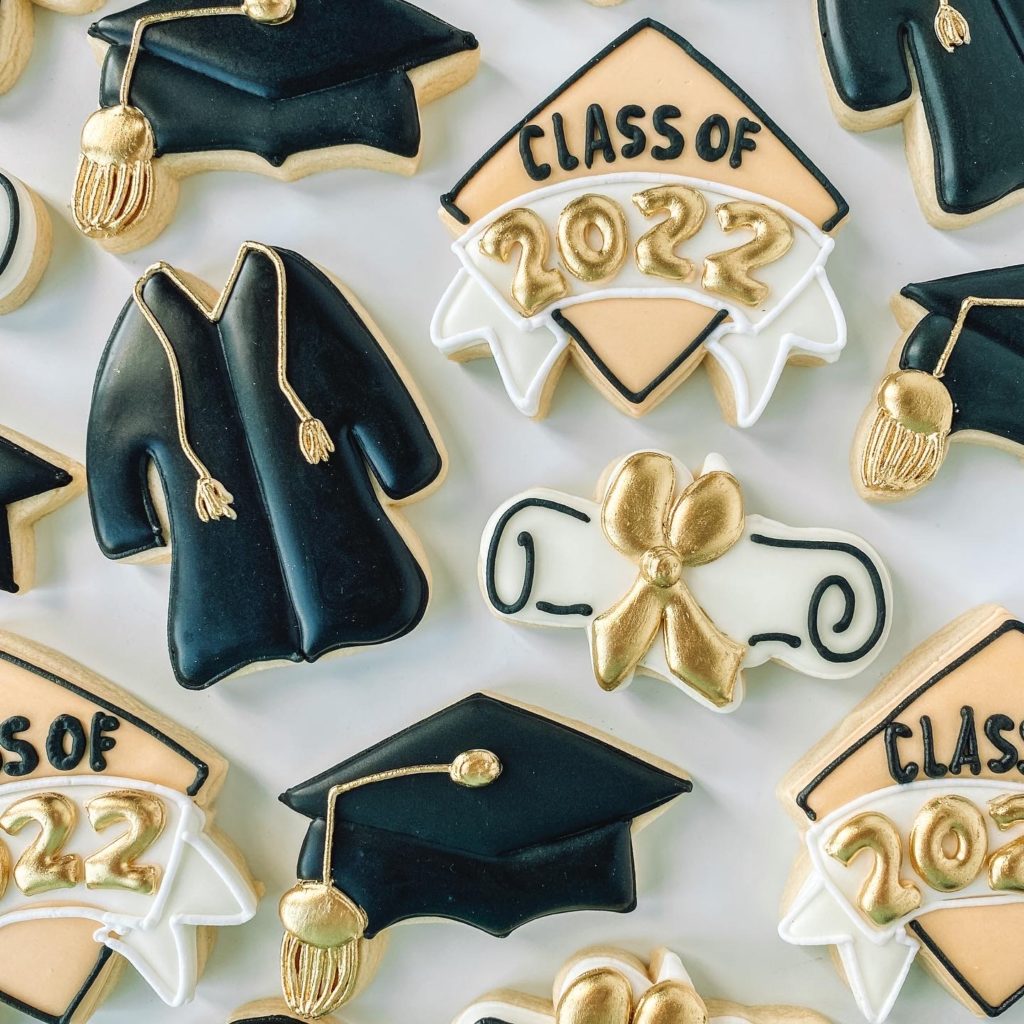
Using gold in your royal icing can be a little tricky, so I broke it down for you and also walk you through how to make this classy set of Gold Graduation Cookies. These are perfect for any graduating party or gift, and you can change out the colors for the school that is being represented. I just like the glistening gold tones to add a little more celebratory design to this set.
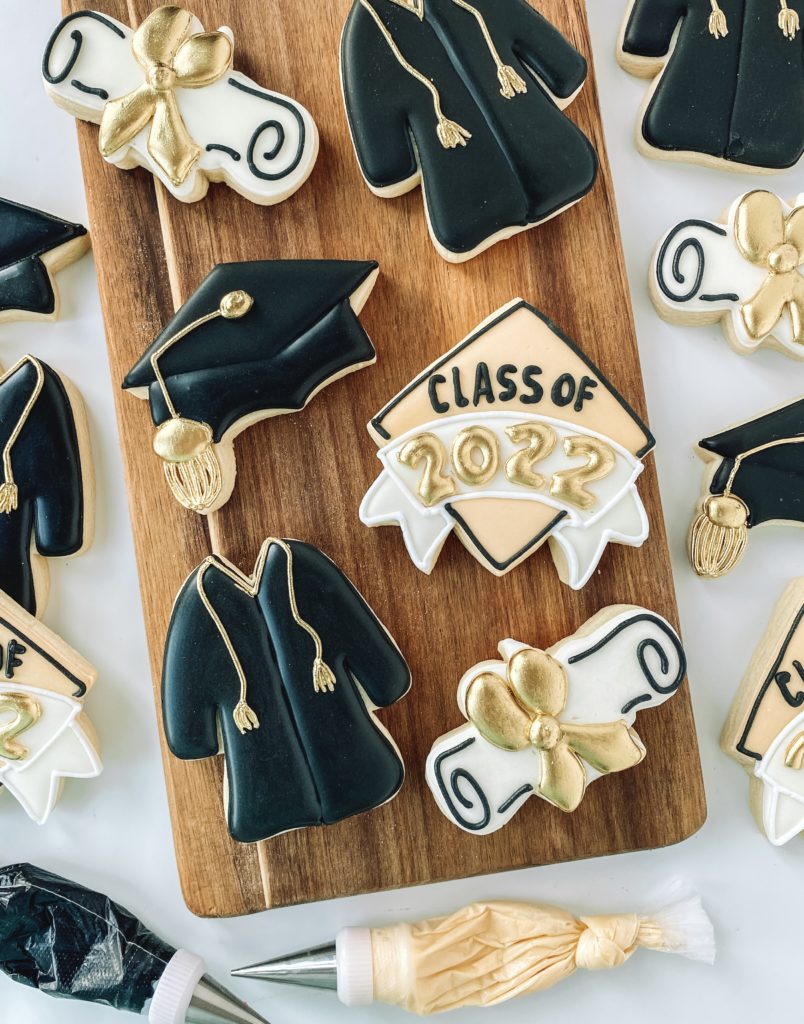
For these cookies, I used my exclusive sugar cookie recipe and royal icing recipe. The cookie recipe yielded about 12-15 regular size 3 – 3.5 inch cookies. I like thicker cookies so I roll out my cookies to 3/8″ using my Cookie Countess Precision Rolling Pin. The thickness of your cookie will change the cookie yield.
Check out the step-by-step video tutorial
I show you how to decorate these AWESOME Graduation cookies and also share how to level them up with GOLD. Check out the video tutorial for tips on how to make and package these cookies!
CUTTERS: GRADUATION GOWN, CAP, DIPLOMA AND CLASS OF PLAQUE ALL FROM SIMPLY RENEE SWEETS.
COLORS YOU WILL NEED:
- White – outline and flood icing
- Black – outline and flood icing
- Ivory- outline and flood icing
OPTIONAL:
- TMP SuperGold
- Everclear or Vodka
- Paintbrush
Prepping your Royal Icing
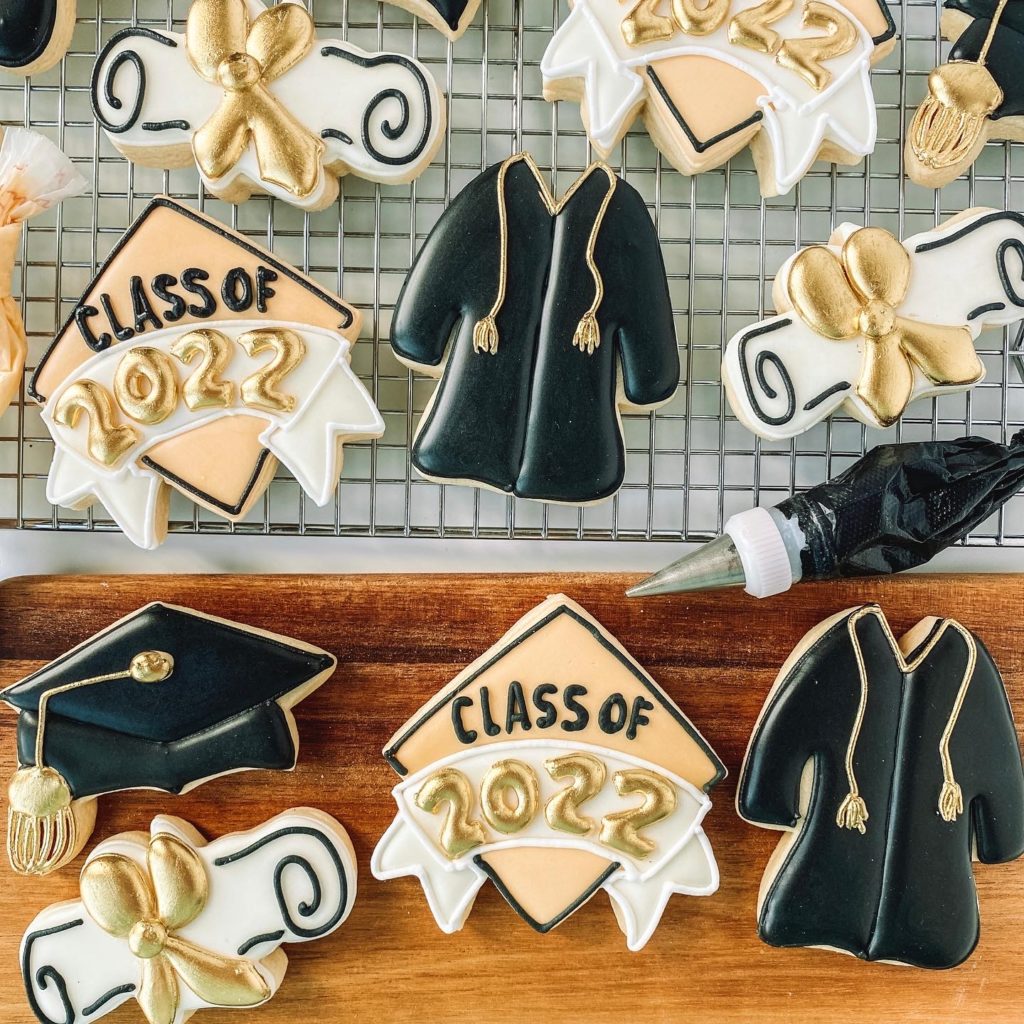
Graduation Cookie Guide
This cookie set includes 3 icing colors using white, black, and ivory. I made all the colors with Americolor
Helpful Decorating Tips and Tricks
Cookie Timeline
I like to break up the decorating process over a few days. It works better for my stage of life to do a little each day. Here is a sample timeline to show how long each step takes.
DAY 1
Make and bake my cookies. I do not chill my dough so usually, this takes about 1 hour from start to finish. Mix royal icing, color, and prep all the icing bags. I like to color the day before because the colors will deepen over time.
DAY 2
Outline and Flood Cookies. Make sure to allow them to dry in front of a fan for 1-2 hours before adding details. Add final details like airbrushing, piping and stenciling.
Day 3
Always take pictures of your beautiful cookies. Make sure to allow 10-14 hours of drying time before packaging your cookies. I like to store mine on a baking pan with a lid overnight.
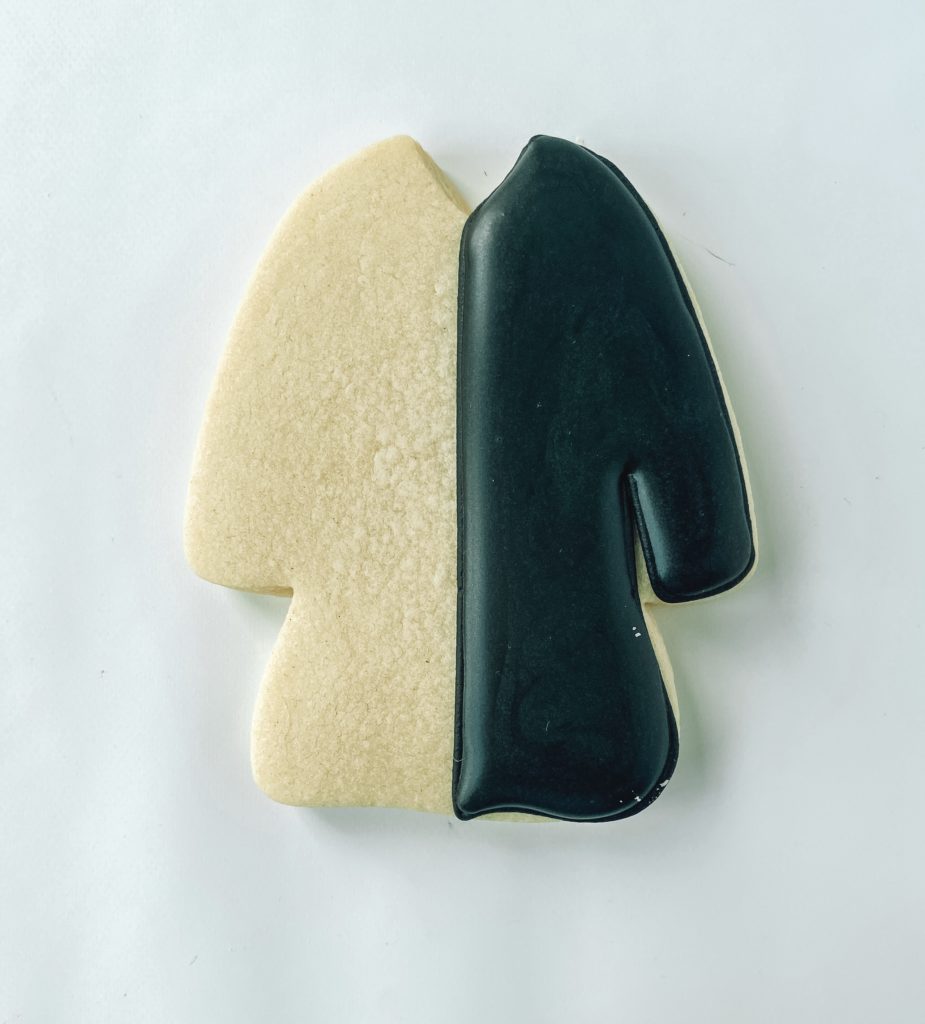
GRADUATION GOWN COOKIE
OUTLINE AND FLOODING
Step 1: Outline half the gown with black piping icing. Fill in the outlined section with black flood icing.
Stop and allow your cookie to dry in front of a fan for 10-20 minutes before moving to the next section.
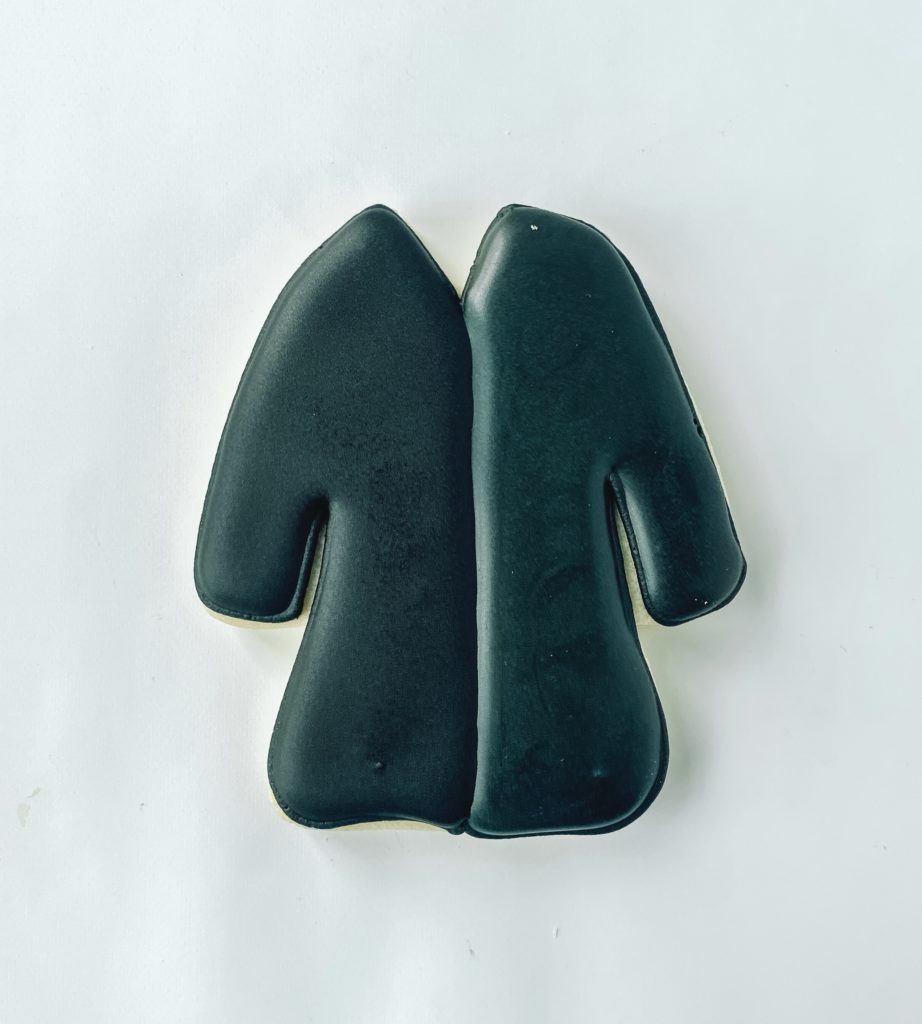
Step 2: Outline the other half of the gown with black piping icing. Fill in the outline section with black flood icing.
Stop and allow your cookie to dry in front of a fan for 1-2 hours before moving to the next section.
DETAILS
Step 3: Using Ivory piping icing make a V at the top then make two tassels on each side of the gown.
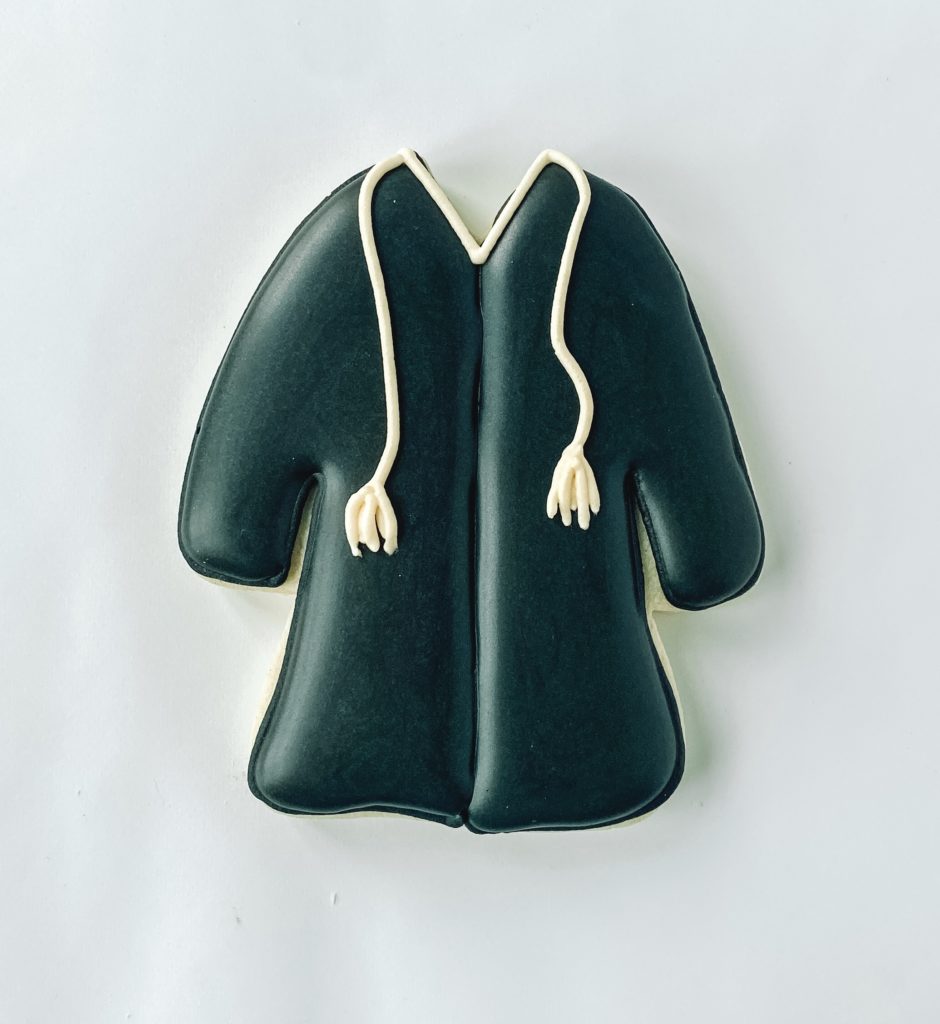
Step 4: My favorite part is leveling up these gowns with gold paint. To make the gold paint mix equal parts gold dust and Everclear. You want the consistency to be like a gel paste.
Step 5: Once you get your right consistency gently paint the gold on all the icing that is ivory.

DIPLOMA COOKIE
OUTLINE and FLOODING
Step 1: Outline the entire cookie with white piping icing.
Step: 2: Fill in the outlined section with white flood icing.
Stop and allow your cookie to dry in front of a fan for 1-2 hours before moving to the next section.
DETAILS
Step 3: Make a bow using ivory piping icing. Fill in the bow with ivory flood icing
Stop and allow your cookie to dry in front of a fan for 30-40 minutes before moving to the next section.
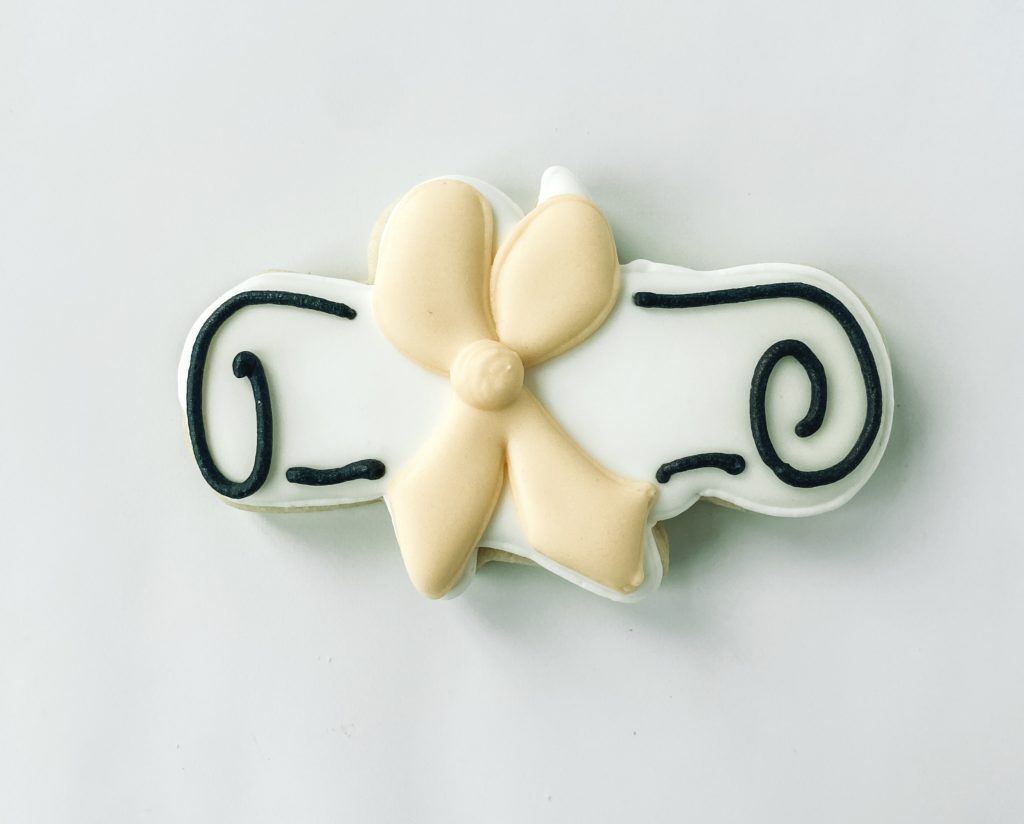
Step 4: Add details with black piping icing.
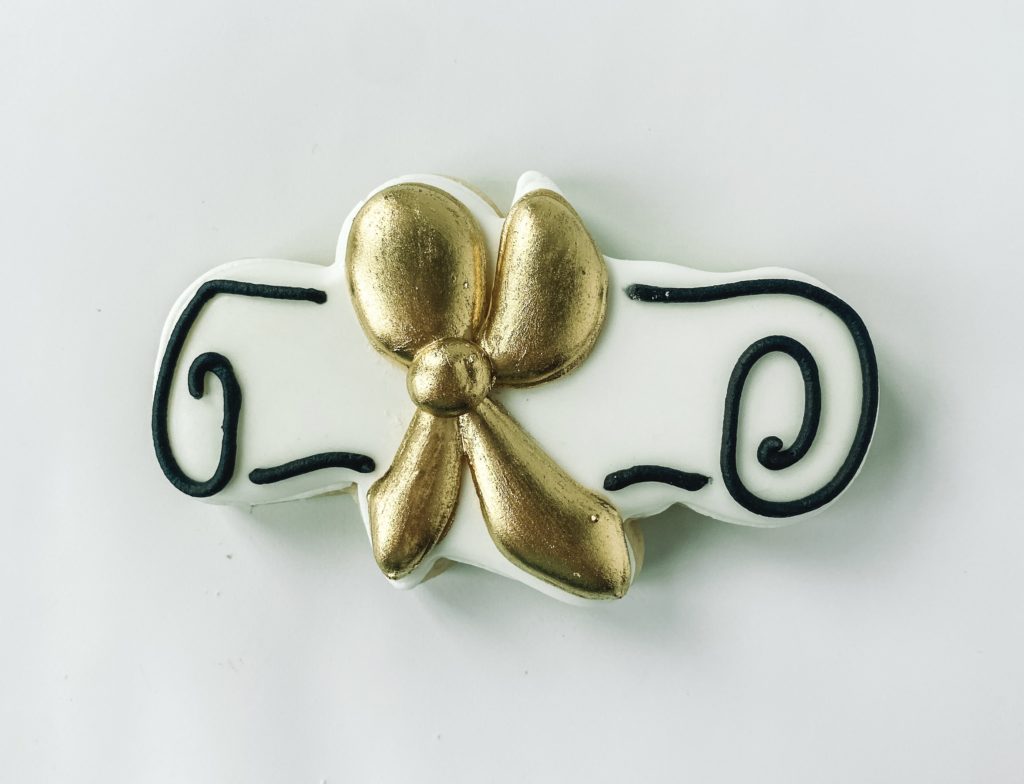
Stop and allow your cookie to dry in front of a fan for 1-2 hours before moving to the next section.
To make the gold paint mix equal parts gold dust and Everclear. You want the consistency to be like a gel paste.
Step 5: Once you get your right consistency gently paint the gold on all the icing that is ivory.
GRADUATION CAP COOKIE
OUTLINE AND FLOODING
Step 1: Outline the top portion of the cap with black piping icing. Outline the bottom as well but make sure you outline around where the tassel will go.
Step 2: Fill in the middle section with black flood icing.
Stop and allow your cookie to dry in front of a fan for 15-20 minutes before moving to the next section.
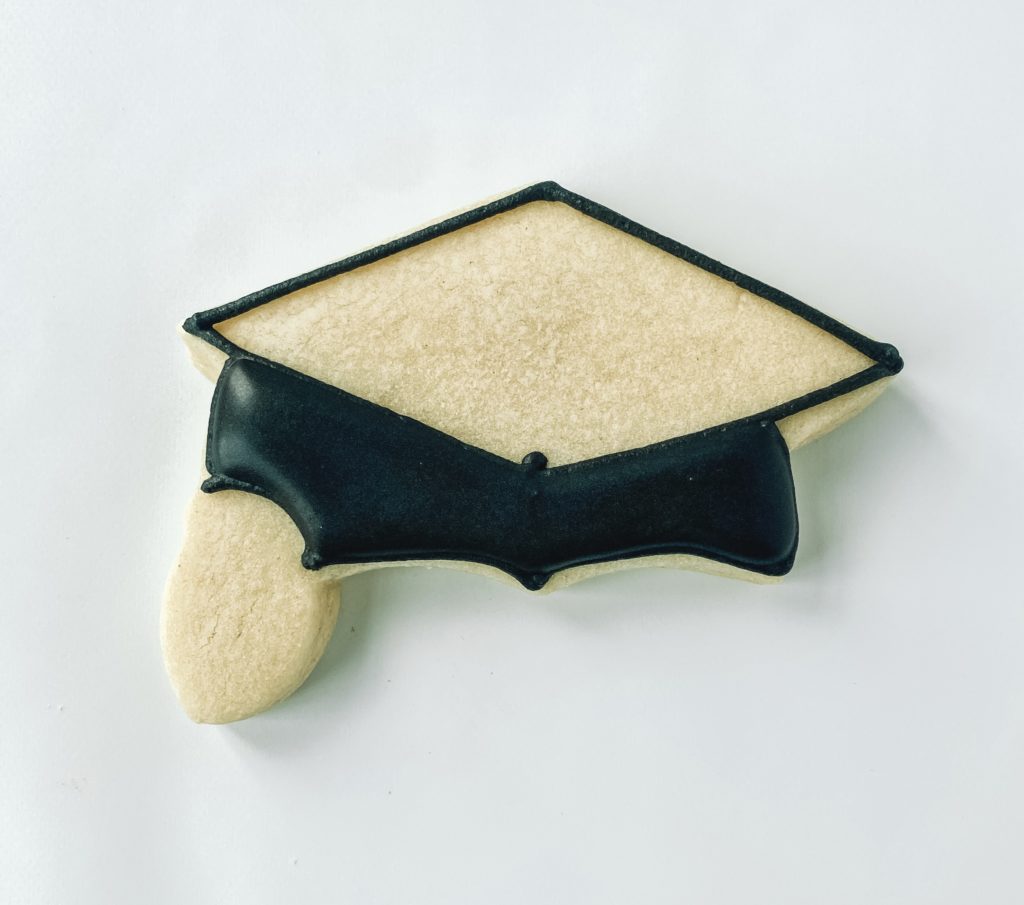
Step 3: Fill in the triangle part of the cap with black flood icing.

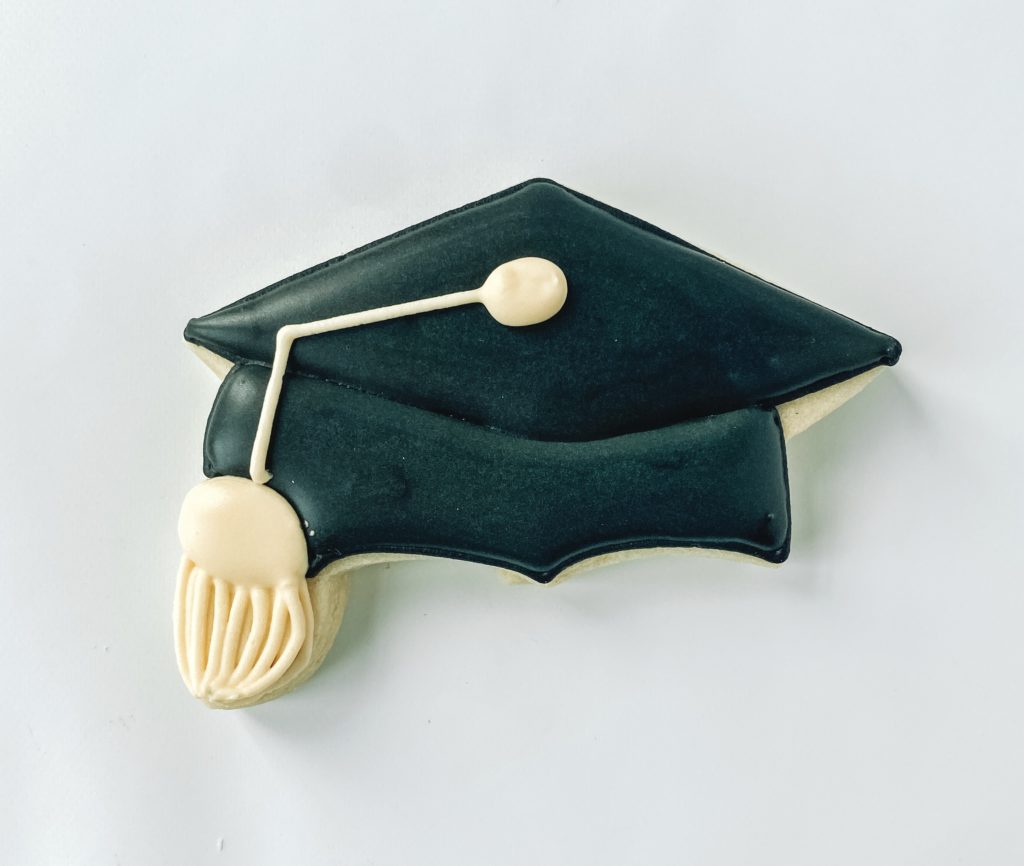
DETAILS
Step 4: Add the tassel with ivory piping icing. Add one layer of tassel then go back over again to create a detailed look. Add the details with ivory piping icing.
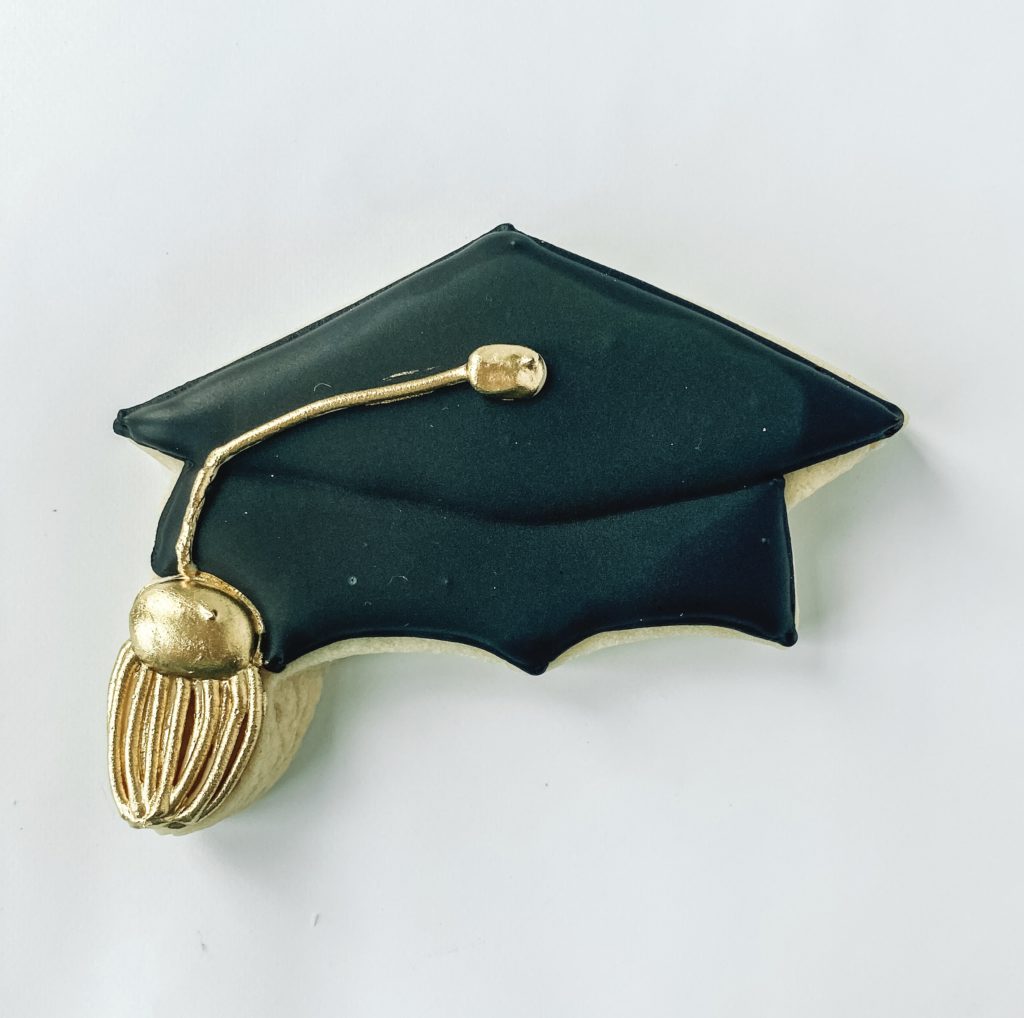
To make the gold paint mix equal parts gold dust and Everclear. You want the consistency to be like a gel paste.
Step 5: Once you get your right consistency gently paint the gold on all the icing that is ivory.
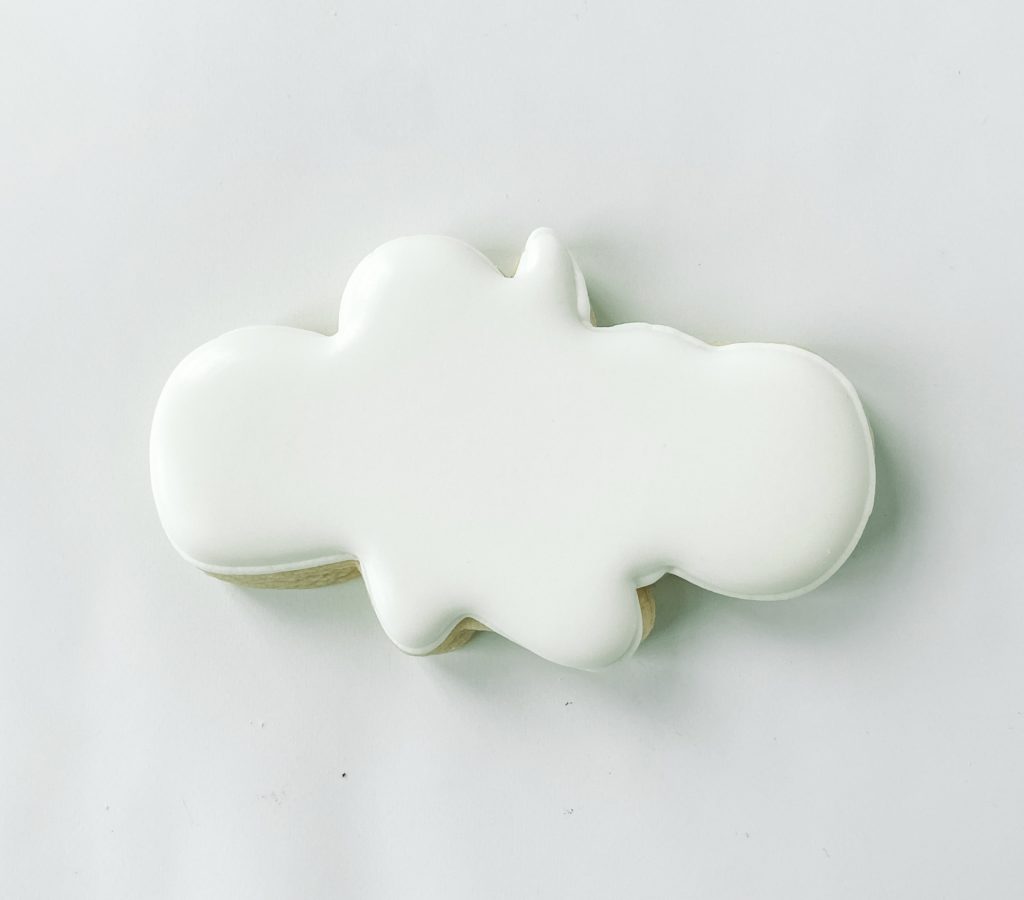
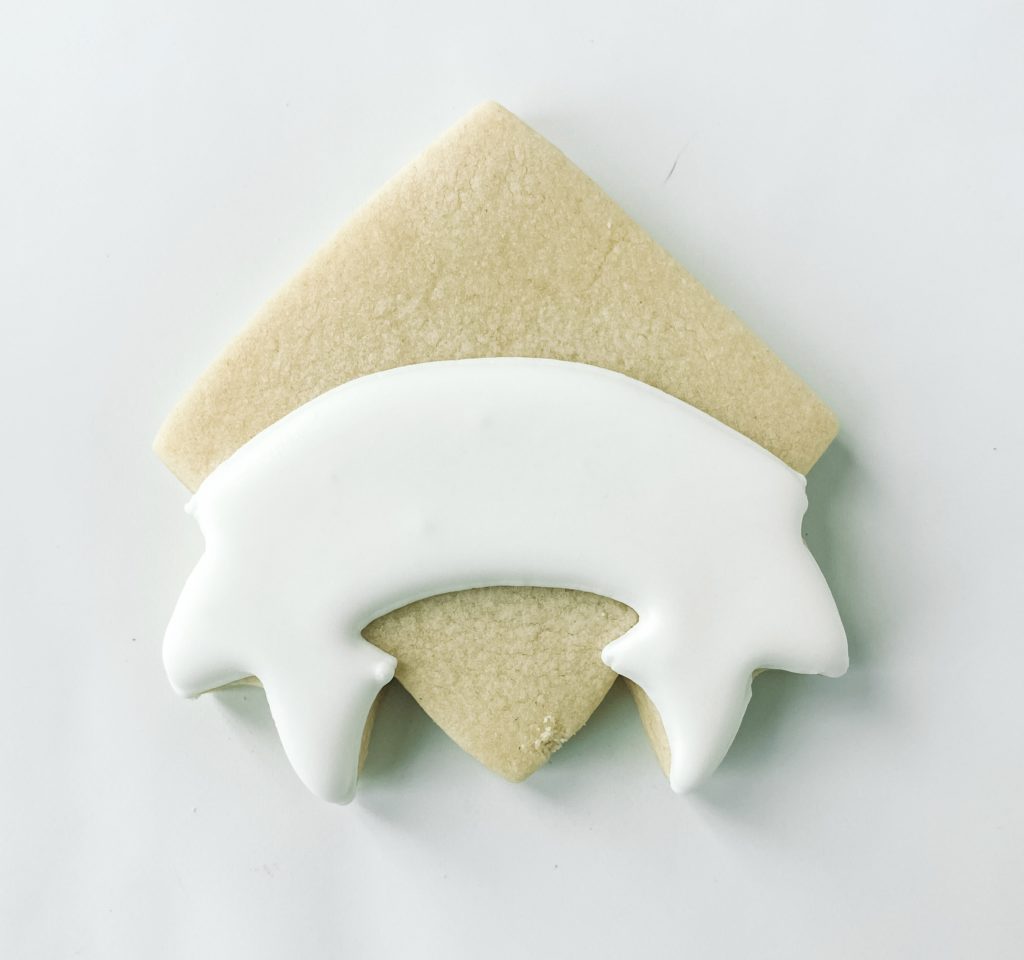
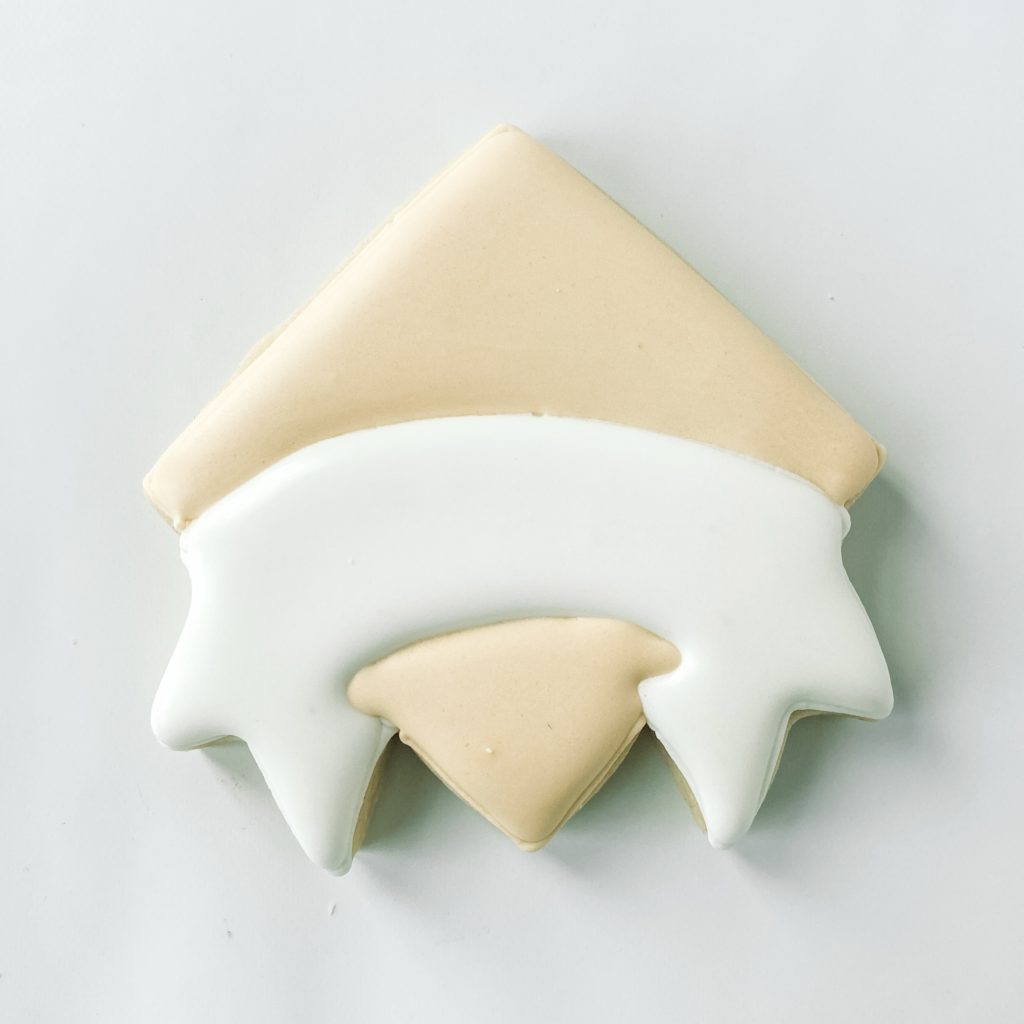
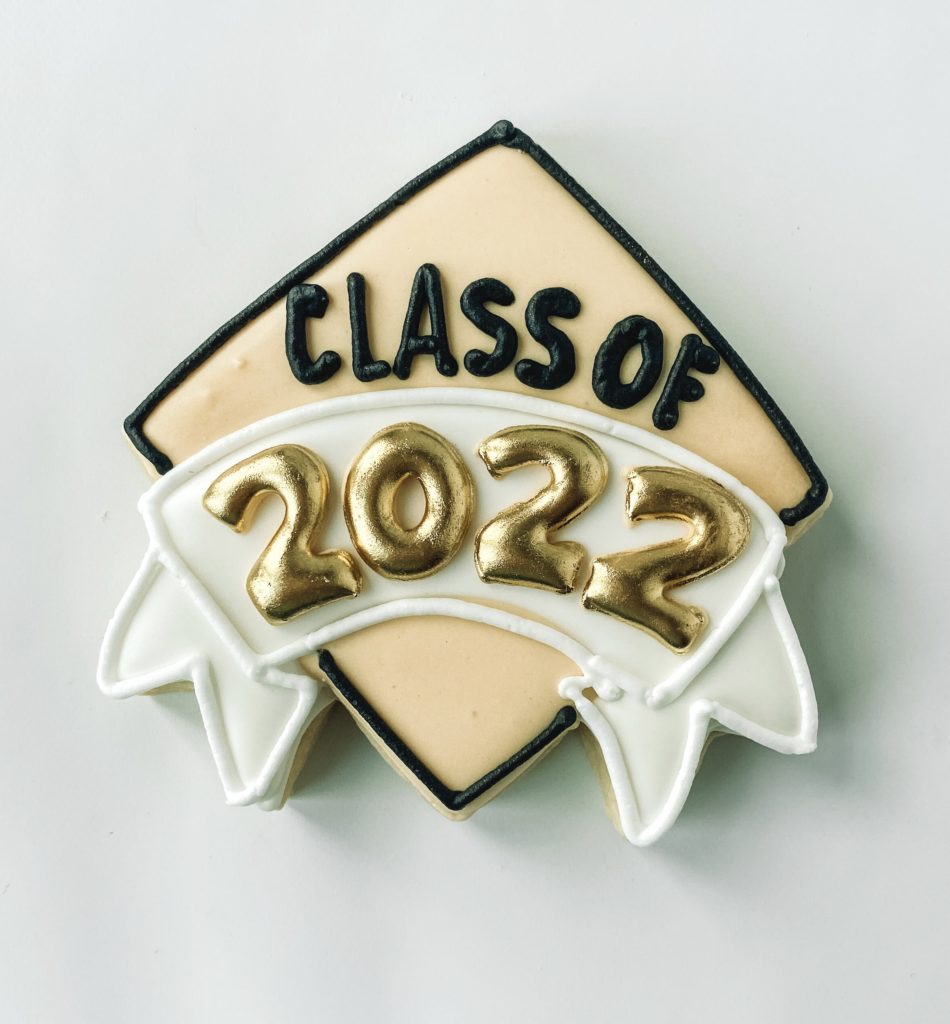
CLASS OF 2022 PLAQUE COOKIE
OUTLINE AND FLOODING
Step 1: Outline the ribbon across the middle in white piping icing.
Step 2: Fill the outlined section with white flood icing.
Stop and allow your cookie to dry in front of a fan for 1-2 hours before moving to the next section.
Step 3: Outline the rest of the cookie in ivory piping icing.
Step 4: Fill the outlined section with ivory flood icing.
Stop and allow your cookie to dry in front of a fan for 1-2 hours before moving to the next section.
DETAILS
Step 5: Add “Class of” in black piping icing.
Step 6: Outline “2022” in ivory piping icing. Fill in the numbers with ivory flood icing.
Step 4: Outline the square with black piping icing.

To make the gold paint mix equal parts gold dust and Everclear. You want the consistency to be like a gel paste.
Step 5: Once you get your right consistency gently paint 2022 gold.

Do you feel like you can handle metallic royal icing techniques now? All you have to do is make the dust into thin paint and carefully paint it over your details! You can make this Graduation Cookie Set, I am confident any skill level can take this set and succeed! Just take your time and practice a little with the gold luster paint and you’ll be adding metallic details to all your decorated sugar cookies in no time!
Make your set of graduation cookies and share them online, don’t forget to tag me so I can see your beautiful work!