
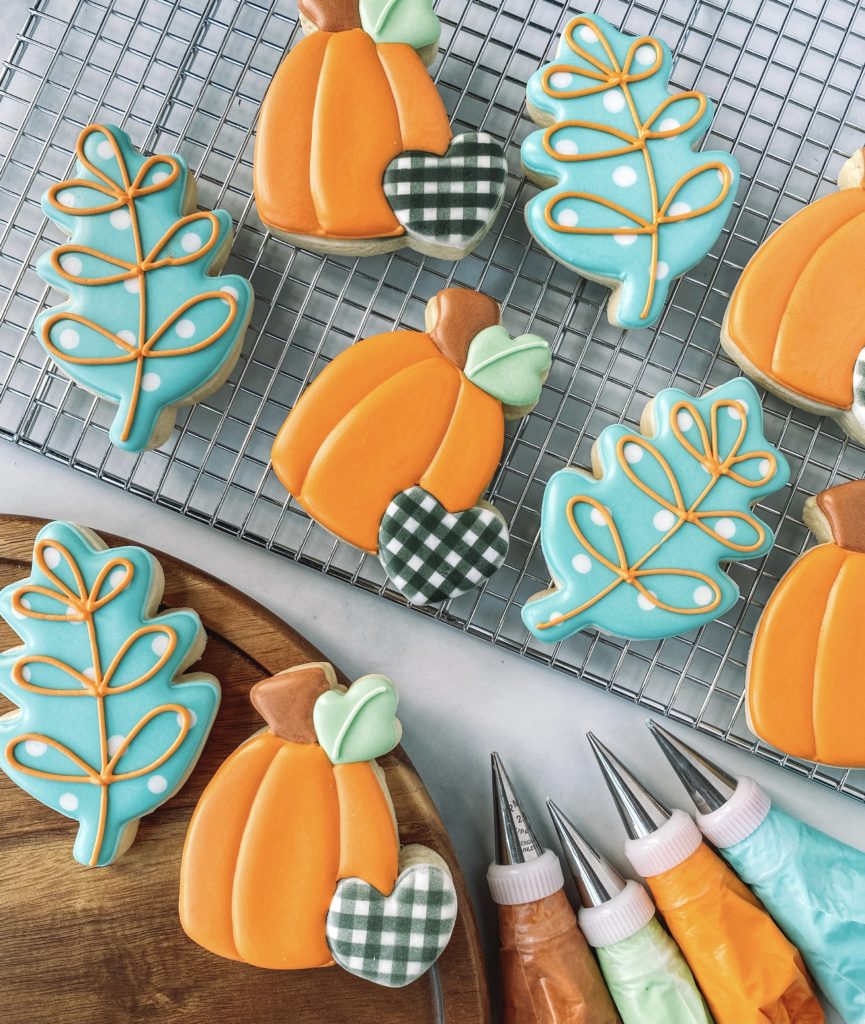
Fall pumpkin and leaf cookies are perfect to include in any set of fall-themed cookies this year, find out how to make them!
When I plan out cookies for a project I like to see what I can re-use and re-purpose so I can make the cookies in bulk and then decorate in different ways. These fall pumpkin and leaf cookies are going to be perfect to include in any sets that I need to add a couple of cookies that are just a little different.
I am really into the buffalo check airbrushing this season, it matches so much of the decor and fall items that are out in stores this year, and you can never go wrong with polka dots! You could do any colors you want to match a theme for a football team or your child’s sports teams, or the classical fall shades or Halloween colors. However you decorate your cookies you can’t go wrong.
YOU WILL NEED:
- Cut-out sugar cookie dough
- Royal icing
- Icing colors – I use Americolor brand
CUTTERS: Fall Pumpkin with heart from Sweet Leigh Printed and leaf from Ann Clark Cutters
TOOLS AND TIPS:
- Tips #2 or #2.5
- Couplers
- Icing bags
- Parchment paper
- Cookie sheet
- Toothpick or scribe
OPTIONAL:
Cookie Countess Air Brush Gun
Cookie Countess Air Brush Color black tuxedo
Cookie Countess then line stencil
COLORS YOU WILL NEED:
Pumpkin Icing – outline and flood
Mint Green Icing – outline and flood
Brown – outline, and flood
Turquoise – outline, and flood
White Icing – outline and flood
OUTLINE and FLOODING
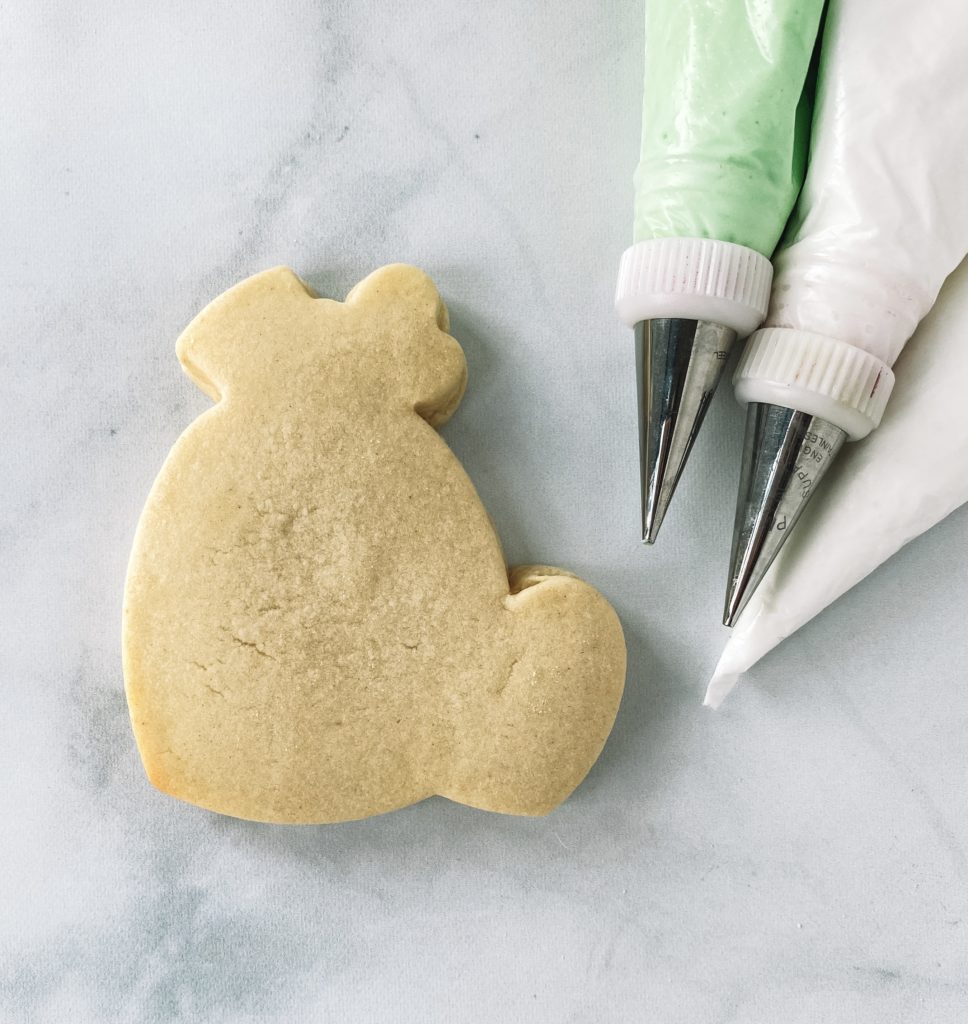
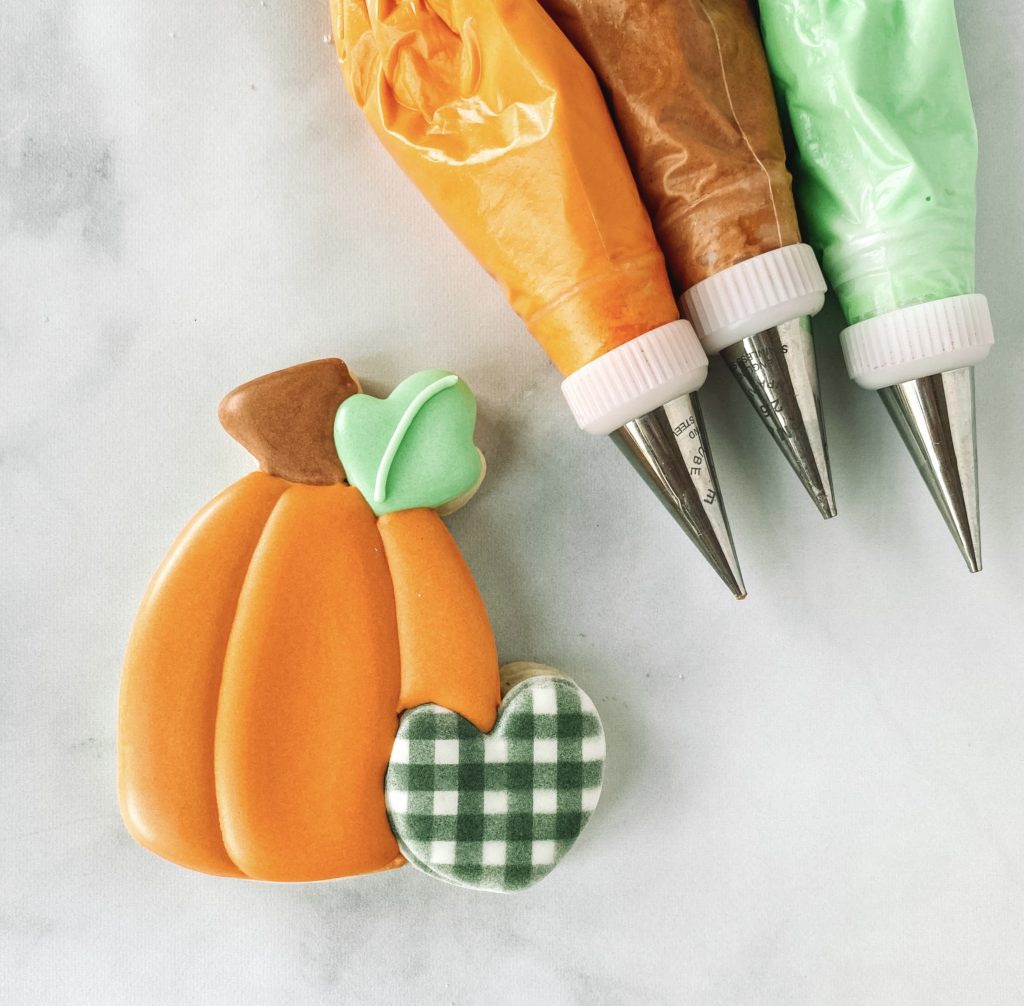
Step 1: Outline the heart with white piping icing and leaf with mint green piping icing.
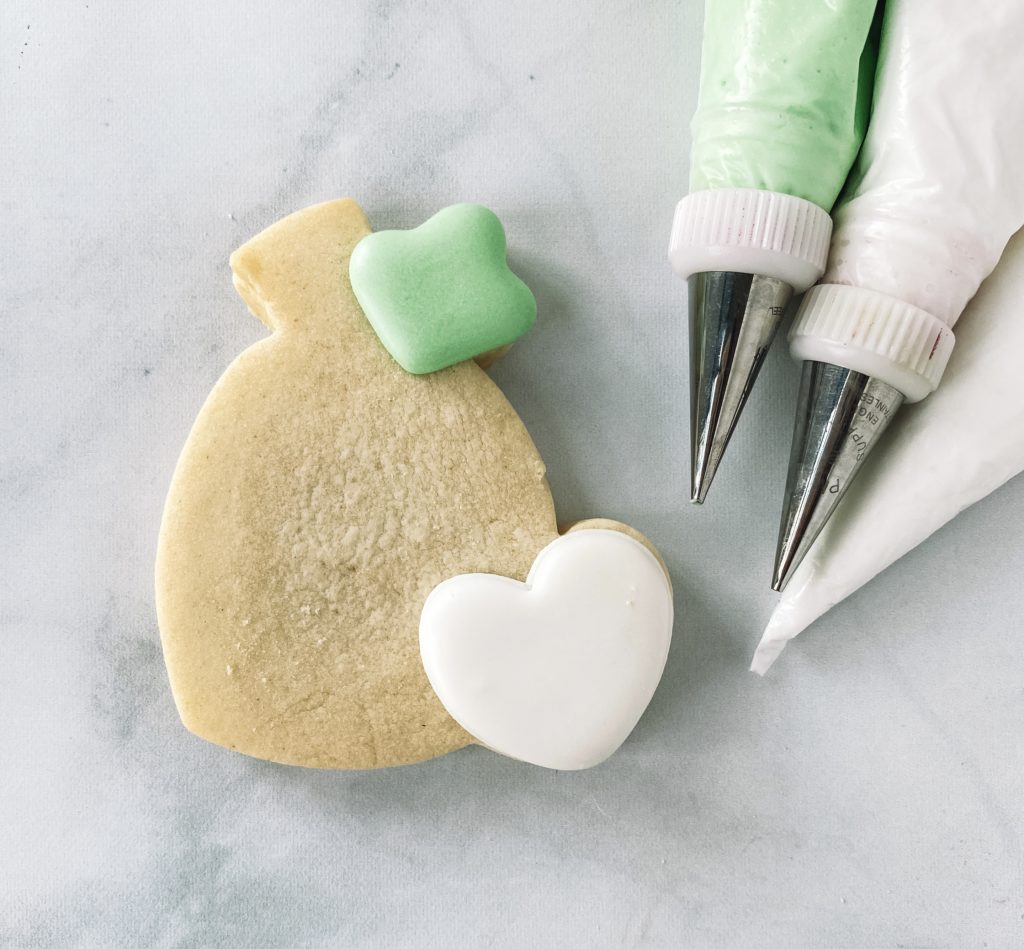
Step 2: Fill the heart with white flood icing and the leaf with green flood icing.
Stop and allow your cookie to dry in front of a fan for 1-2 hours before flooding the next section.
Step 3: Using pumpkin piping icing outline the pumpkin and make sure to add 2 lines to give dimension to your cookie Fill in the 2 outside sections in pumpkin flood icing.
Stop and allow your cookie to dry in front of a fan for 1-2 hours before flooding the next section.
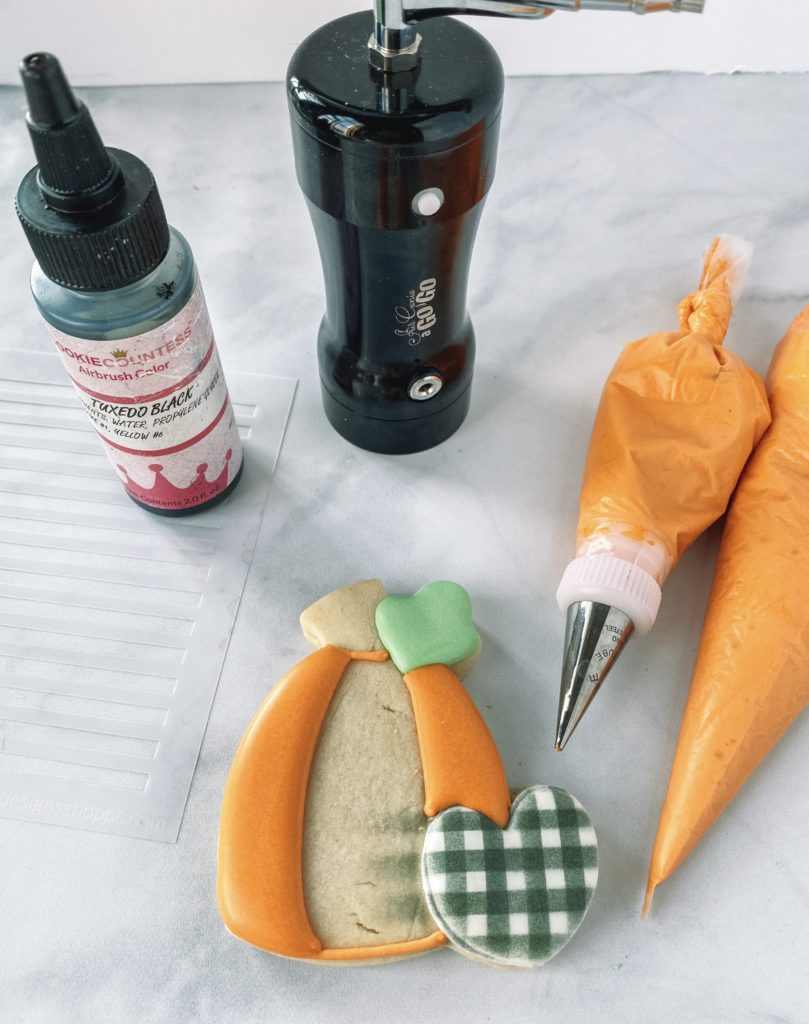
Step 4: Grab your thin line stencil and airbrush gun with black tuxedo airbrush color. Lay the stencil across the white heart and spray lightly and apply in layers. Gently pick up the stencil. Turn the stencil to go the opposite direction creating a gingham check pattern. Spray lightly and apply in layers.
DETAILS
Step 4: Fill in the center section of the pumpkin with orange/pumpkin flood icing. Outline the top stem of the pumpkin in brown piping icing and fill in with brown flood icing. Lastly, use green piping icing add a line in the middle of the leaf.
LEAF COOKIES
OUTLINE and FLOODING
Step 1: Outline the leaf with turquoise piping icing.
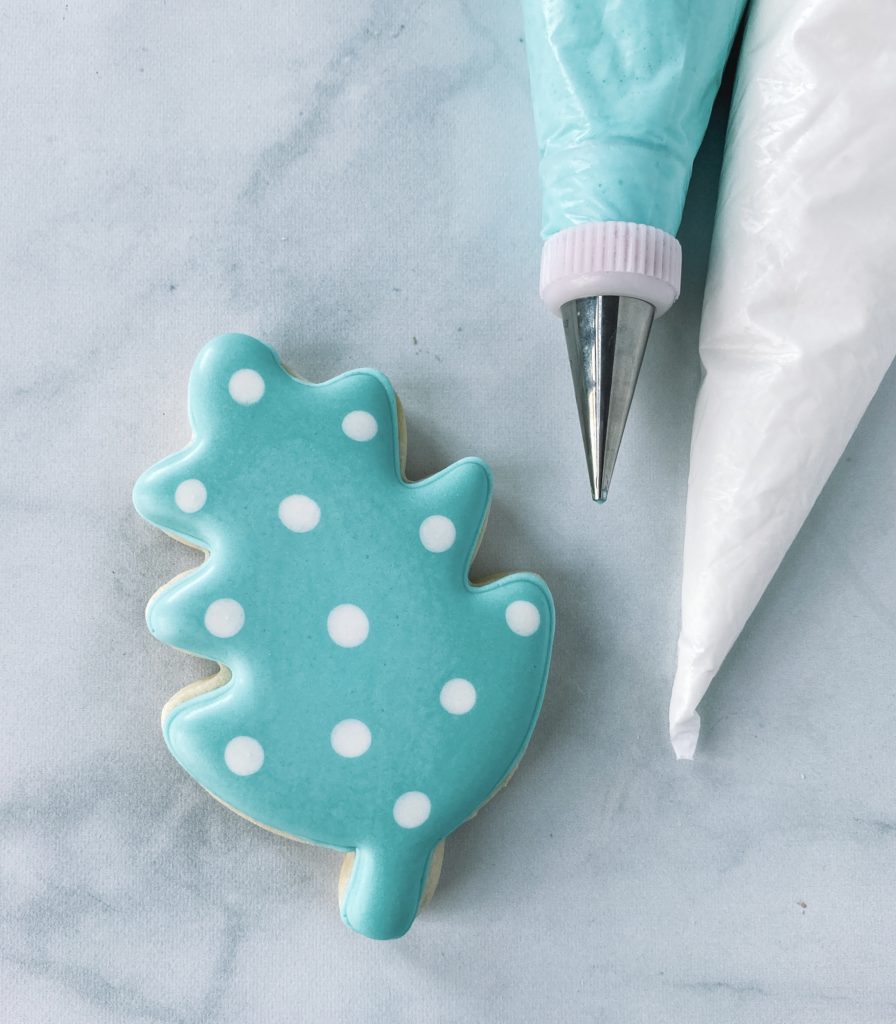
Step 2: Fill the outline using turquoise flood icing. Once you have covered the entire cookie with flood icing use white flood icing to add polka dots to your leaf cookie
Stop and allow your cookie to dry in front of a fan for 1-2 hours before flooding the next section.
DETAILS
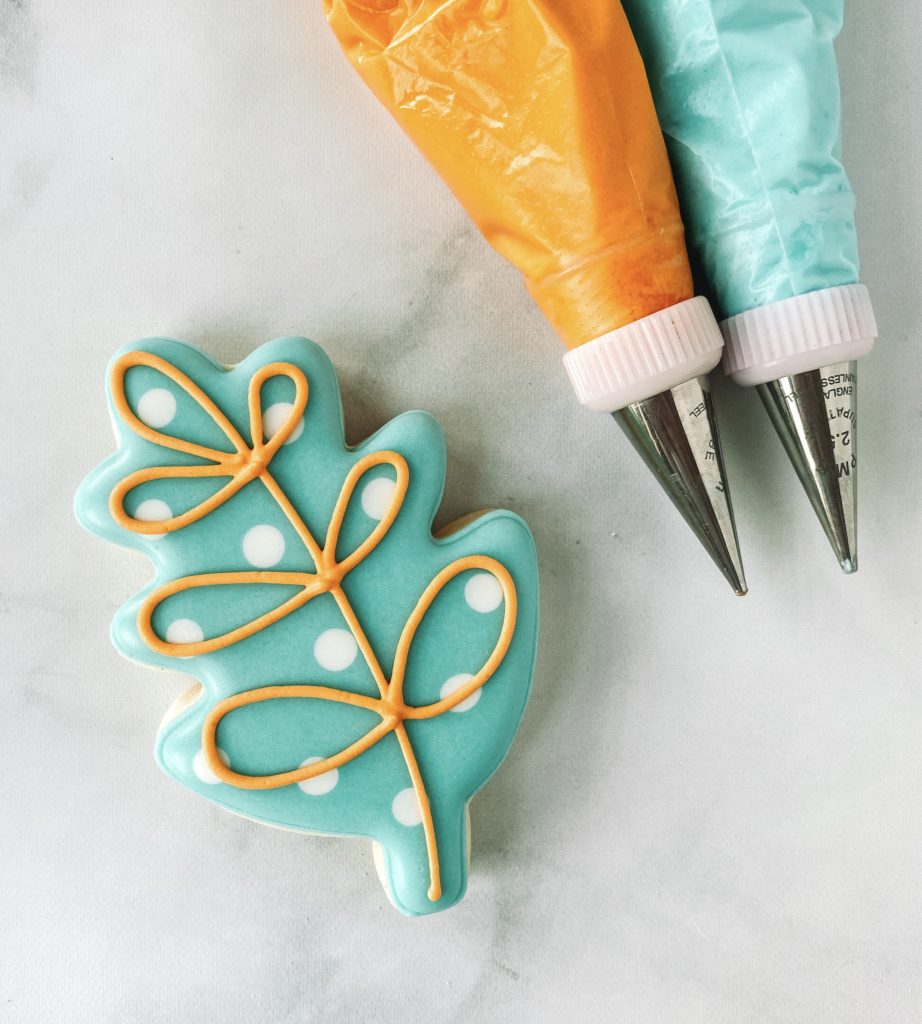
Step 3: Using orange/pumpkin piping icing adding details with loops.
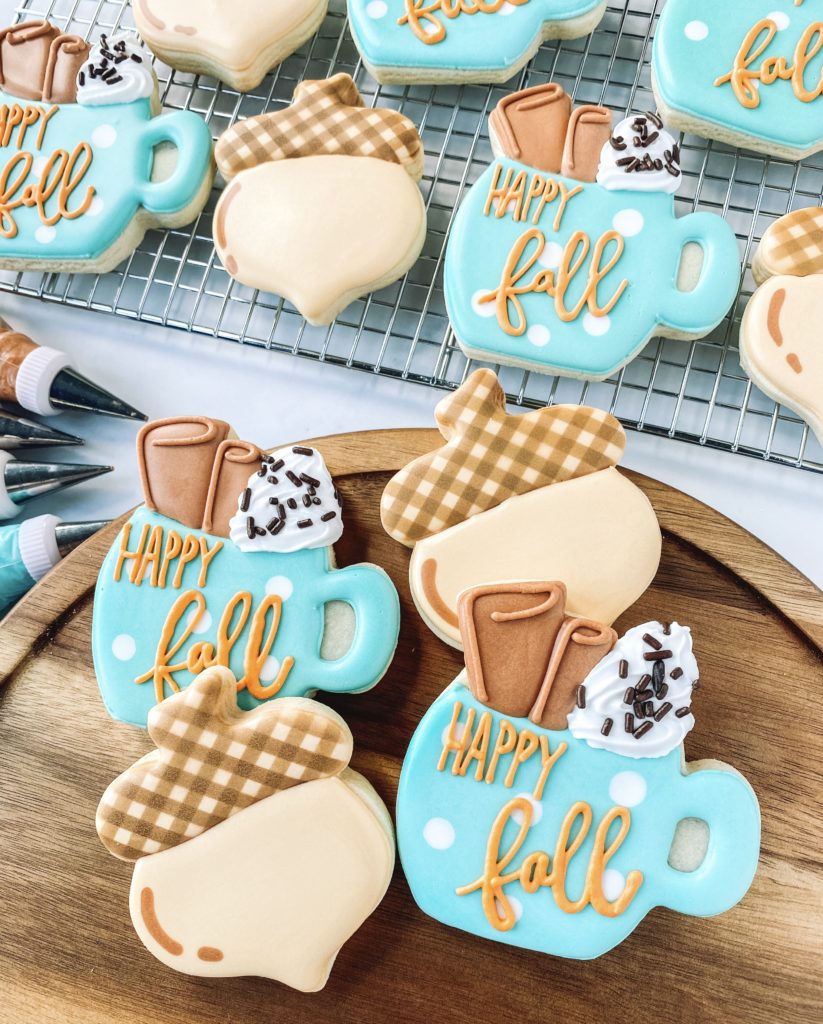
If you loved that set you are really going to love this next fall set, see how I made them so you can add in the pumpkin or leaf to another set easily? Look for the Mugs and acorns in my other fall cookie post coming soon!
I want to see how you decided to decorate your cookies, tag me in pictures of your fall cookies so I can see all your beautiful cookies, and share your beautiful work!