
Making Christmas Cookies I sometimes like to mix it up a little to some with buttercream instead of using all royal icing. I do this for a couple of reasons, one is some people don’t like to eat Royal Icing and that is ok, buttercream brings a different flavor and softer texture that I enjoy just as much as Royal Icing. I also like the variety of textures you can achieve using buttercream with all the fun designs of Christmas Cookies. So I change it up sometimes as I did for these Cookie Pops, you will love how easy these are, especially this piping technique to get perfectly fluffy trees with no trouble.

Using any Christmas Tree cutter make sure your cookies are thick enough to add a cookie stick or paper straw. I like to cut my cookies at 3/8″. Once you have cut out your cookies gently insert a cookie stick or straw right in the middle of the dough going about two-thirds away up the cookie.

Step 1: Using Stick royal icing and a number 18 tip turn the tree upside down and pipe first letting icing billow out a little before pulling back towards the top middle of the Christmas tree.
Step 2: Continue to add layer upon layer until you have reached the top.
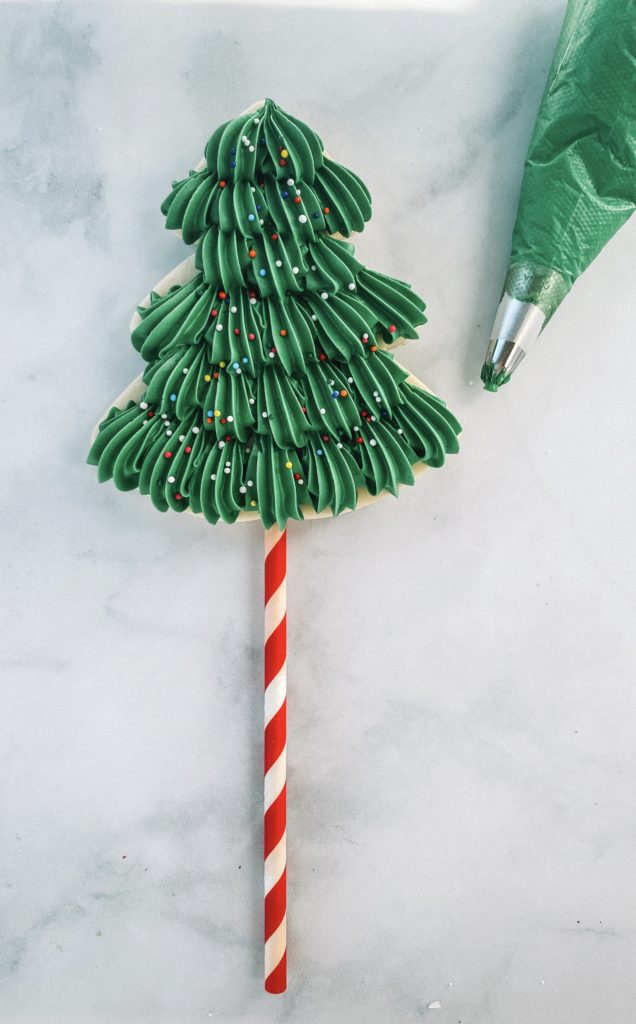
Step 3: While the icing is still wet immediately add rainbow sprinkles or white non-perils for extra details on your cookie.
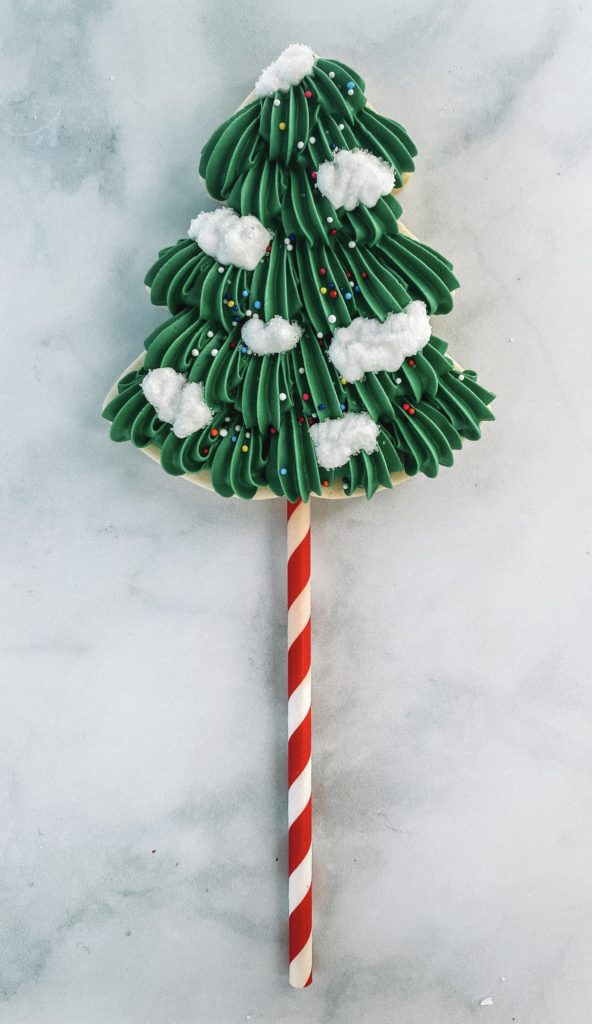
Step 4: Once the cookie is dry (1-2 hours) add snow by using white piping icing and white sanding sugar.
Step 5: Using a 5×7″ cello bag insert the tree in the bag and tie it with a pre-tied bow at the base of the tree.
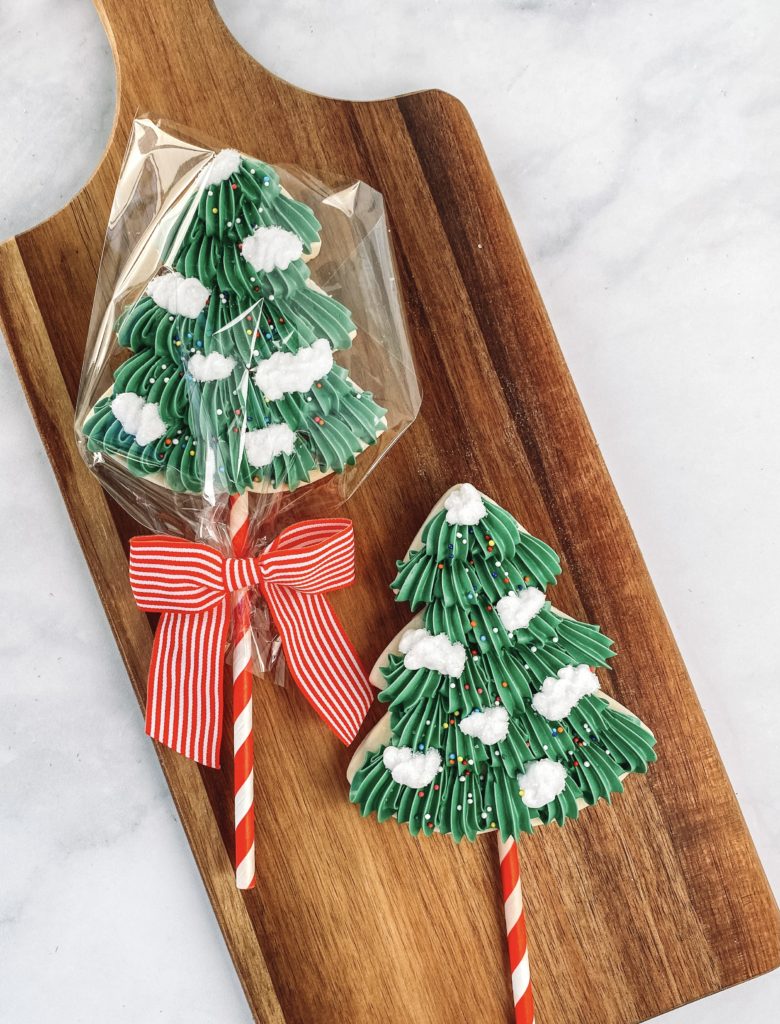
That’s all it takes to make these cute cookies on a stick, you can leave the stick off if you need to, but you can make these cookie pops to add a little something different to hand out as gifts or to sell at a show or bake sale. Wrap em up in bags with bows and you’re all set. They keep fresh in the bags and it is great if you need them to be handled by others before they are eaten.
Make sure to tag me in the pictures of your cookies so I can see all your cute designs too!