
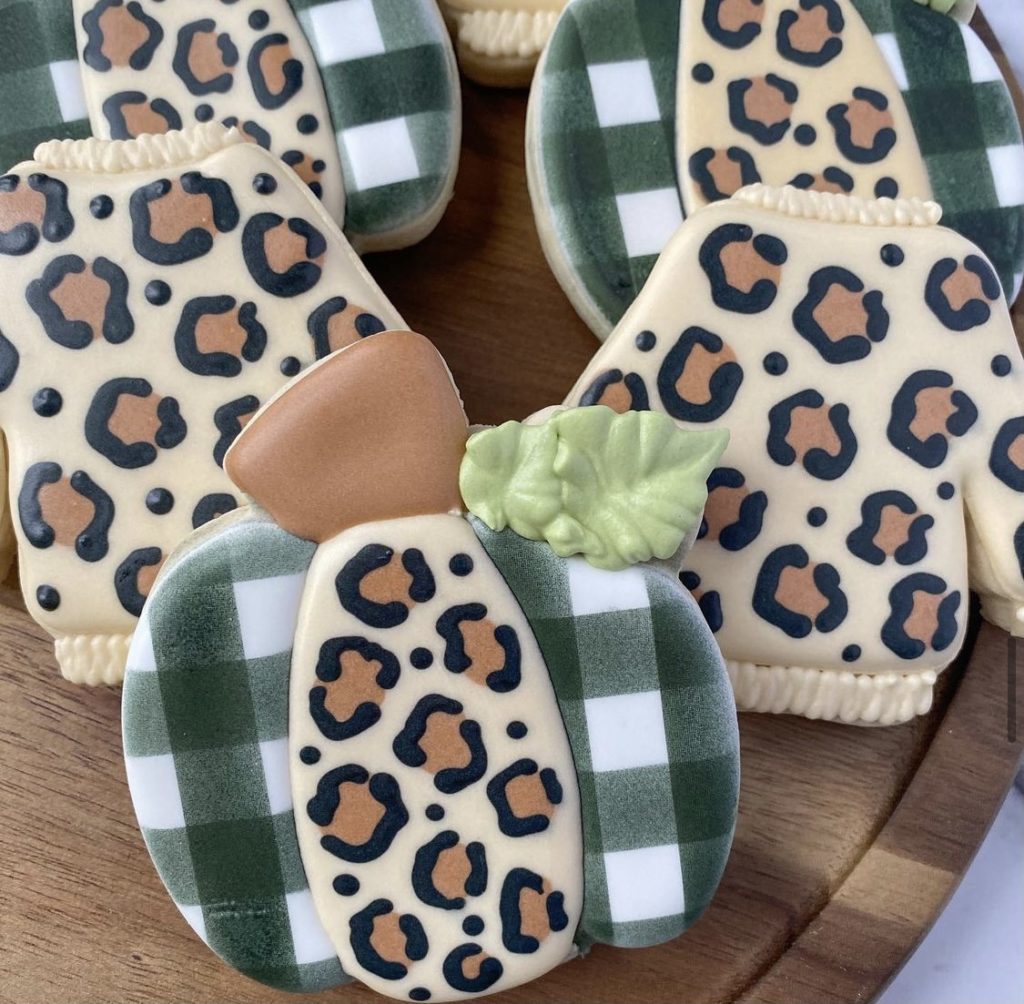
I might only do buffalo check and leopard print fall cookies for the entire season, I’m giving you fair warning, that is how much I love these cookies!
They look much more difficult than they actually are, and they are not as time-consuming as they look either. The Leopard print is a wet-on-wet technique, it takes no time at all to make those adorable prints, and the buffalo check is done with an airbrush and takes hardly any time to add as well! You’re going to start adding these two patterns to all your cookies, no matter what time of year it is because they just add so much fun texture to everything!
I’m going to give you all the step by step instructions and make sure to check out the videos I did for them too, here I will link them for you so you can get to them quickly: BUFFALO CHECK VIDEO & LEOPARD PRINT VIDEO
BUFFALO CHECK AND LEOPARD PRINT FALL COOKIES
YOU WILL NEED:
- Cut-out sugar cookie dough
- Royal icing
- Icing colors – I use Americolor brand
CUTTERS: Pumpkin cutter – Simple Renee Sweets and sweater cutter from Kaleidacuts
- TOOLS AND TIPS:
- Tips #2 or #2.5
- Couplers
- Icing bags
- Parchment paper
- Cookie sheet
- Toothpick or scribe
OPTIONAL:
Wide line stencil from cookie countess
Cookie Countess airbrush machine
Black Tuxedo Air Brush Color from the Cookie Countess
- COLORS YOU WILL NEED:
- Ivory Icing – outline and flood
- Brown Icing – outline and flood
- Black – outline, and flood
- Olive Green – outline and flood
- White – outline and Flood
PUMPKIN COOKIE
OUTLINE AND FLOODING
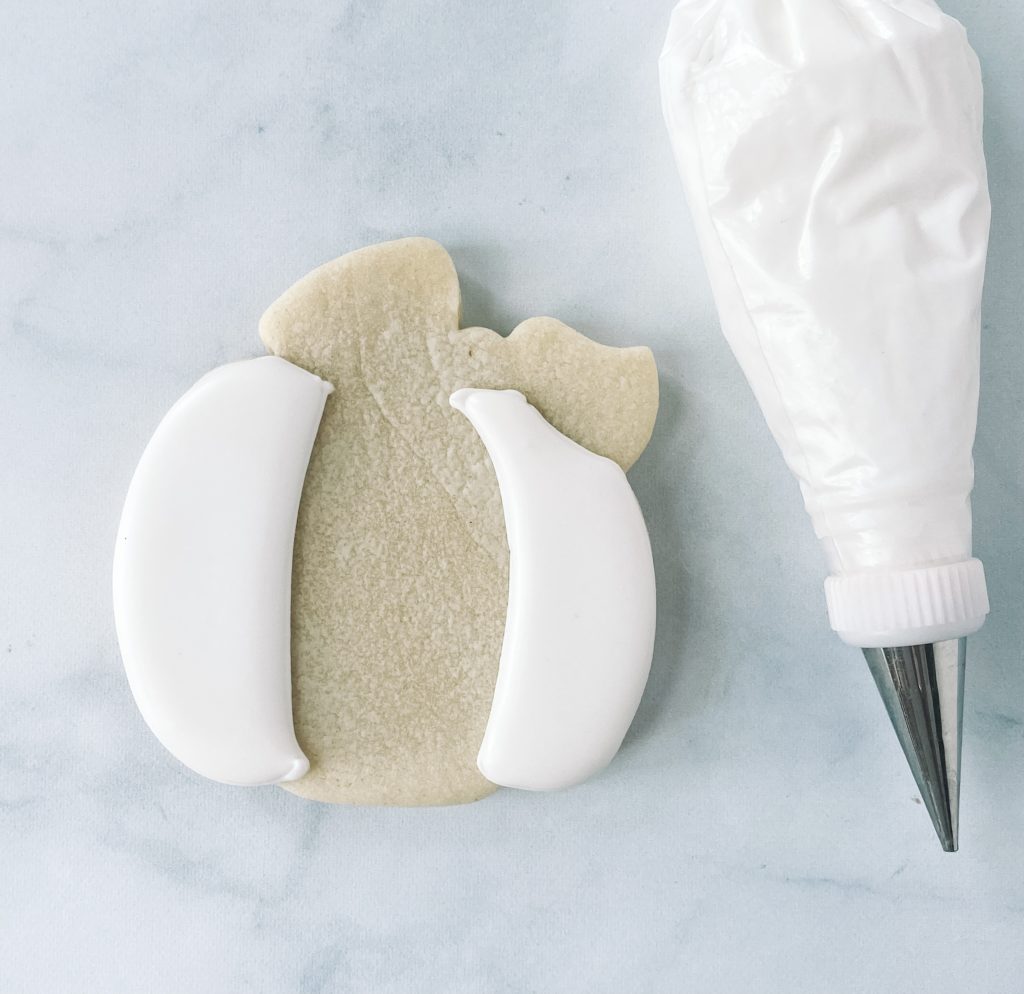
Step 1: Etch the two outside sections of the pumpkin. Outline the sections with white piping icing.
Step 2: Fill the outlined section of the pumpkin with white flood icing.
Stop and allow your cookie to dry in front of a fan for 1-2 hours before flooding the next section.
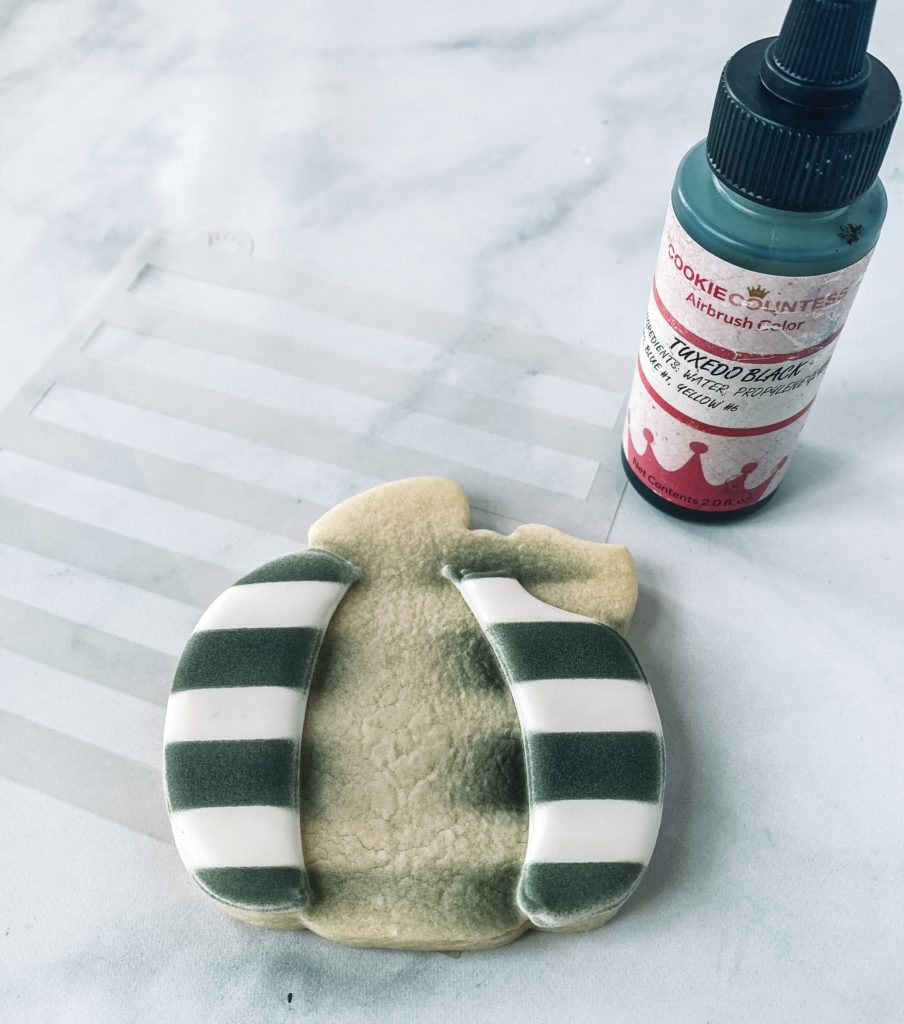
Step 3: Grab your wide-lined stencil and black airbrush color. Lay the stencil on the cookie and airbrush, going slow and applying in layers.
Stop and allow your cookie to dry in front of a fan for 10-15 min.
Step 4: Turn the stencil 90 degrees and airbrush again. Carefully lift up the stencil and reveal your cute buffalo pattern.
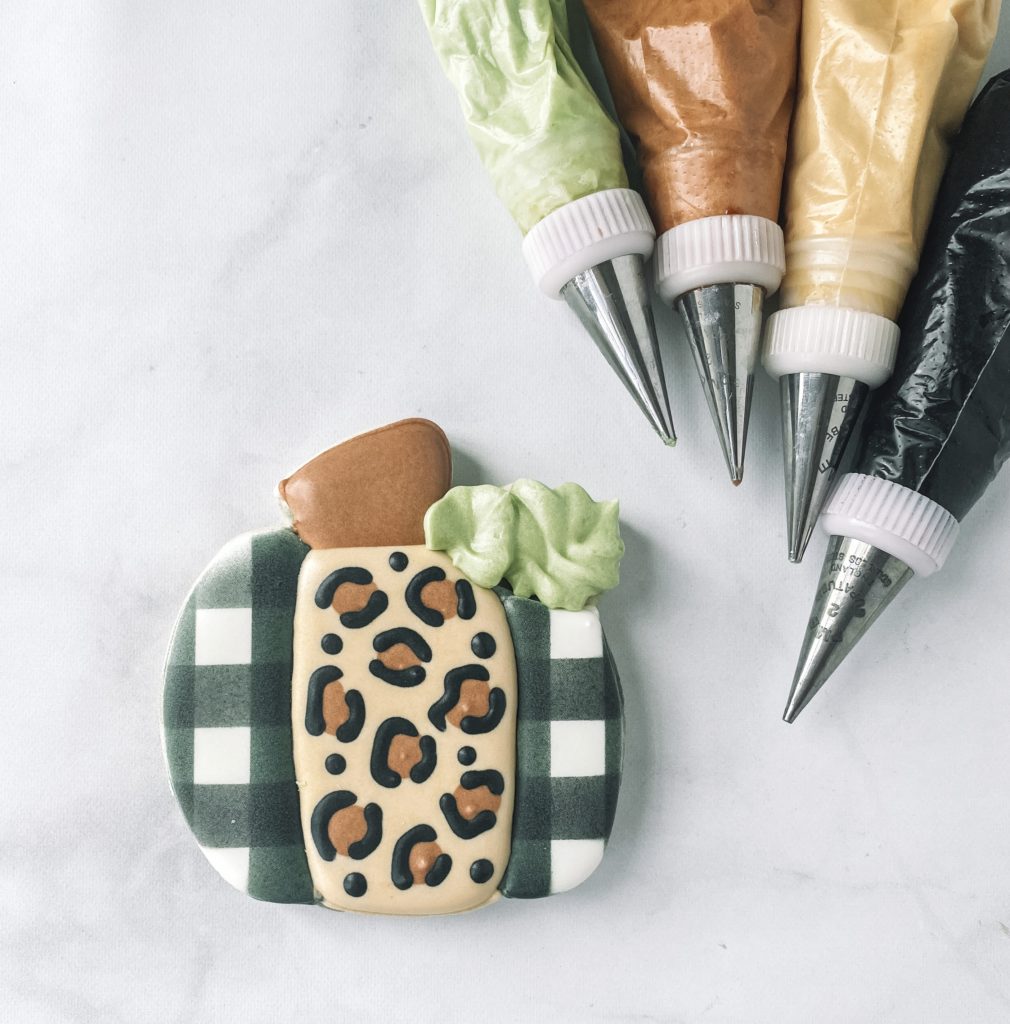
Step 5: Outline the middle section of the pumpkin in ivory piping icing. Flood the middle section of the pumpkin with ivory flood icing. Using brown flood icing make brown dots in the flood icing. Using black flood icing carefully draw a line halfway around the brown circle and do the same on the other side but make sure not to connect the black lines. Add a few polka dots with black flood icing.
Stop and allow your cookie to dry in front of a fan for 1-2 hours before flooding the next section.
DETAILS
Step 6: Outline the stem with brown piping icing. Fill with brown flood icing.
Step 7: Using a leaf tip #352 and piping icing, make 2 leaves for the top of the pumpkin. To make the leaves make sure the “V” on the tip is facing the side.
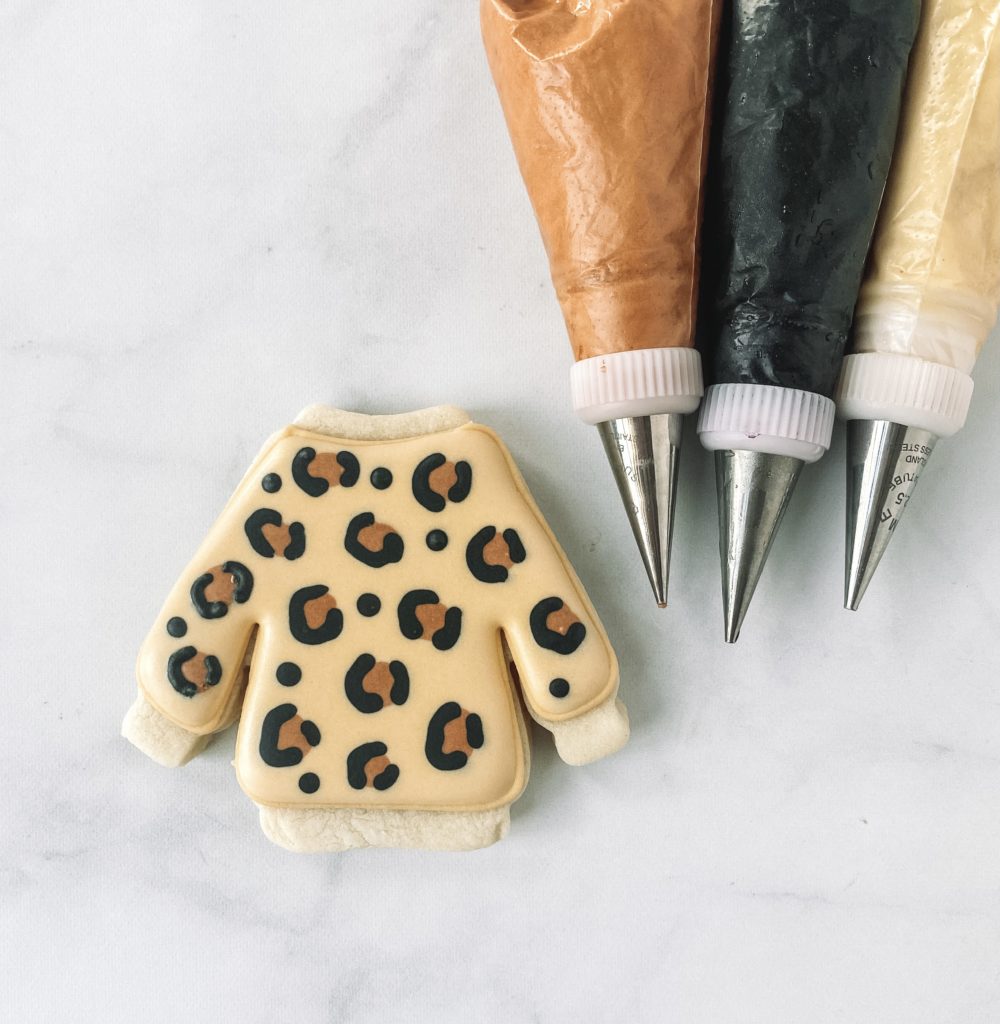
LEOPARD PRINT SWEATER
OUTLINE and FLOODING
Step 1: Outline the sweater in ivory piping icing. Make sure to leave a little space for the color, cuffs, and bottom hem of the sweater
Step 2: Fill the outline using ivory flood icing.
Step 3: Once flooded use brown flood icing to add dots all over the sweater.
Step 4: Take black flood icing and outline only half of the brown circle. Add a line to the other side but do not connect the lines.
Stop and allow your cookie to dry in front of a fan for 1-2 hours before flooding the next section.

DETAILS
Step 5: Use ivory piping icing to make the collar, cuffs, and bottom.
See how easy those were? You nailed it, I know you did! Anyone can decorate these cookies and they will look amazing, your friends and family will be in pure aw of your talents! I can’t wait to see your cookies, please make sure to share them on Instagram and tag me so I can see them!