
Paint your own sugar cookies are getting very popular and the kids especially love them (don’t tell anyone but the adults love them even more!).
I made these cookies for our kids’ table this Thanksgiving and I will more than likely make a set up for Christmas dinner too, and probably for the New Year’s Eve party so the kids have a fun edible craft to do together and share the excitement.
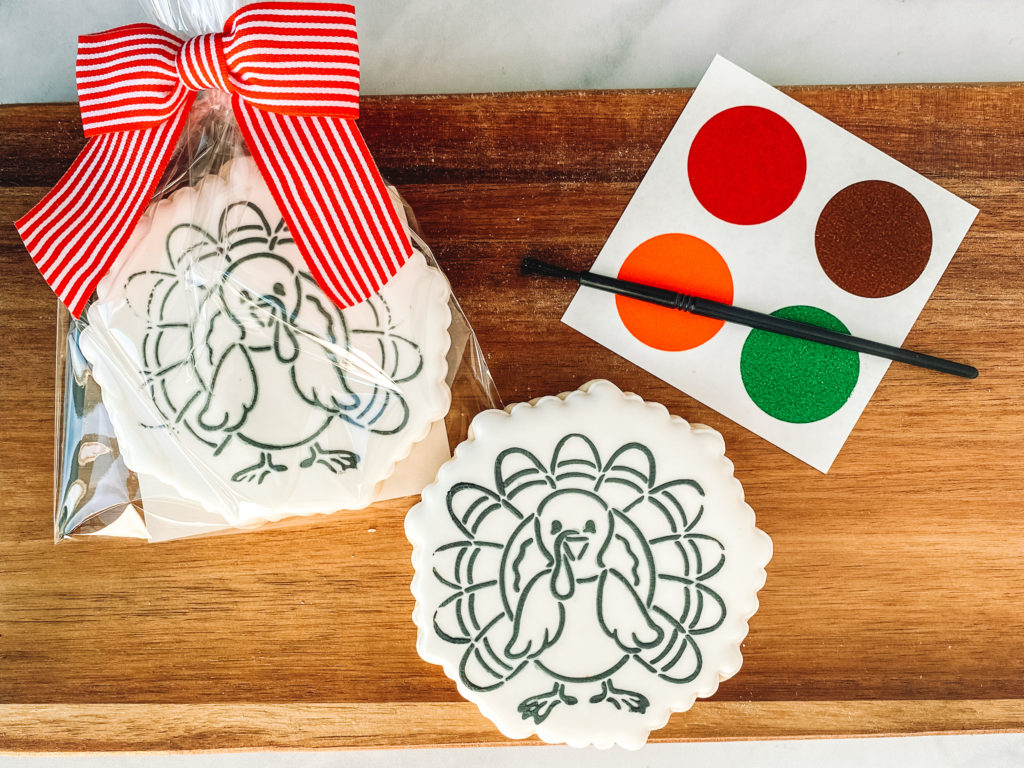
Paint your own cookies are perfect for kids and adults alike. I love these cute turkeys for the kids entertainment while the adults are prepping dinner or an after-lunch activity. The stencil, paint palette and small paint brush are all from The Cookie Countess. It works just like watercolor. Dip your brush into some water then pick a color and paint right on your cookie.
Once you have outlined and flooded your cookie allow ample amount of time for the cookie to dry – at least 10-12 hours before using the stencil on the cookie.
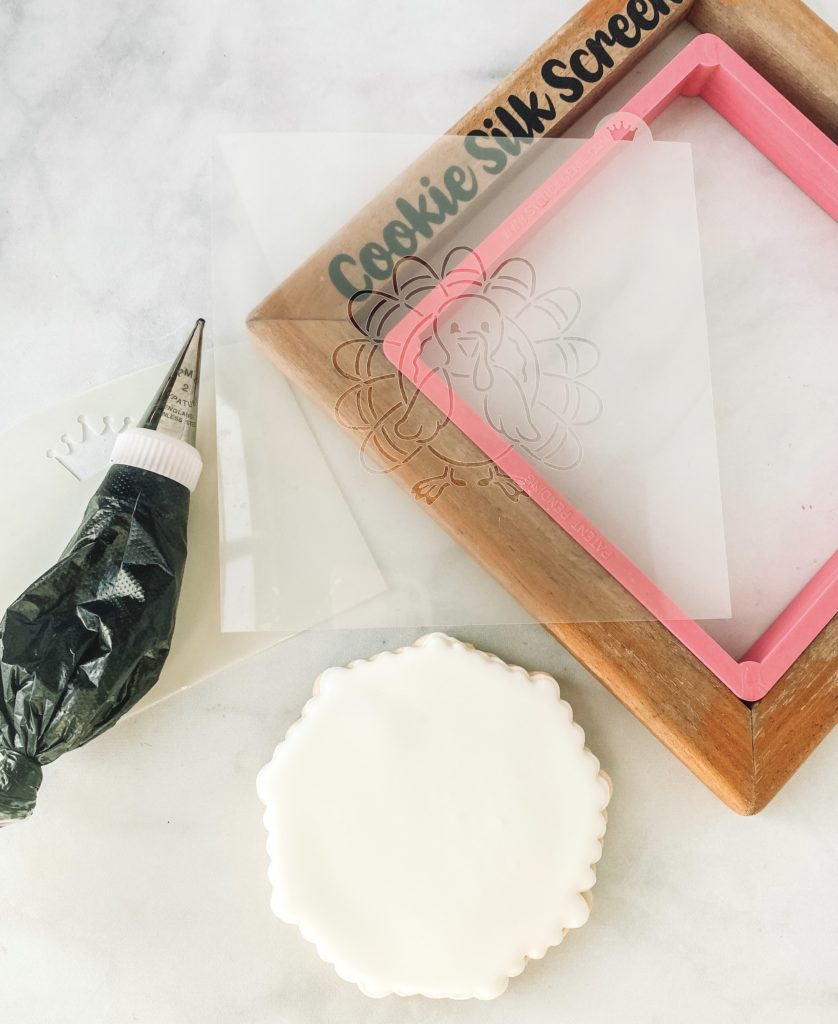
Place your stencil in your stencil genie. I ended up not using a silk screen as my icing was too thick. I like to use thick piping icing when using a stencil
Apply black piping icing to a scraper or spatula, hold down the stencil and gently swipe icing over the stencil and cookie.
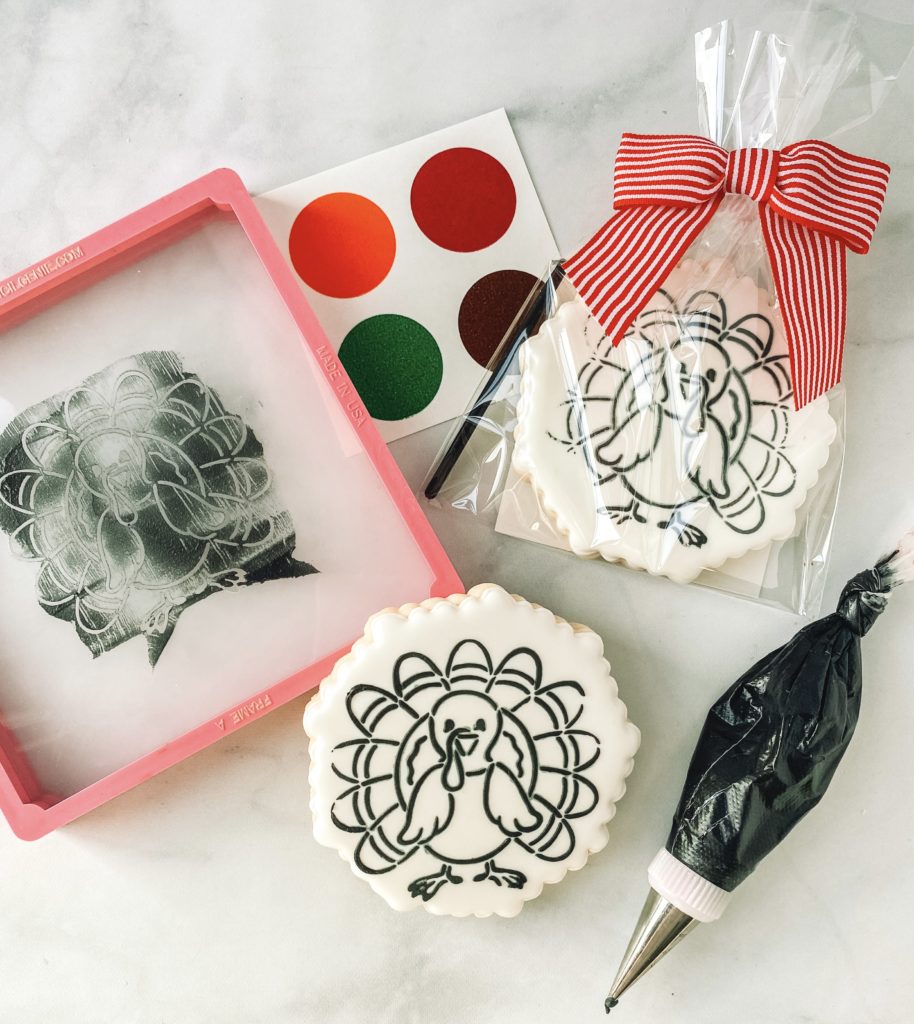
You see how easy it is to make the paint your own cookies and just purchase the little kits to decorate them from the linked site for Cookie Countess. The kids will truly love these, and so will the adults. They are a quick, no-mess craft and treat the kids will be talking about for days and asking for repeatedly. Now that you know how easy they are these are a great addition to birthday and holiday parties, as well as having ready if you run a cookie decorating business to have as an option for an add-on sale when you are quoting a cookie package!
When you make these be sure to share photos online and tag me so I can see them and share in your excitement!