
If you can’t decide whether mom would prefer cookies or flowers, you can get her both with this Mother’s Day Flower Bouquet cookie set!
Flowers that she doesn’t have to water, and cookies that taste as good as they look! Win-Win for everyone! I’ll talk you through step-by-step how to decorate this cute set of cookies so you can make them for the moms in your life!

Check out the step-by-step video tutorial.
I will show you how to decorate these colorful mother’s day floral cookies and also share the best way to package them. Check out the video tutorial for tips on making and packaging these cookies!
For these cookies I used my exclusive sugar cookie recipe and royal icing recipe. The cookie recipe yielded about 35 small 2.5 inch cookies. I like thicker cookies so I roll out my dough to 3/8″ using my Cookie Countess Precision Rolling Pin. The thickness of your cookie will change the cookie yield.
CUTTERS: MOTHER’S DAY TEA SET FROM KALEIDACUTS
COLORS YOU WILL NEED:
- Electric Green Icing – outline and flood icing
- Light Pink Icing – outline and flood icing
- Electric Pink – outline and flood icing
- Olive Green – outline and flood icing
- White- outline and flood icing
- Red – outline and flood icing
Optional
- Cookie Countess Airbrush Machine
- Beachy Blue Airbrush Color – Cookie Countess
- Creative Cookies Stencil Genie and Screen Genie
- Thick lines stencil from Cookie Countess
- BRP Box Shop – 7” x 4 3/8”
Prepping Royal Icing
This cookie set include 6 icing colors using pink, sky blue, green, lemon yellow, vivid violet and white. I made all the colors with Americolor food gels except the purple is violet-purple from the Cookie Countess.
Helpful Decorating Tips and Tricks
Cookie Timeline
I like to break up the decorating process over a few days. It works better for my stage of life to do a little each day. Here is a sample timeline to show how long each step takes.
DAY 1
Make and bake my cookies. I do not chill my dough so usually, this takes about 1 hour from start to finish. Mix royal icing, color, and prep all the icing bags. I like to color the day before because the colors will deepen over time.
DAY 2
Outline and Flood Cookies. Make sure to allow them to dry in front of a fan for 1-2 hours before adding details. Add final details like airbrushing, piping and stenciling.
Day 3
Always take pictures of your beautiful cookies. Allow 10-14 hours of drying time before packaging your cookies. I like to store mine on a baking pan with a lid overnight.

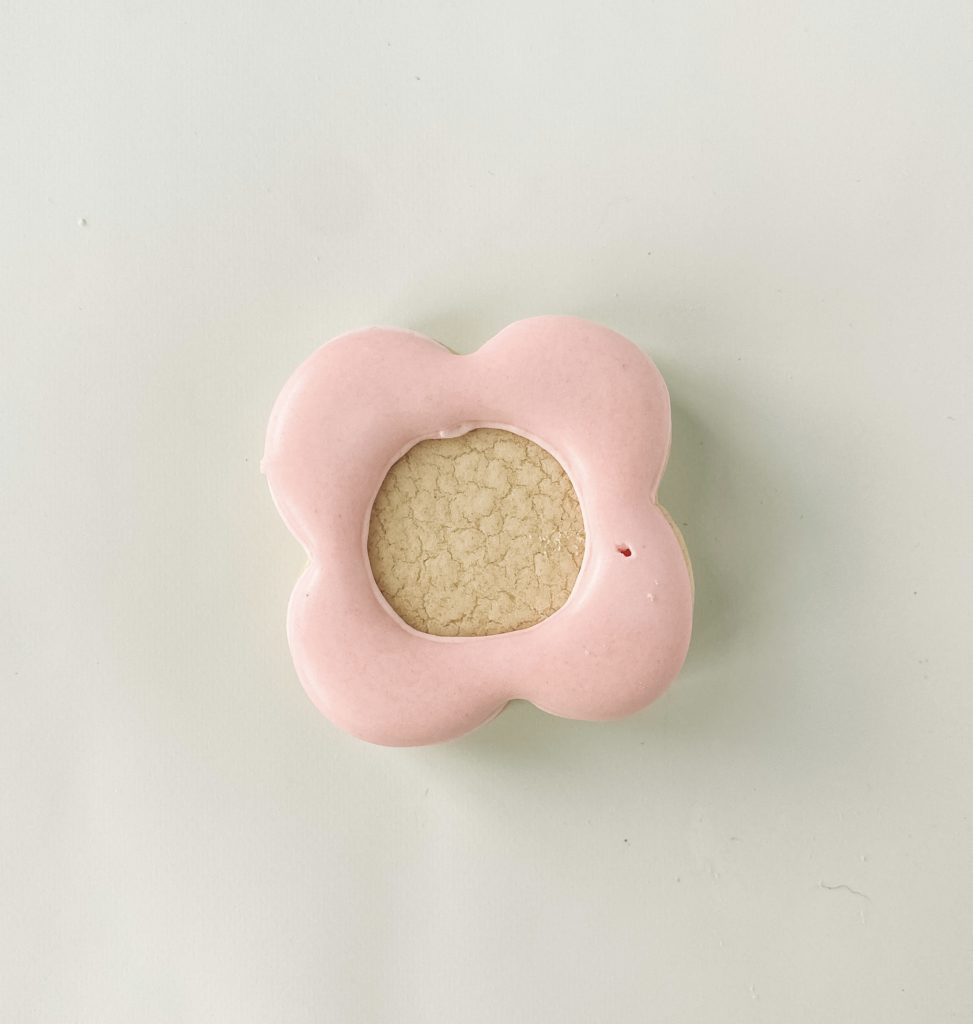
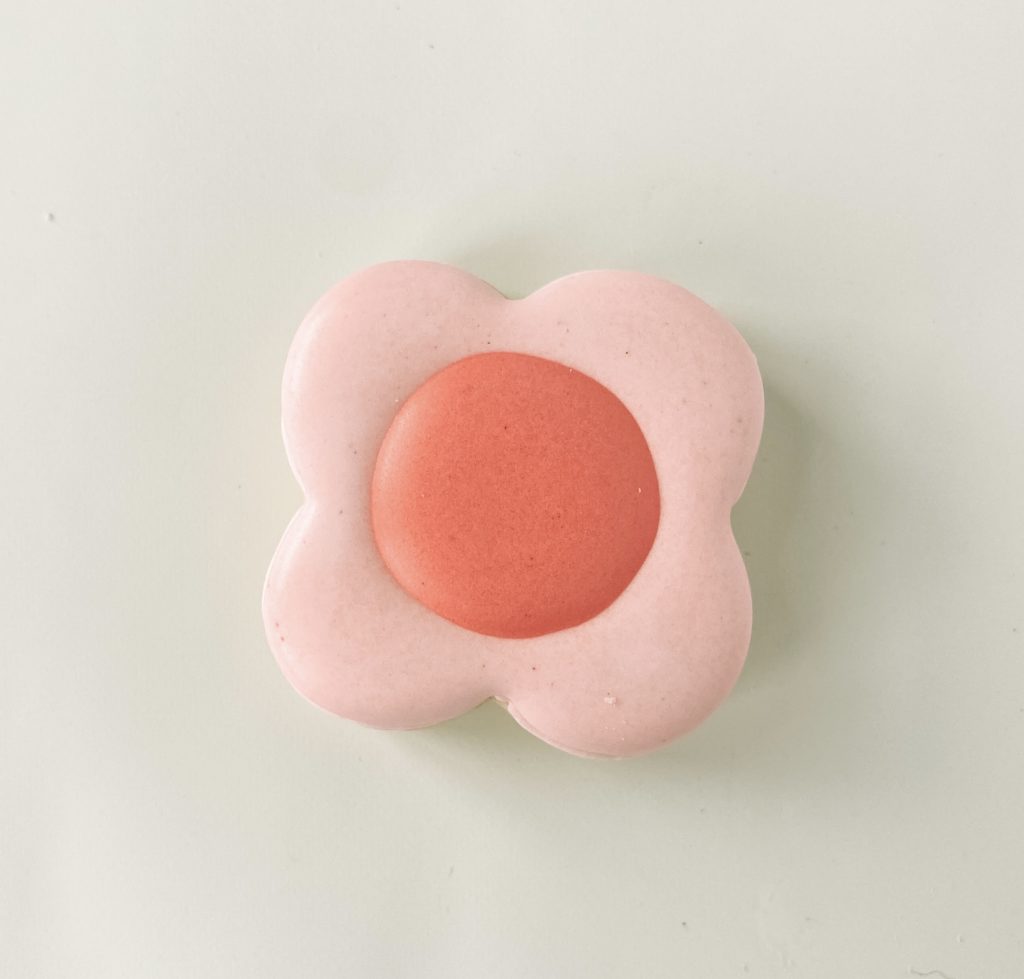
PINK FLOWER COOKIE
OUTLINE AND FLOODING
- Step 1: Outline the flow in light pink and outline a circle in the middle.
- Step 2: Fill the outer outline in with light pink flood icing.
- Stop and allow your cookie to dry in front of a fan for 1-2 hours before moving to the next section.
DETAILS
- Step 3: Flood the middle of the circle with electric pink flood icing.
- Step 4: Allow the cookie to dry for 30-40 minutes before adding white dots to the center with white piping icing.
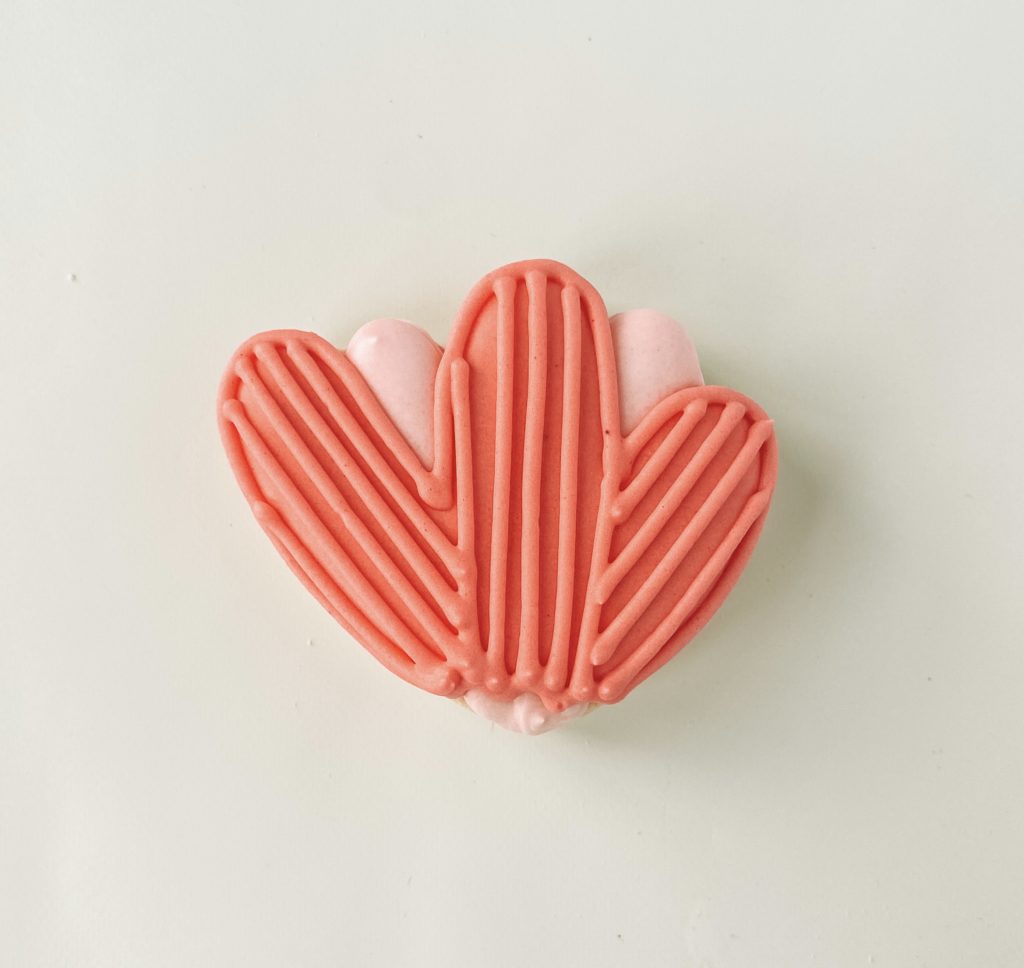
ELECTRIC PINK COOKIE
OUTLINE AND FLOODING
- Step 1: Outline the three sections in electric pink piping icing. Outline the smaller sections between with light pink piping icing. Immediately fill in the light pink outlined areas with the light pink flood.
- Step 2: Fill in the electric pink outline with the electric pink flood.
- Stop and allow your cookie to dry in front of a fan for 30-40 minutes before moving to the next section.
DETAILS
- Step 3: Using electric pink piping icing, add details and lines to the three sections on the flower
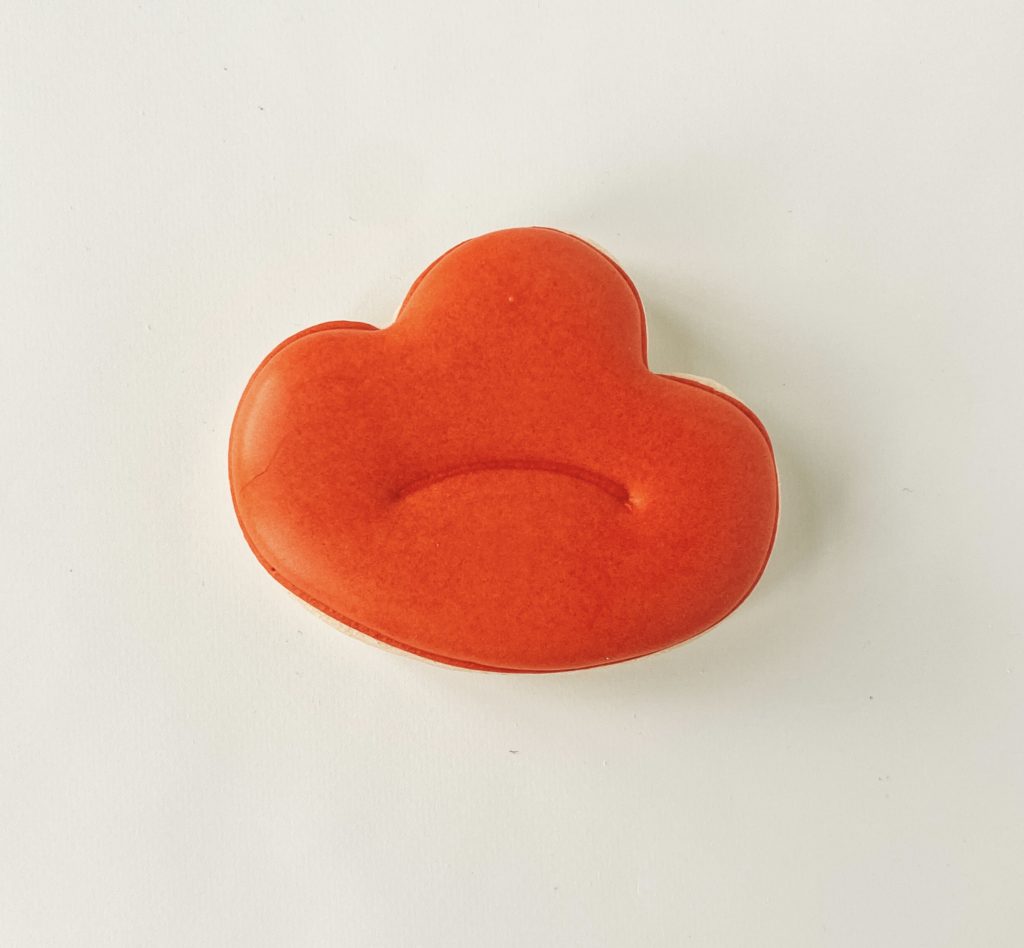
POPPY FLOWER COOKIE
OUTLINE and FLOODING
- Step 1: Outline the flower in red piping icing and add a double layer outline in the middle.
- Step 2: Fill in the outlined cookie with red flood icing.
- Stop and allow your cookie to dry in front of a fan for 30 minutes before moving to the next section.
DETAILS
- Section 3: Using black piping icing, add the stems to the middle of the poppy flower.

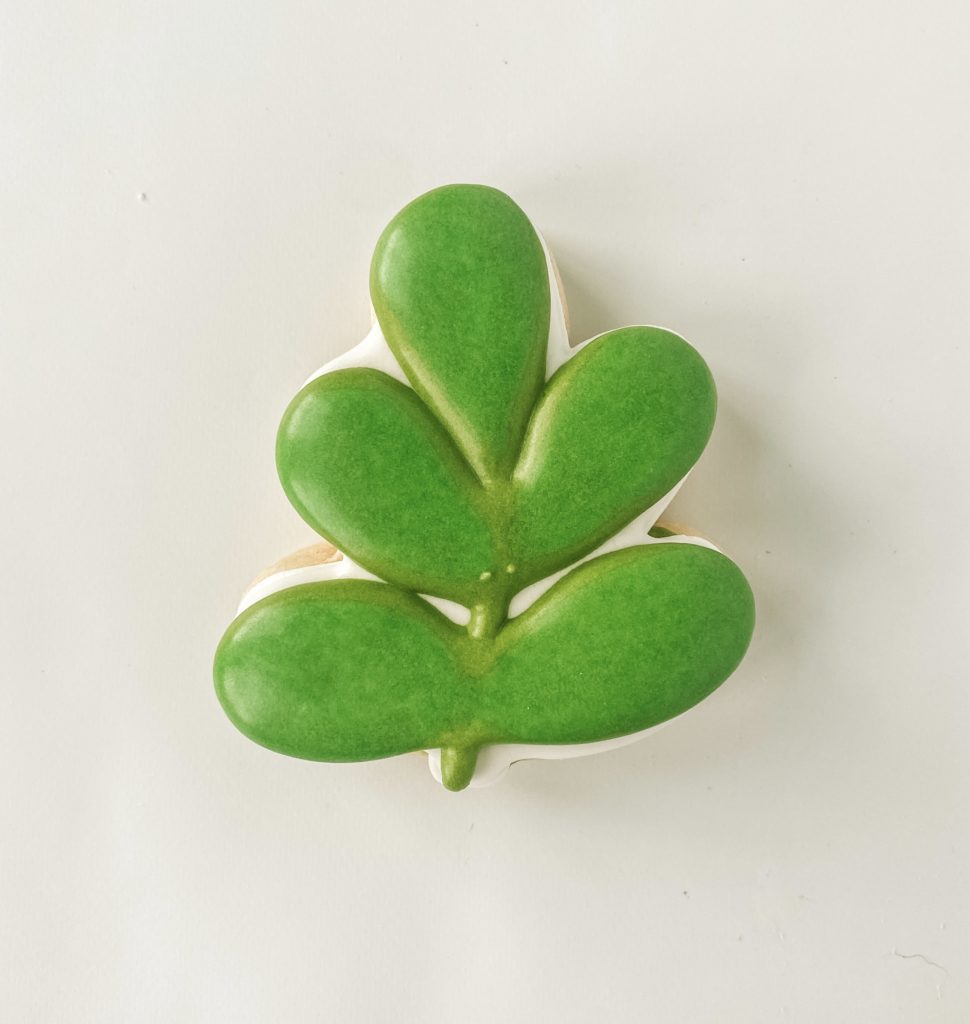
LEAF COOKIE
OUTLINE and FLOODING
- Step 1: Outline the leaf in white piping icing and fill with white flood icing
- Stop and allow your cookie to dry in front of a fan for 1-2 hours before moving to the next section.

DETAILS
- Section 2: Using olive green piping icing add a stem and leaves to the cookie. Fill in the leaves with olive green flood icing.
- Stop and allow your cookie to dry for 15-20 mixtures before moving to the next section.
- Section 3: Add a line in the middle of the leaf with olive green piping icing.
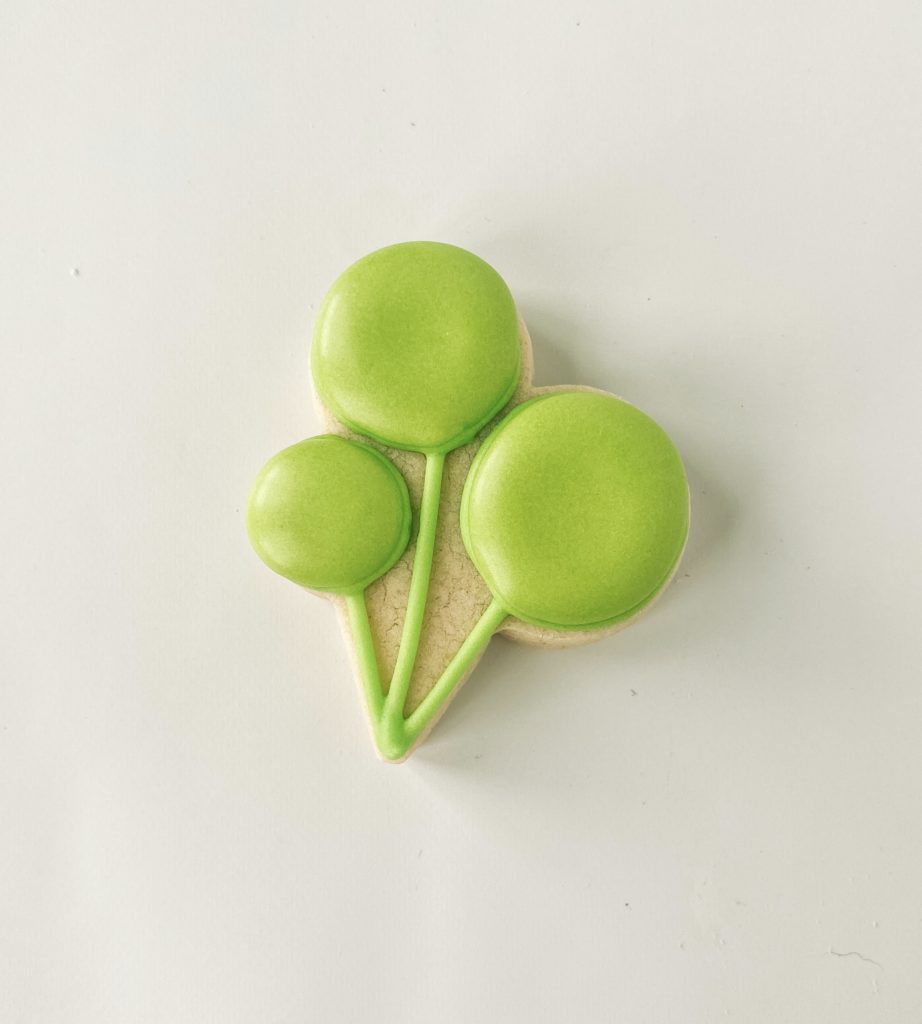
GREEN SPRIG COOKIE
OUTLINE and FLOODING
- Step 1: Outline the three sprigs on the cookie with electric green piping icing. Make sure to add the three stems to each sprig.
- Step 2: Fill in each spring with electric green flood icing.
TEA CUP COOKIE
OUTLINE AND FLOODING
- Step 1: Outline the coffee cup in white piping icing.
- Step 2: Fill the outlined section with white flood icing.
- Stop and allow your cookie to dry in front of a fan for 1-2 hours before moving to the next section.

DETAILS
Using beachy blue airbrush color and the thick line stencil, place the stencil on the cookie at an angle and apply the airbrush color – slow and apply in layers. Carefully pick up the stencil once done and patiently wait for 15-20 before applying the next layer. Turn the stencil 80 degrees so that the pattern makes a checkered board.
Step 3: Add the handle on the side using white piping icing, then fill it in with flood icing.

- Step 4: Lastly, use the hot pink icing (or light pink) for lettering MOM on the teacup. Using a teardrop method, add a tiny heart in the corner for a little extra pop of color.


You did it! Now you have a cute set of floral cookies to arrange in a teacup bouquet for the mom in your life! Easy, fun, cute, and feminine Mother’s Day Cookie Bouquet gifts will bring a smile to everyone you give them to!