
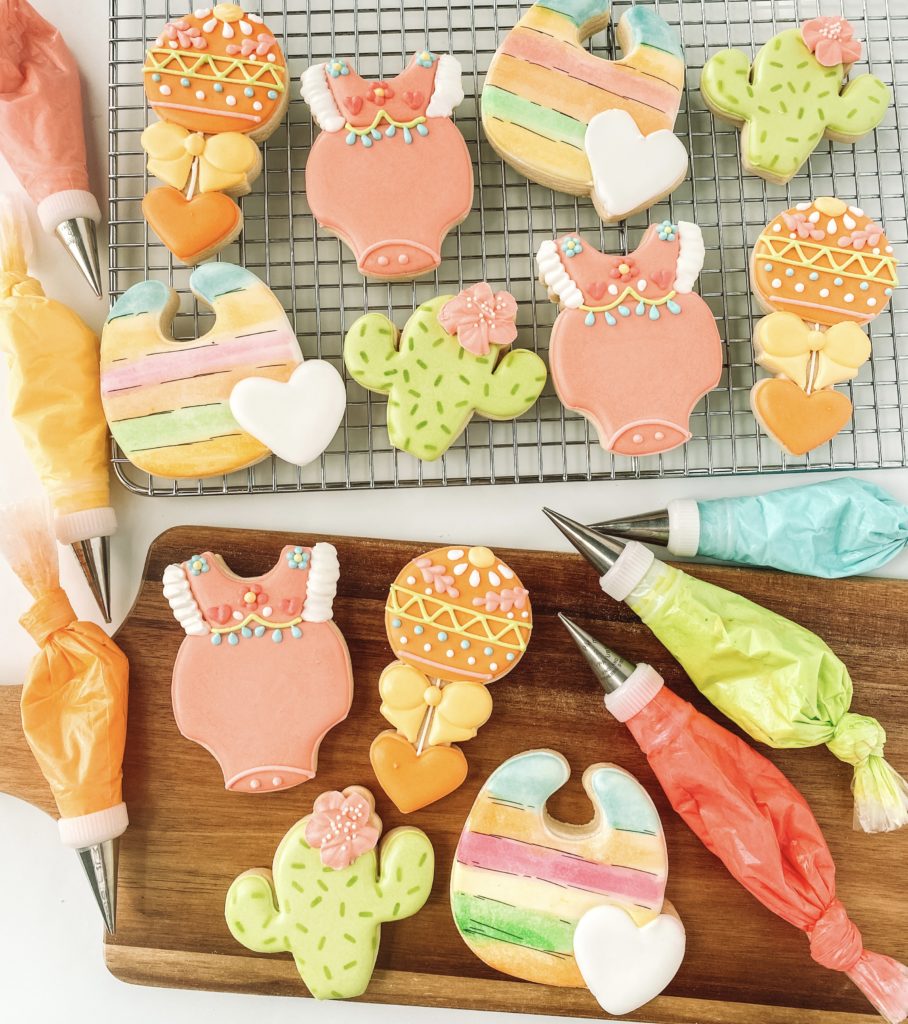
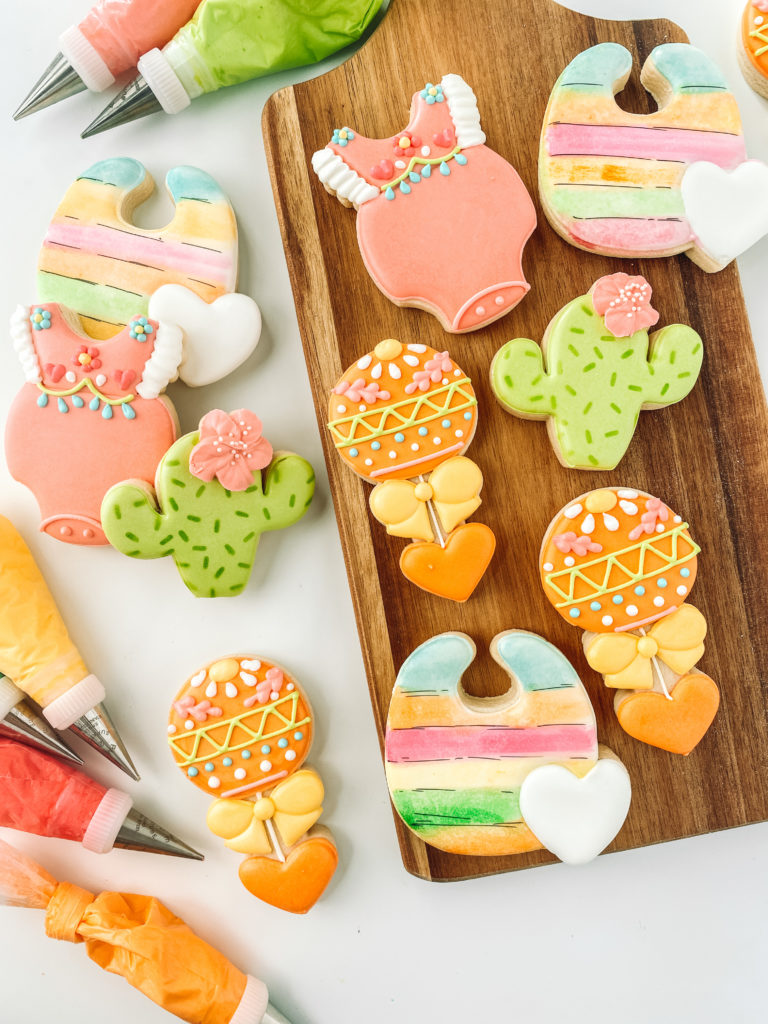
This adorable Fiesta Baby Cookie Set is perfect for a baby shower, first birthday party, gender reveal party, and more! I love all the fun colors of this fiesta baby cookie set, it’s one of my favorites really! Bright colors, simple techniques and patterns, and plenty of possibilities for an occasion to use them or sell them. You’ll be able to easily duplicate this cute set of Fiesta Baby Cookies with just a few simple steps, keep reading and you’ll see they are easier than they look!
Check out the step-by-step video tutorial
I show you how to decorate these colorful Fiesta baby Cookies and share the best way to package them. Check out the video tutorial for tips on how to make and package these cookies!
For these cookies, I used my exclusive sugar cookie recipe and royal icing recipe. The cookie recipe yielded about 12-15 regular size 3 – 3.5 inch cookies. I like thicker cookies so I roll out my cookies to 3/8″ using my Cookie Countess Precision Rolling Pin. The thickness of your cookie will change the cookie yield.
CUTTERS: CACTUS CUTTER – KALEIDACUTS, BABY RATTLE, AND BIB – SIMPLY RENEE SWEETS, ONESIE – SWEETLEIGH PRINTED
COLORS YOU WILL NEED:
- Electric Green Icing – outline and flood icing
- Pink Icing – outline and flood icing
- Electric Pink – outline only icing
- Yellow – outline and flood icing
- Turquoise- outline and flood icing
- Orange – outline and flood icing
- White – outline and flood icing
Optional
Wilton tip 101
Everclear
Color palette
White non-perils
Prepping Royal Icing
Fiesta Baby Guide
This cookie set includes 6 icing colors using pink, orange, yellow, electric pink, turquoise, and lime green. I made all the colors with Americolor
Helpful Decorating Tips and Tricks
Cookie Timeline
I like to break up the decorating process over a few days. It works better for my stage of life to do a little each day. Here is a sample timeline to show how long each step takes.
DAY 1
Make and bake my cookies. I do not chill my dough so usually, this takes about 1 hour from start to finish. Mix royal icing, color, and prep all the icing bags. I like to color the day before because the colors will deepen over time.
DAY 2
Outline and Flood Cookies. Make sure to allow them to dry in front of a fan for 1-2 hours before adding details. Add final details like airbrushing, piping and stenciling.
Day 3
Always take pictures of your beautiful cookies. Make sure to allow 10-14 hours of drying time before packaging your cookies. I like to store mine on a baking pan with a lid overnight.
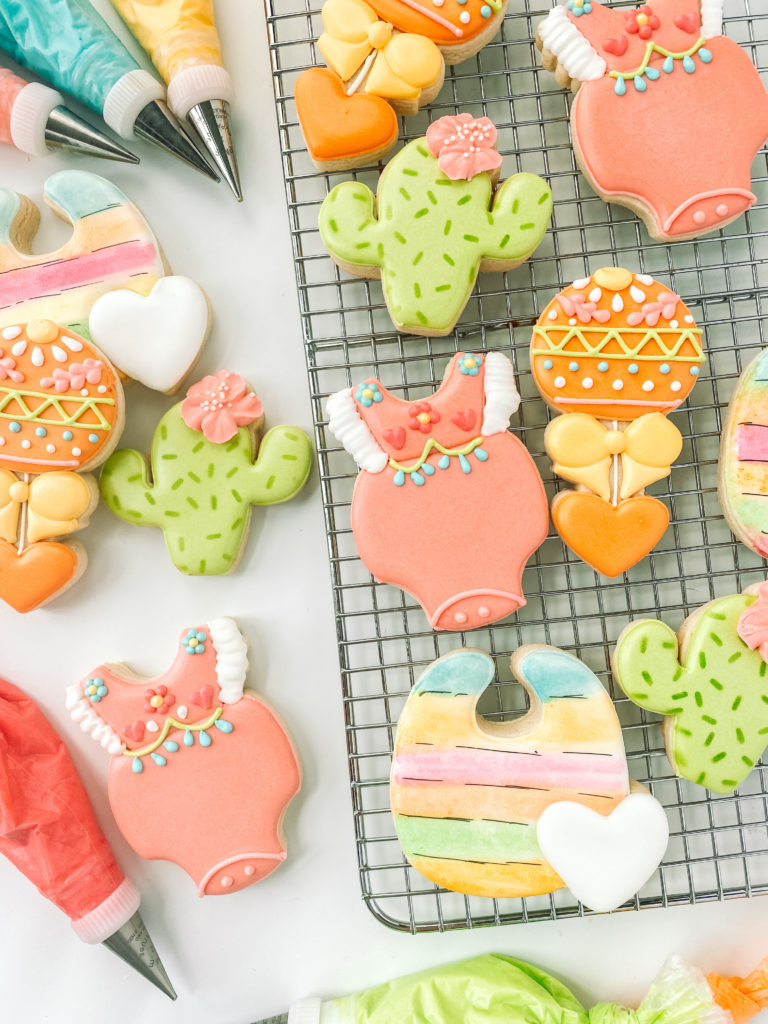
CACTUS COOKIE
OUTLINE AND FLOODING
Step 1: Outline the cactus in green piping icing
Step 2: Fill the outer outline in with electric green flood icing.
Stop and allow your cookie to dry in front of a fan for 1-2 hours before moving to the next section.
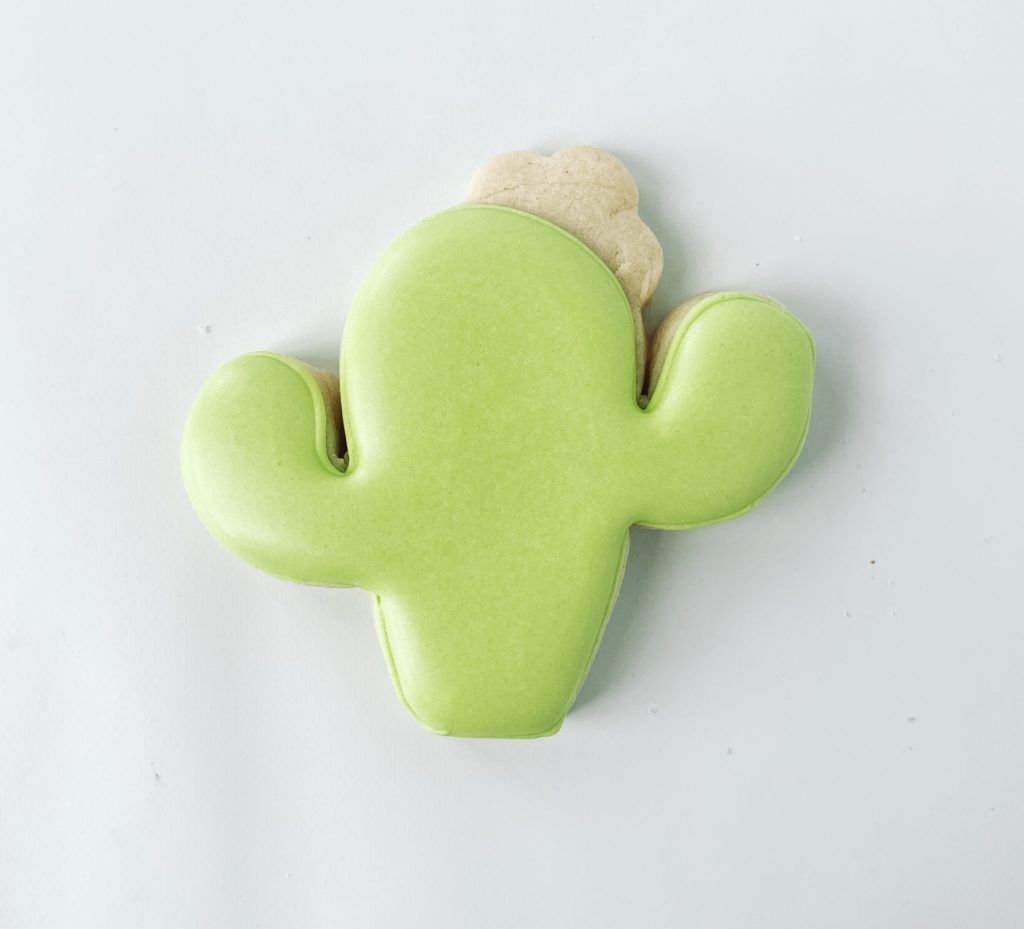
DETAILS
Step 3: Using the sprinkle airbrush stencil and glowing green AB color gently apply the airbrush.
Step 4: Allow the cookie to dry for 10-15 minutes before moving on to the next step.
Step 5: Using a Wilton number 101 tip add a flower, one petal at a time, to the top of the cactus. While the flower is still wet add a few non-perils to the center of the flower.
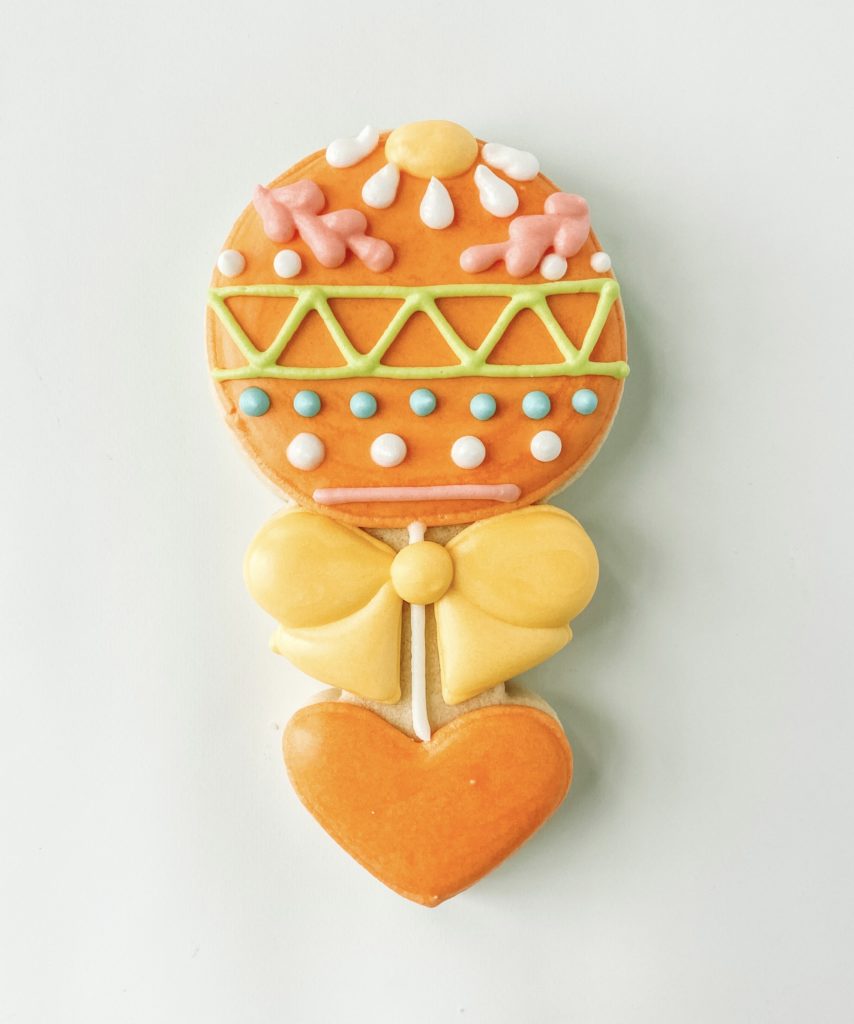
BABY RATTLE COOKIE
OUTLINE AND FLOODING
Step 1: Outline the top of the rattle and heart at the bottom of the rattle with orange piping icing.
Step 2: Fill in the outline with orange flood icing.
Stop and allow your cookie to dry in front of a fan for 30-40 minutes before moving to the next section.
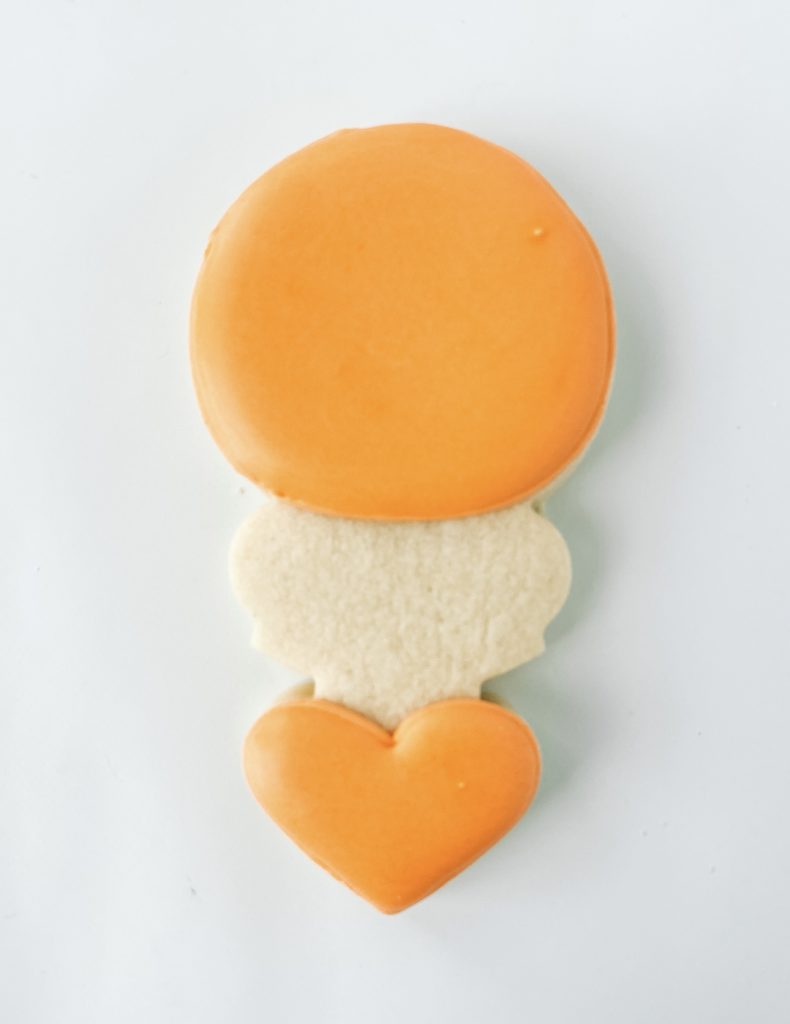
DETAILS
Step 3: With white piping icing add a line down the middle of the cookie. Outline the bow, including the tails, with yellow piping icing. Fill in the tails with yellow flood icing.
Stop and allow your cookie to dry in front of a fan for 30-40 minutes before moving to the next section.

Step 4: Fill in the bows with yellow flood icing. Add details with green, blue, white, pink, and yellow piping icing.
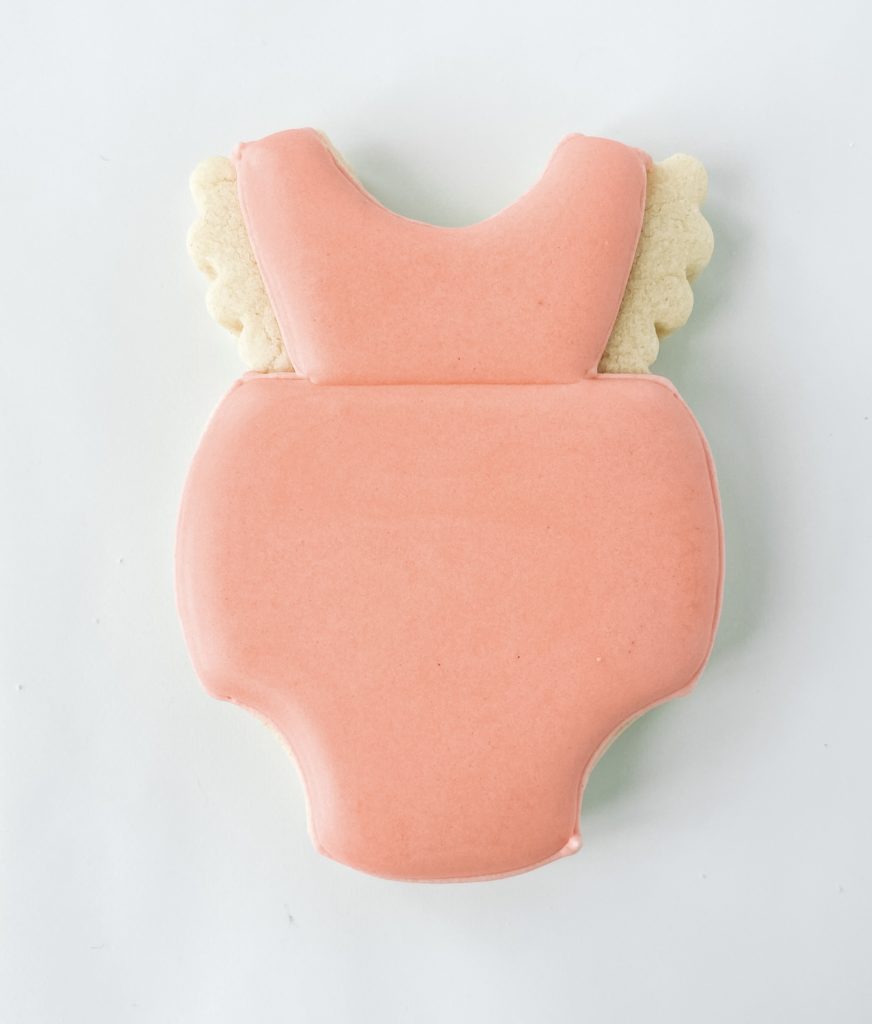
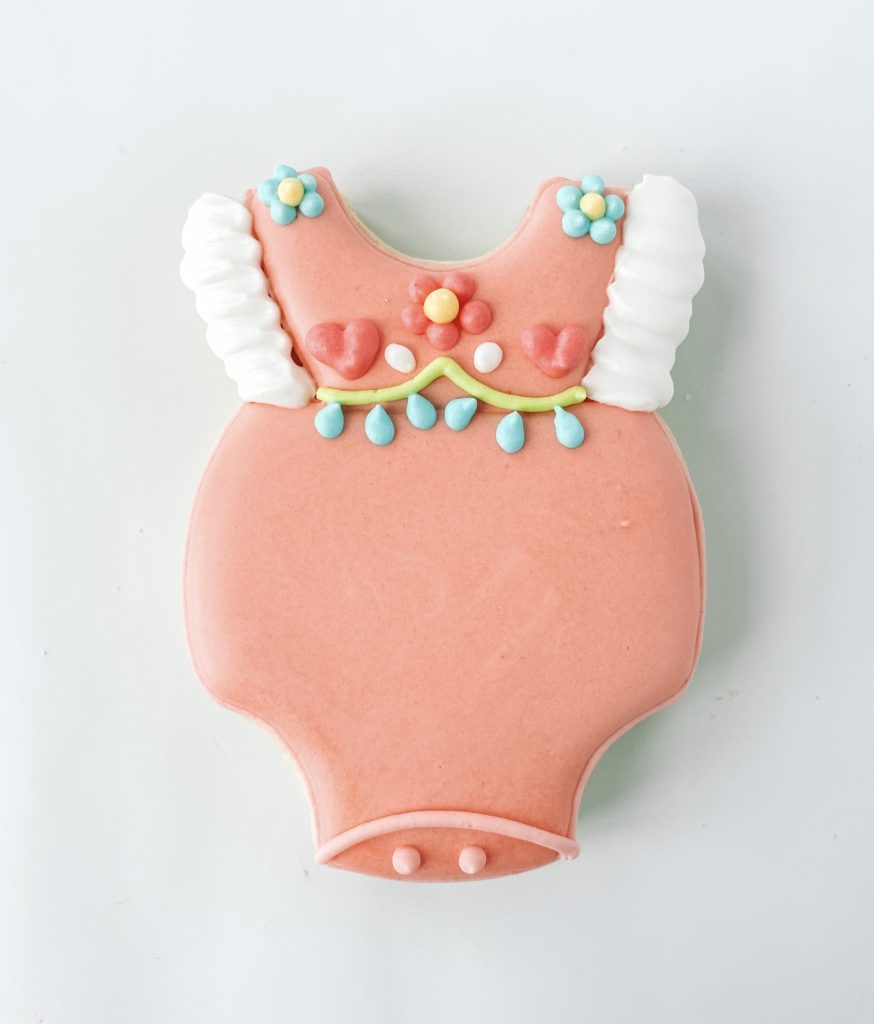
BABY ONESIE COOKIE
OUTLINE and FLOODING
Step 1: Outline the baby onesie with pink piping icing and fill in the bottom section with pink flood icing
Stop and allow your cookie to dry in front of a fan for 15-20 minutes before moving to the next section.
Step 2: Fill in the outlined top pink section with pink flood icing.
DETAILS
Section 3: Using a Wilton tip #101 add ruffles to each side of the onesie.
Section 4: Add details with green, blue, pink, white, and yellow piping icing.
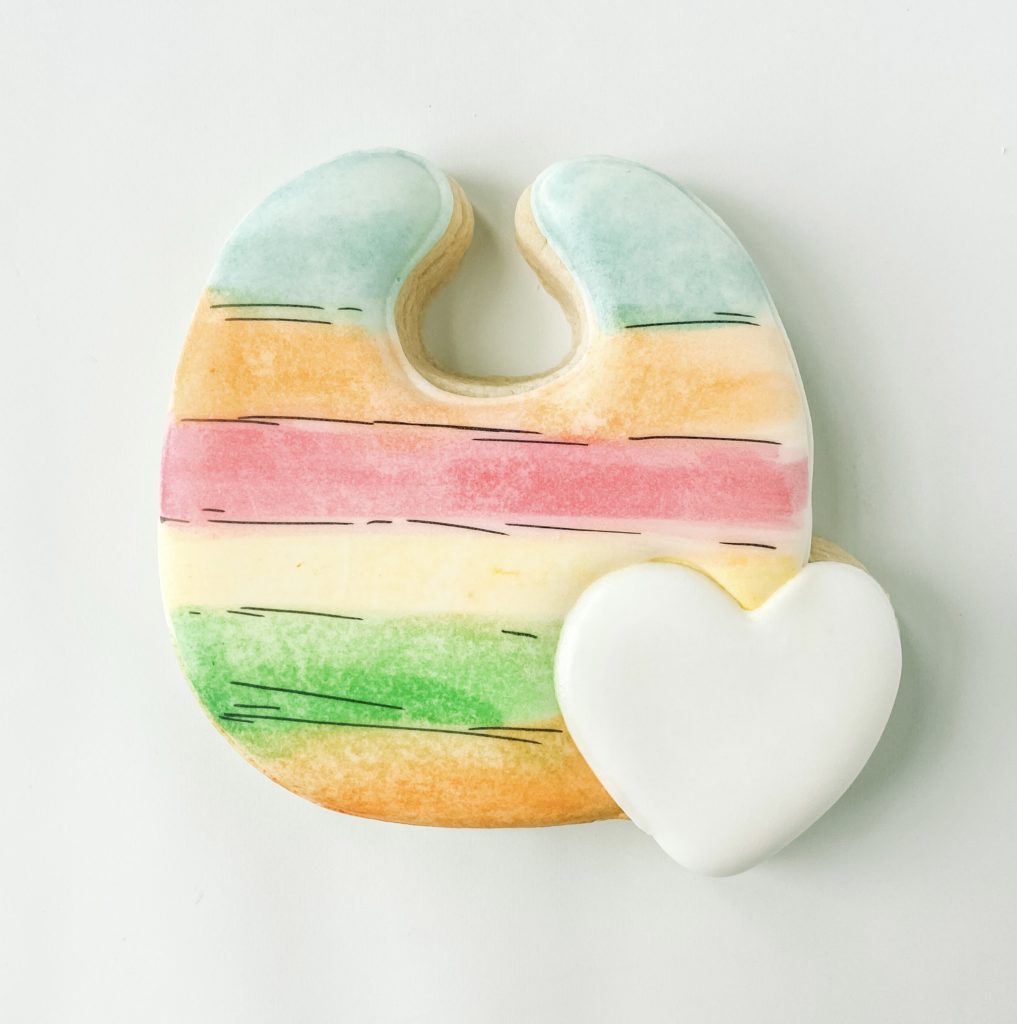
BABY BIB COOKIE
OUTLINE AND FLOODING
Step 1: Outline the bib, minus the heart, with white piping icing.
Step 2: Fill the outlined section with white flood icing.
Stop and allow your cookie to dry in front of a fan for 1-2 hours before moving to the next section.

DETAILS
Step 4: Prep your watercolors: I use a plastic art palette and add a small drop of gel color to the side of the palette. Add some ever clear over the gel color. Use a paintbrush to mix the color with Everclear.
Step 3: Dip the paintbrush in the desired color and paint it onto the cookie. I like to have a paper towel handy to test out my color and wipe off my paintbrush.
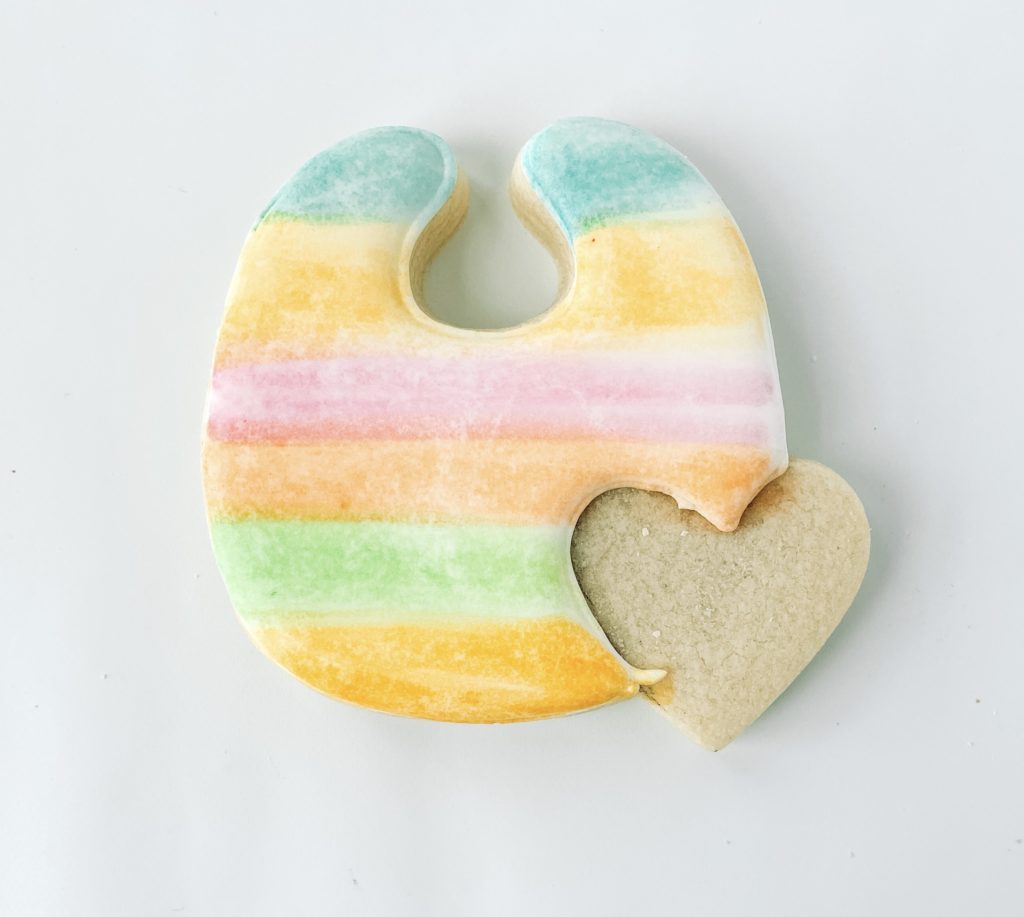
Step 4: Outline the heart with white piping icing and fill in with white flood icing. With a black edible marker add lines between each color.
Did you have fun with all the different techniques in this cookie set? I love it when I can take out a paint palette and do some watercolor icing decorating, it’s just so fun and beautiful. I love this cookie set for so many different options and fun ways to use a baby set of cookie cutters.
I would love to see how your set turned out so make sure to comment on this post and let me know what you loved most about your Feista Baby Cookie Set, share a picture on Instagram and tag me so I can see your set too!