
YOU WILL NEED:
Cut-out sugar cookie dough
Royal icing
Icing colors – I use Americolor brand
TOOLS AND TIPS:
Tips #2 or #2.5
Couplers
Icing bags
Parchment paper
Cookie sheet
Toothpick or scribe
For these cookies, I used my exclusive sugar cookie recipe and royal icing recipe. The cookie recipe yielded about 12-15 regular size 3 – 3.5 inch cookies. I like thicker cookies so I roll out my cookies to 3/8″ using my Cookie Countess Precision Rolling Pin. The thickness of your cookie will change the cookie yield.
Check out the step-by-step video tutorial
I show you how to decorate these sweet Spring cookies.
CUTTERS: Rainy Spring Set
COLORS YOU WILL NEED:
White – outline and flood icing
Pink – outline and flood icing
Blue- outline and flood icing
Green – outline and flood icing
Prepping Royal Icing
This cookie set includes 3 icing colors using white, black, and ivory. I made all the colors with Americolor
Helpful Decorating Tips and Tricks
Cookie Timeline
I like to break up the decorating process over a few days. It works better for my stage of life to do a little each day. Here is a sample timeline to show how long each step takes.
DAY 1
Make and bake my cookies. I do not chill my dough so usually, this takes about 1 hour from start to finish. Mix royal icing, color, and prep all the icing bags. I like to color the day before because the colors will deepen over time.
DAY 2
Outline and Flood Cookies. Make sure to allow them to dry in front of a fan for 1-2 hours before adding details. Add final details like airbrushing, piping and stenciling.
Day 3
Always take pictures of your beautiful cookies. Make sure to allow 10-14 hours of drying time before packaging your cookies. I like to store mine on a baking pan with a lid overnight.
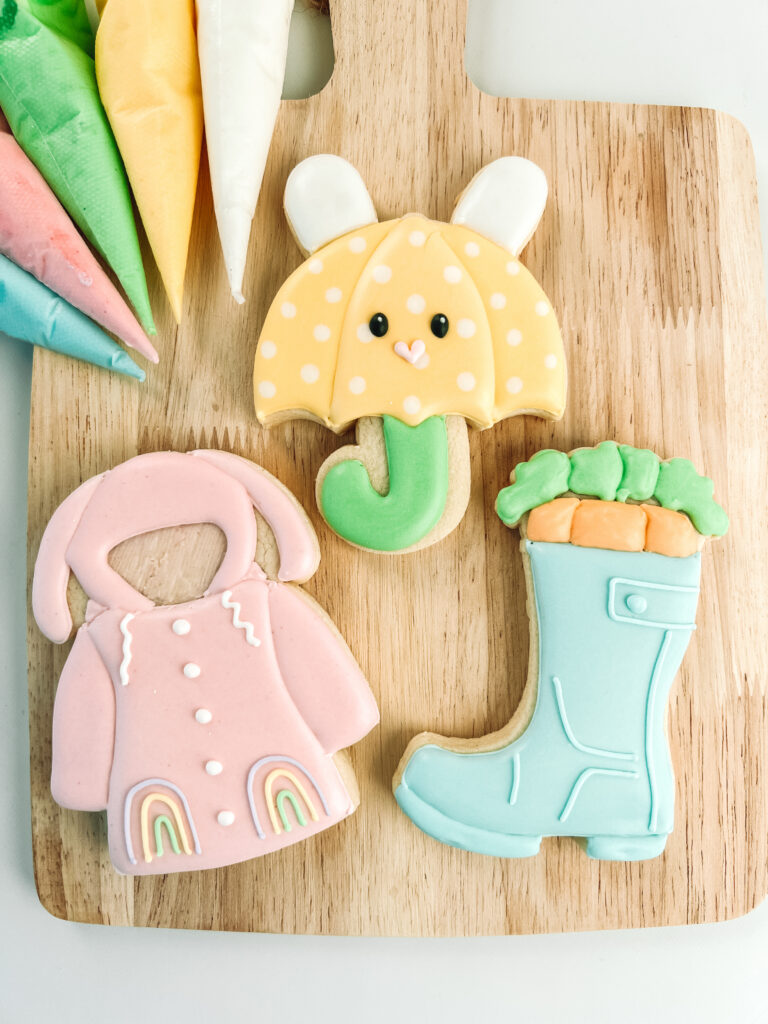
RAIN JACKET COOKIE
OUTLINE AND FLOODING
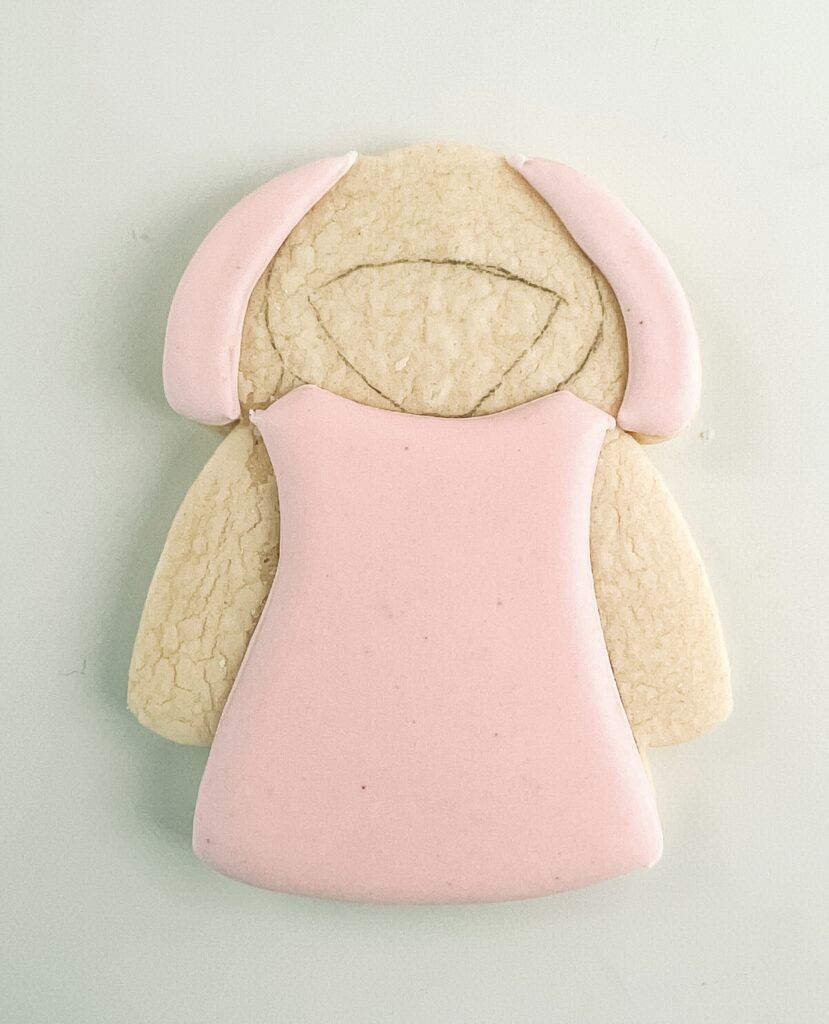
Step 1: Add some pink piping icing to the middle of the hood part of the raincoat and smooth out with a paintbrush. Outline the raincoat (middle section) and the bunny ears on the top in pink piping icing.
Step 2: Fill in the outlined section with pink flood icing.
Stop and allow your cookie to dry in front of a fan for 10-20 minutes before moving to the next section.
Step 2: Outline the sleeves in pink piping icing. Outline the hood in pink piping icing
Stop and allow your cookie to dry in front of a fan for 1-2 hours before moving to the next section.
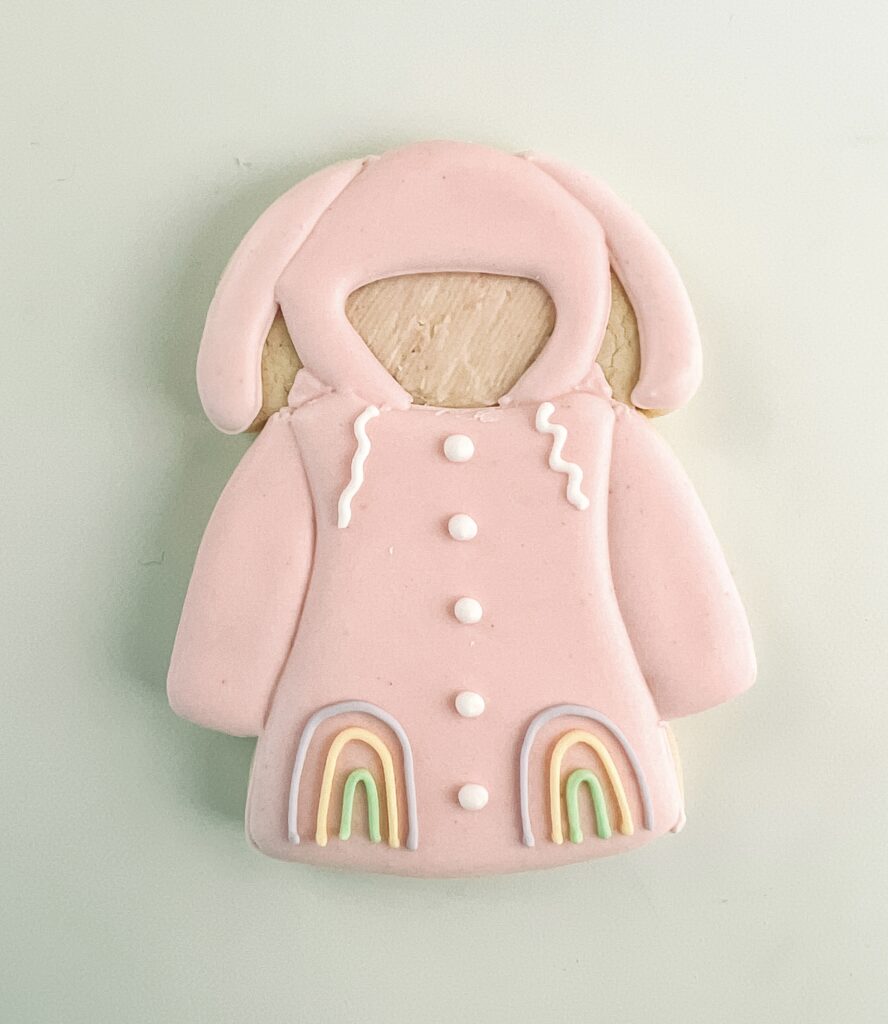
DETAILS!
Step 3: Add white dots down the middle with white piping icing. Add a white string at the base of the hood.
Step 4: At the pocket add a rainbow on each side using your favorite piping icing colors
UMBRELLA COOKIE
OUTLINE AND FLOODING
Step 1: Outline the middle section of the umbrella with yellow piping icing.
Step 2: Fill in the outlined section with yellow food icing and add polka dots
Stop and allow your cookie to dry in front of a fan for 115-20 minutes before moving to the next section.
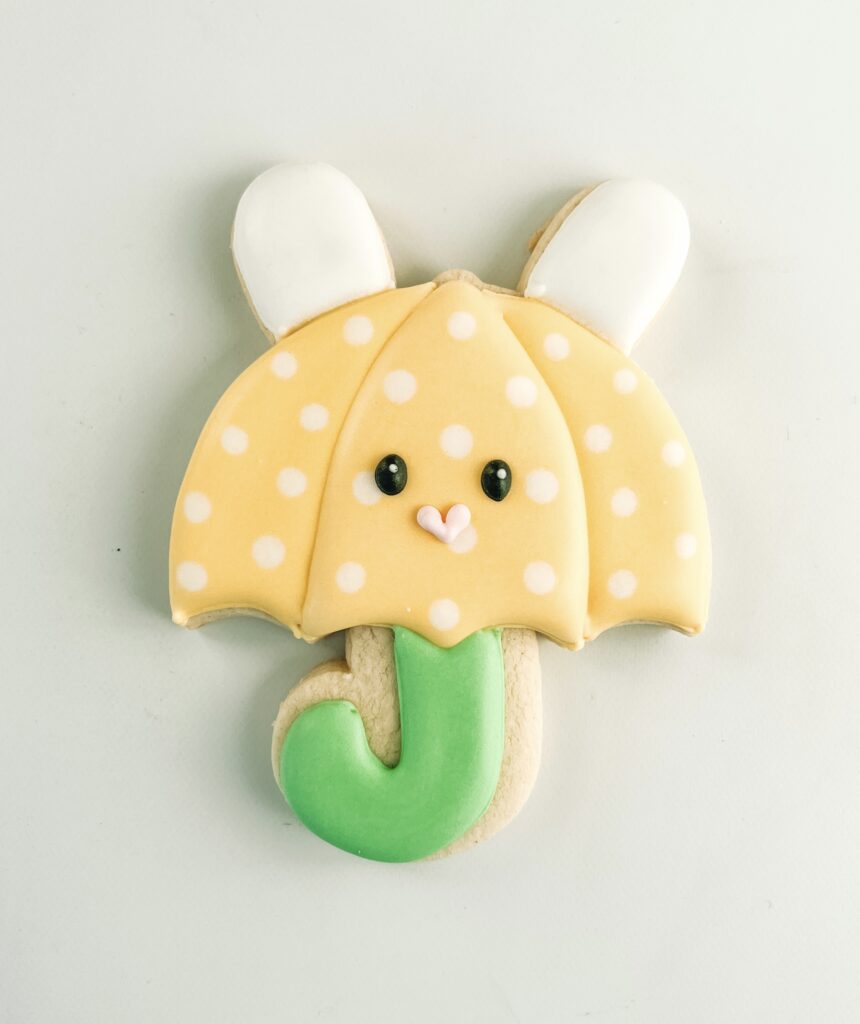
DETAILS
Step 4: Outline the outer two sections of yellow piping icing. Outline the handle with green piping icing
Step 5: Fill in the outlined sections with yellow flood icing. Add polka dots with white flood icing. Fill in the outlined handle with green flood icing.
Step 6: Add a face to the middle section of the umbrella with black outline icing for the eyes and a pink heart for the mouth using pink piping icing.
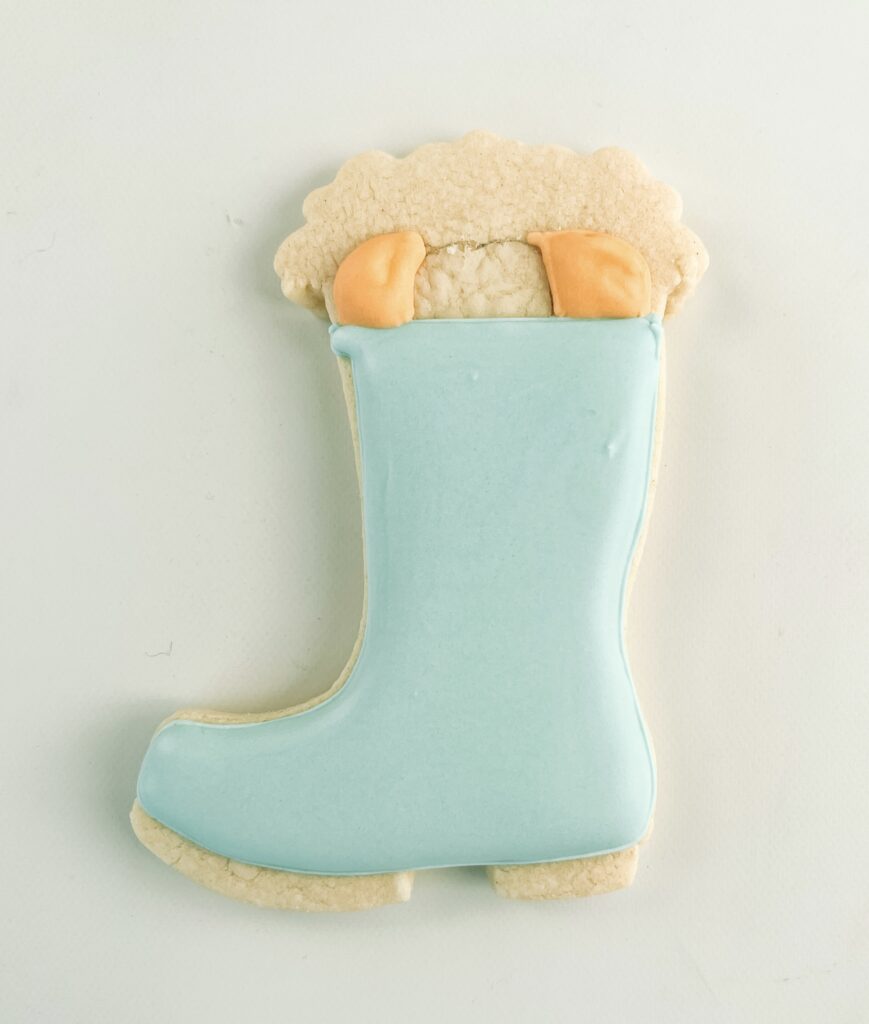
RAINBOOT COOKIE
OUTLINE and FLOODING
Step 1: Outline the boot with blue outline icing. Don’t outline the very bottom of the boot or the top that will be the carrots.
Step: 2: Fill in the outlined section with blue flood icing.
Stop and allow your cookie to dry in front of a fan for 1-2 hours before moving to the next section.
DETAILS
Step 3: Outline and flood the two outside carrots on the top of the boot in orange piping icing.
Stop and allow your cookie to dry in front of a fan for 10-20 minutes before moving to the next section.
Step 4: Outline and flood the middle carrot with orange piping icing.
Stop and allow your cookie to dry in front of a fan for 1-2 hours before moving to the next section.
Step 5: Add every other leaf with green piping icing. While the two leaves are drying outline and fill in the bottom of the boot with blue piping icing. Add details to the boot with blue piping icing.
Step 6: Lastly, add the other two leaves with green piping icing.
