
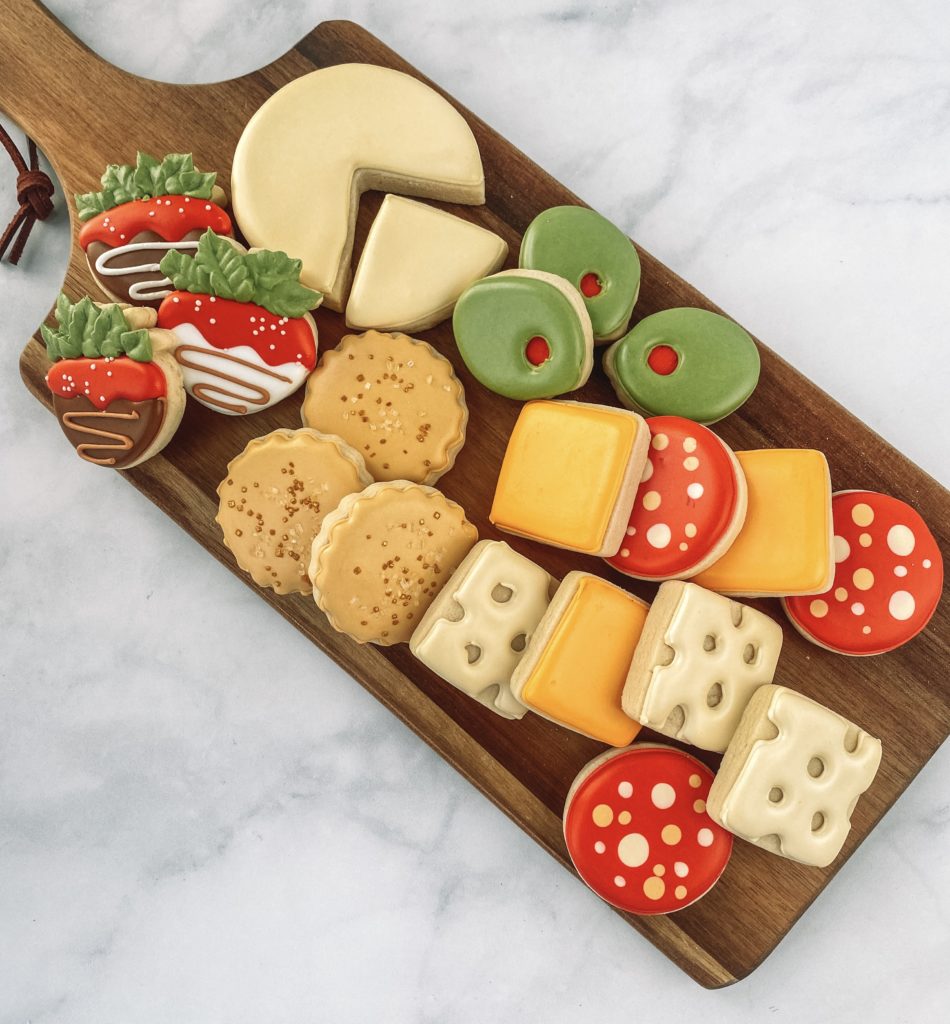
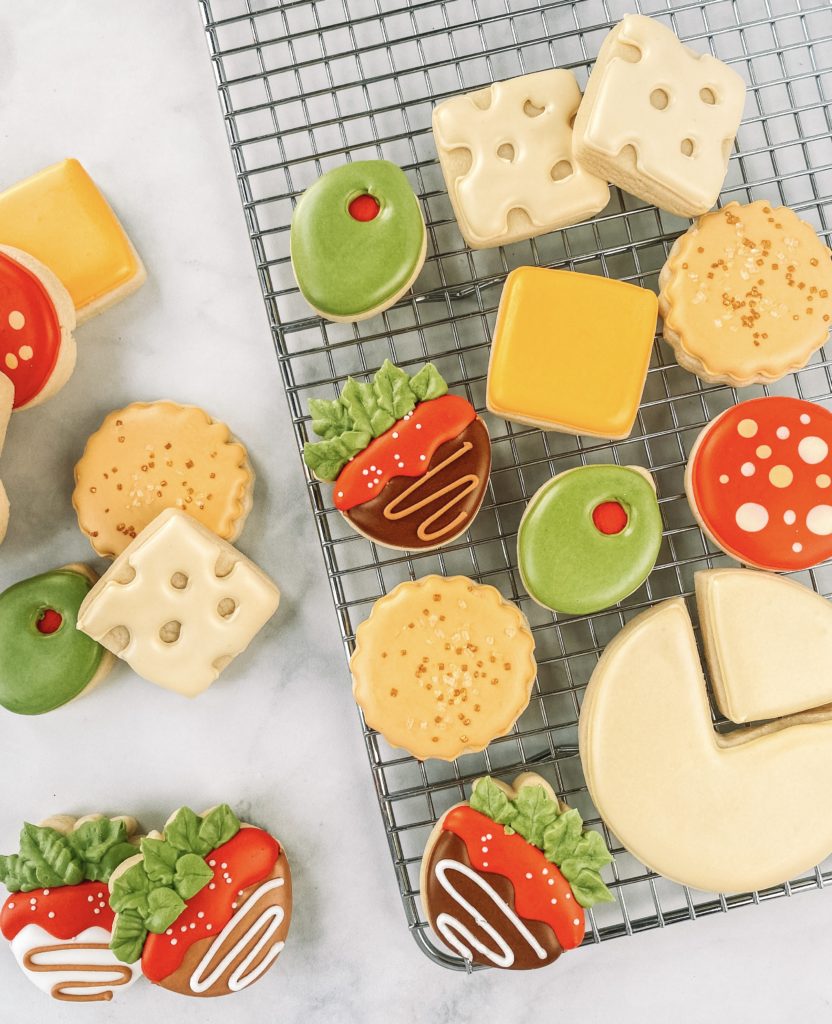
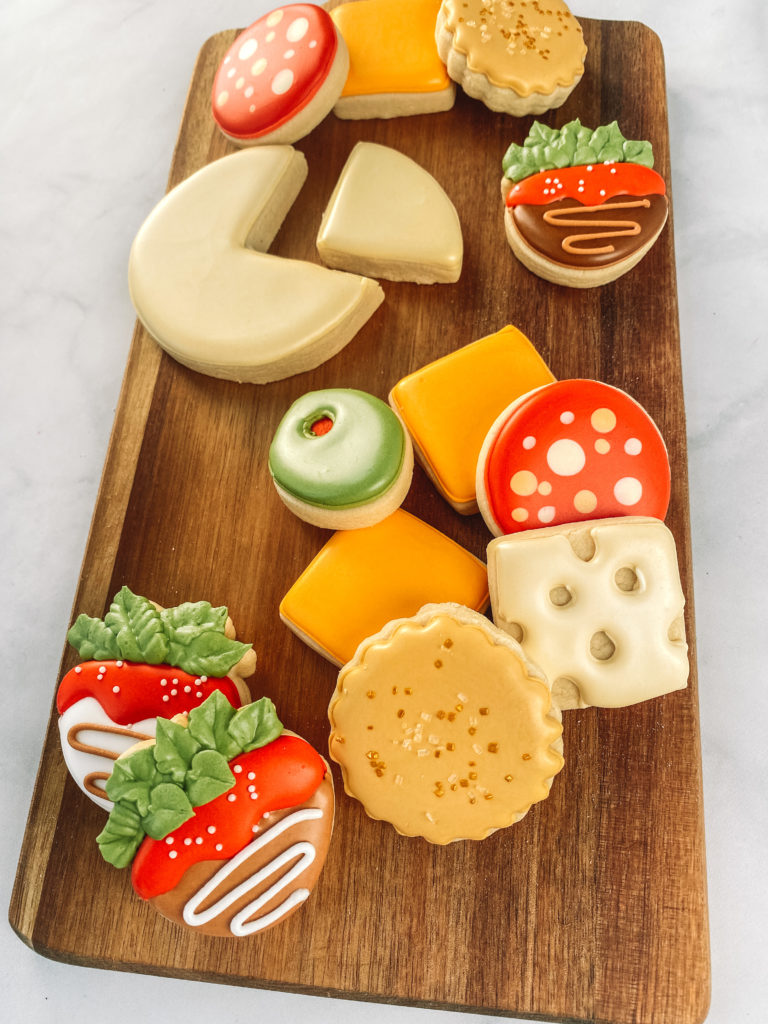
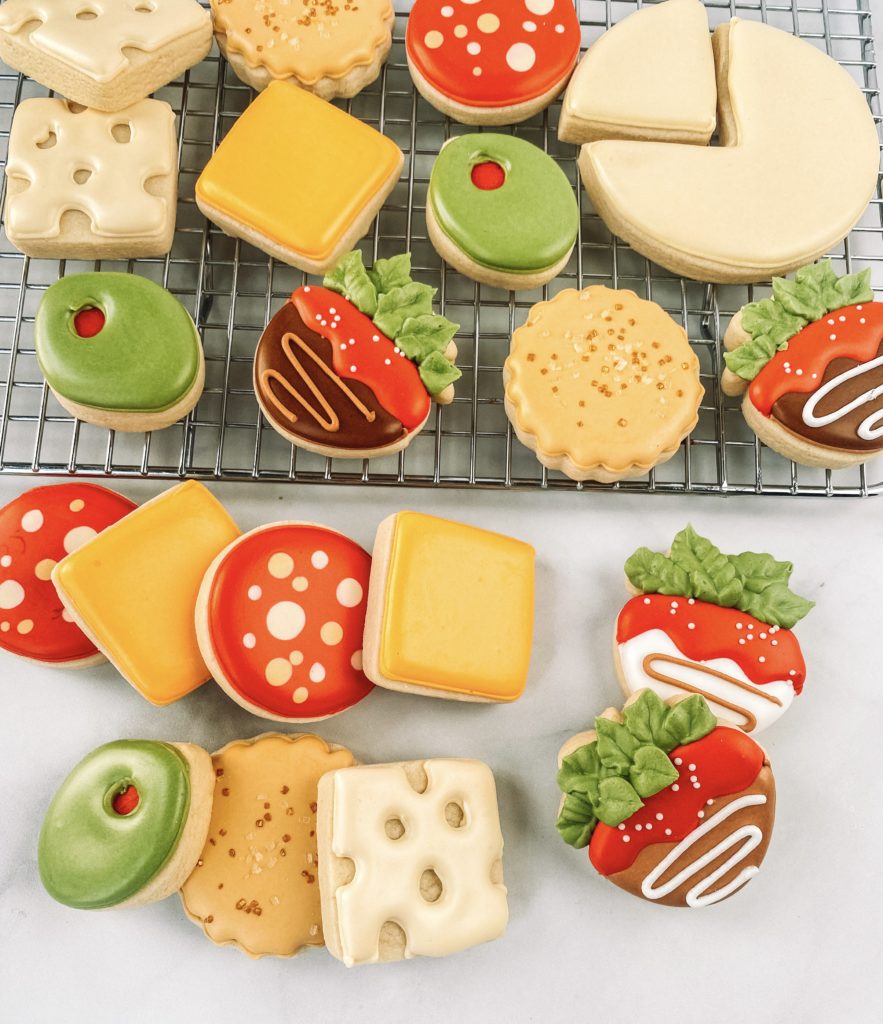
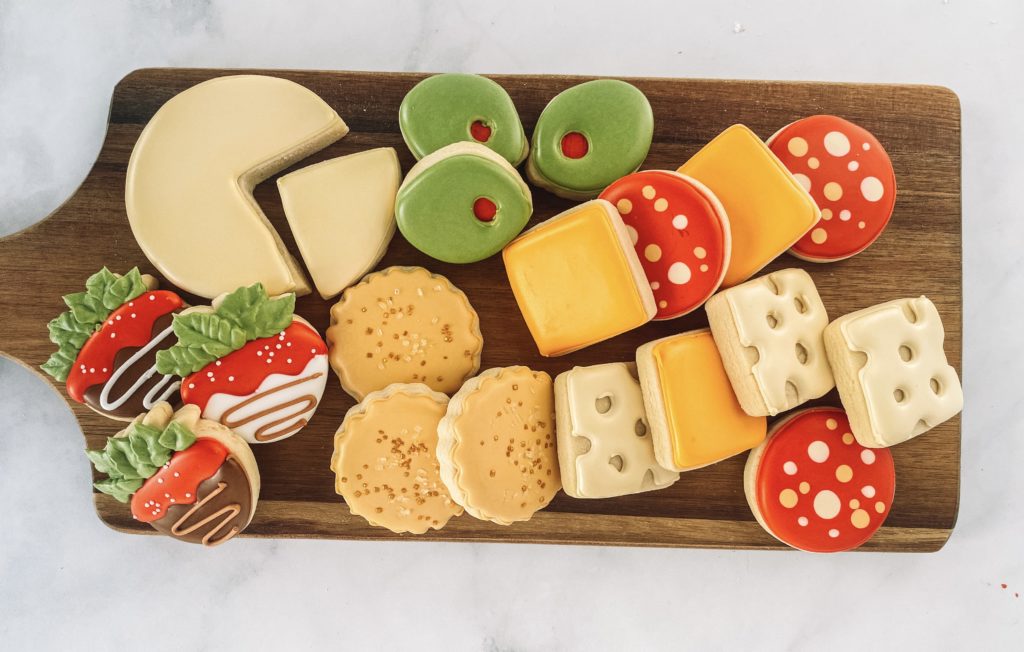
You’ve seen all the regular snack boards, now you can add sugar cookies to your Charcuterie Snack Board that look just like the other foods! This would be fantastic for a Super Bowl Party, to make for your favorite host/hostess, or to take to a fancy event when you would rather bring dessert than the snack spread.
The cookies themselves are very simple, but when you put them together on the board it creates a really fun spread that looks just like a charcuterie board, but tastes even better with mini sugar cookies!
Check out the step-by-step video tutorial
I will show you how to make these snack-themed sugar cookies and how to finish them up and arrange them to look just like a delicious charcuterie snack board.
For these cookies, I used my exclusive sugar cookie recipe and royal icing recipe. The cookie recipe yielded about 35 small/mini cookies. I like a thicker cookie so I roll out my cookies to 3/8″ using my Cookie Countess Precision Rolling Pin. The thickness of your cookie will change the cookie yield.
Charcuterie Snack Board
This cookie set includes 5 icing colors using red, ivory, brown, olive green, egg yellow.
Here’s how I made each color:
- Red – Red Red Americolor
- Ivory – Americolor
- Brown – totally brown Cookie Countess
- Olive Green- olive green Cookie Countess
- Egg Yellow – Americolor
Helpful Decorating Tips and Tricks
Cookie Timeline
I like to break up the decorating process over a few days. It works better for my stage of life to do a little each day. Here is a sample timeline to show how long each step takes.
DAY 1
Make and bake my cookies. I do not chill my dough so usually, this takes about 1 hour from start to finish. Mix royal icing, color, and prep all the icing bags. I like to color the day before because the colors will deepen over time.
DAY 2
Outline and Flood Cookies. Make sure to allow them to dry in front of a fan for 1-2 hours before adding details. Add final details like airbrushing, piping and stenciling.
Day 3
Always take pictures of your beautiful cookies. Make sure to allow 10-14 hours of drying time before packaging your cookies. I like to store mine on a baking pan with a lid overnight.
Tools included in this tutorial:
- 5 Food Gels: Red, Ivory, Brown, Olive green, Egg yellow
- 12 Icing bags
- 6 #2 PME tips
- 6 Couplers
Take your time and get ready to have all the “oohs & ahhs” when you bring out this one-of-a-kind charcuterie board sugar cookie spread. Anyone can make these cookies, they only use a couple of very basic decorating techniques and come together quickly, you can even use simple cookie cutters for most of them without having to buy a set of cutters.
Remember to share your creations on social media and tag me, or come back to this post and put your comments and photos in the comment section so I can see all the fun you’re creating!