
Everyone loves pumpkins in the fall. They are honestly one of my favorite cookies to decorate this time of year. I’m going to show you how you can take a simple and boring orange pumpkin and fancy it up.
First we are going to take out pumpkin cookie and outline with our scribe all the lines for each section as well as the leaf.

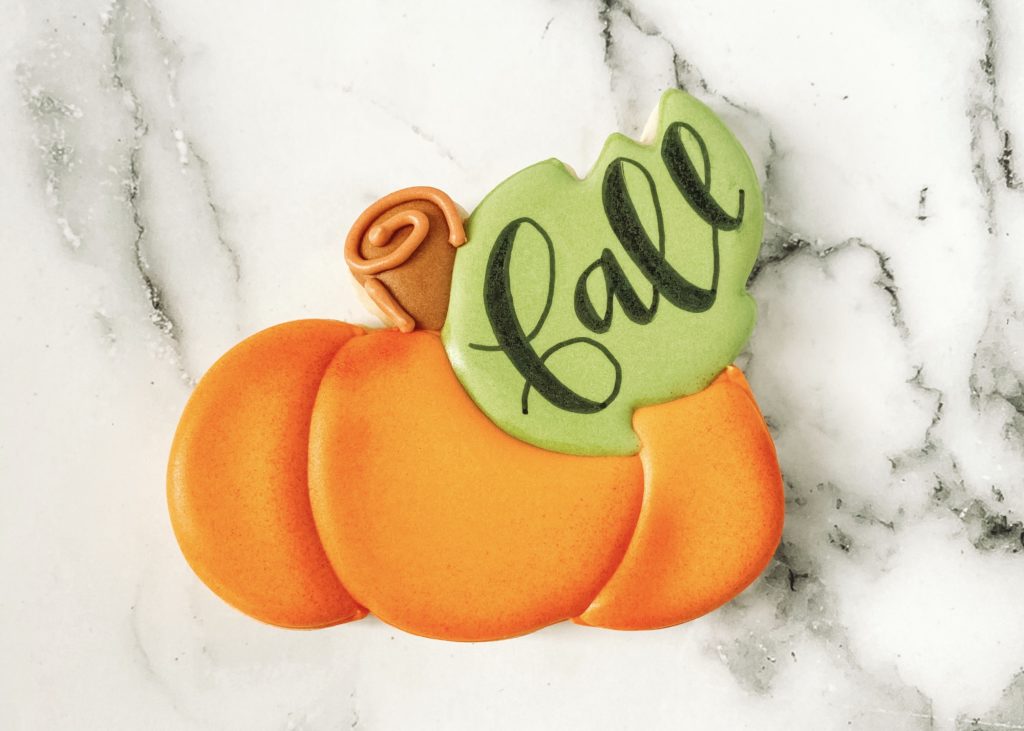
You want to outline and flood the outside sections of your pumpkin. My outline icing is like a toothpaste like consistency. I like to outline in either a 2.5 PME tip or 2 PME tip. My flood icing is like a maple syrup consistency!

Once your outside sections of your pumpkin have crusted cover (about 20 min) flood the inside section of your pumpkin.
Next you want to grab your airbrush with Cookie Countess Tangerine Dream and lightly airbrush around the edge of the pumpkin as well as each section. This creates an extra dimension to your pumpkins.

Once your airbrushed pumpkin is dry you will want to outline and flood your green leaf!

After your green leaf is completely dry (8-10 hours) you can then use an edible marker, I like FoodDoodler edible markers from Amazon to write “Fall” or a name on the leaf.
Next outline and flood your stem with brown icing. Lastly add a little detail to the top of the pumpkin stem.

And there you have it…a fun and multi-dimensional pumpkin perfect for fall.
