
The kids will love having a cookie that doubles as a mask for Halloween, these Halloween Mask Sugar Cookies are perfect for all the parties this year!
Making fun and different Halloween treats can be challenging, it always seems like it has all been done. These cookie masks are really fun and different, and serve two purposes, even three if you make them part of a photo booth! My kids have loved playing with the different mask cookies I have been making, but this one is just so cute it needed a blog post all for it! I mean, look at the little scar and the bolts on his head!!
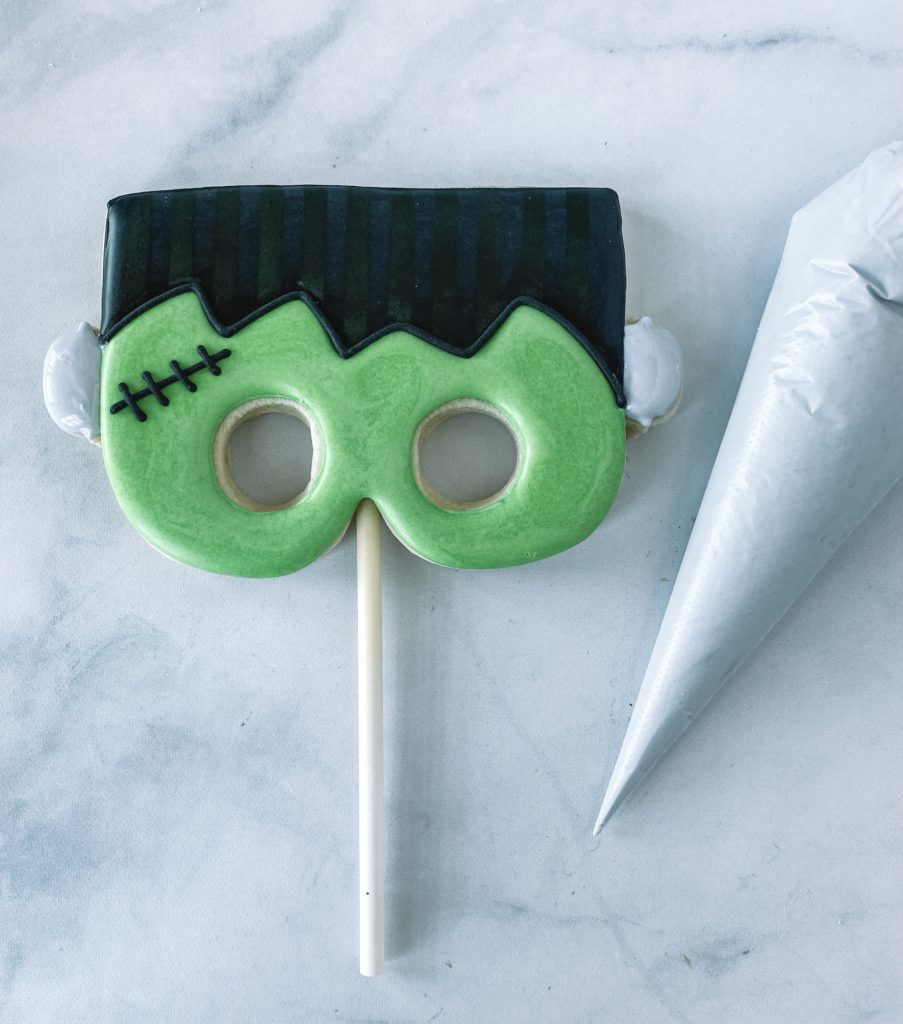
FRANKENSTEIN COOKIE POP
- YOU WILL NEED:
- Cut-out sugar cookie dough
- Royal icing
- Icing colors – I use Americolor brand
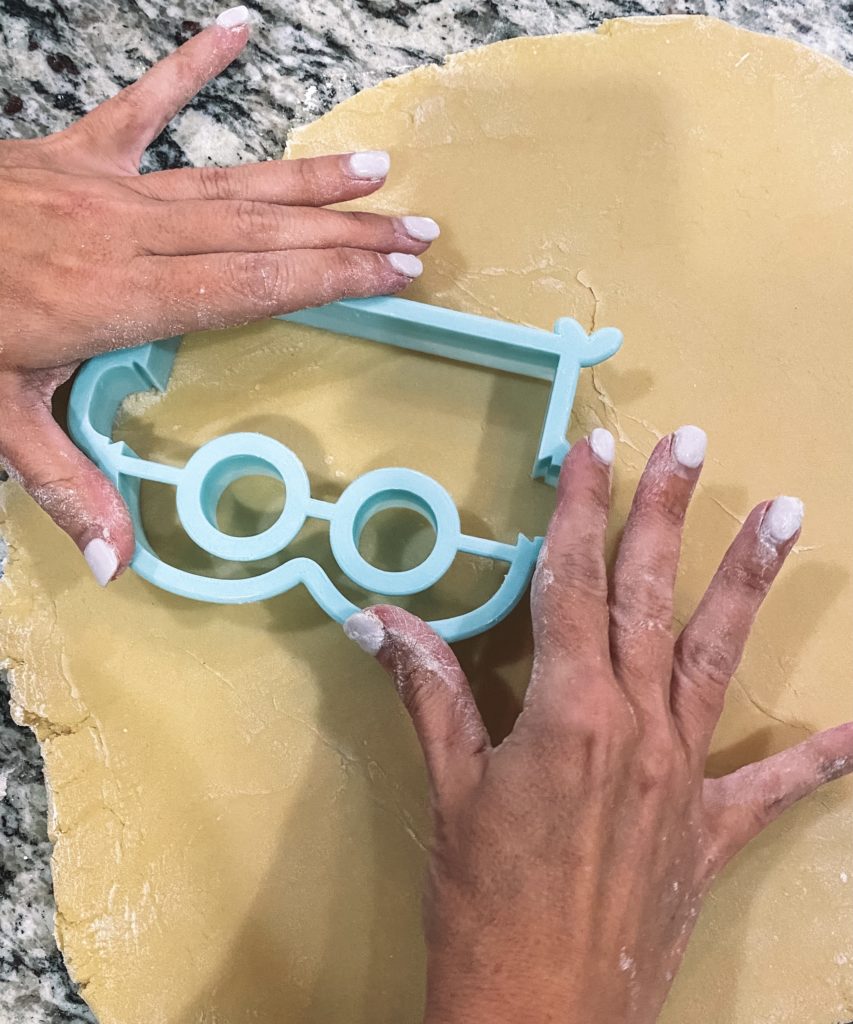
CUTTERS: Frankenstein Mask Cookie Cutter from Simply Renee Sweets
- TOOLS AND TIPS:
- Tips #2 or #2.5
- Couplers
- Icing bags
- Parchment paper
- Cookie sheet
- Toothpick or scribe
- Wilton Cookie Sticks
- Leaf tip #352
COLORS YOU WILL NEED:
Mint Green Icing – outline and flood
Black Icing – outline and flood
Gray – outline and flooding
FRANKENSTEIN COOKIE POP
BEFORE BAKING
Step 1: Cut out cookie with Frankenstein cookie cutter
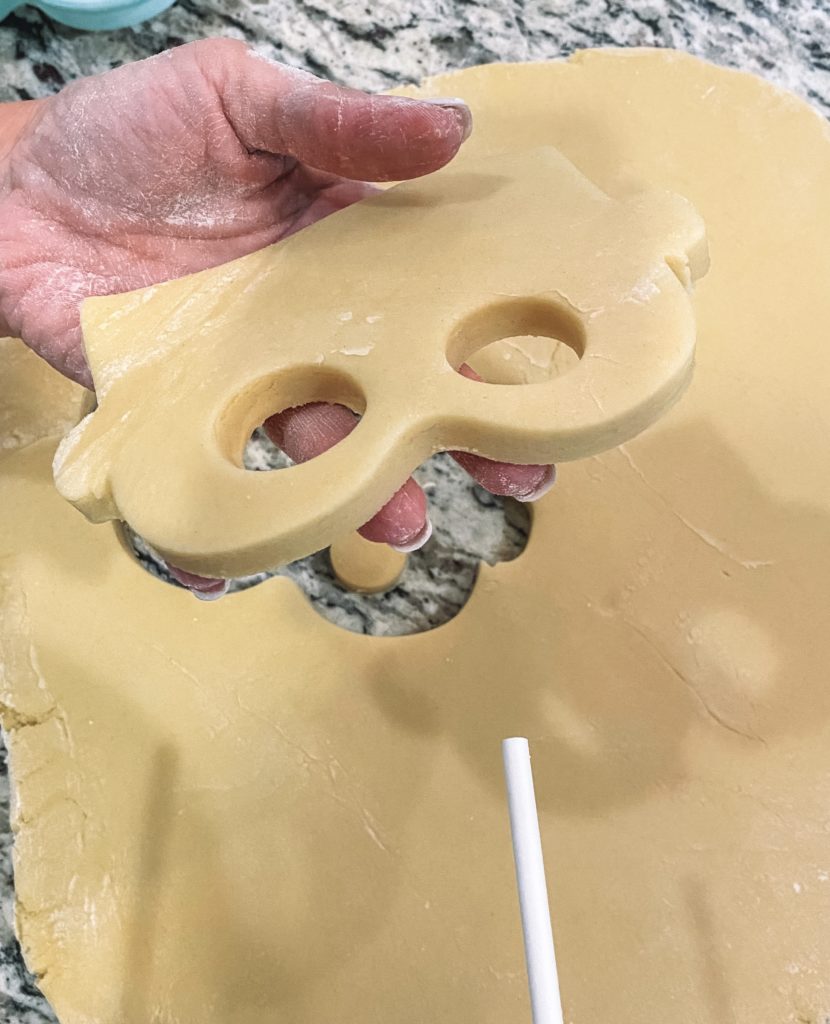
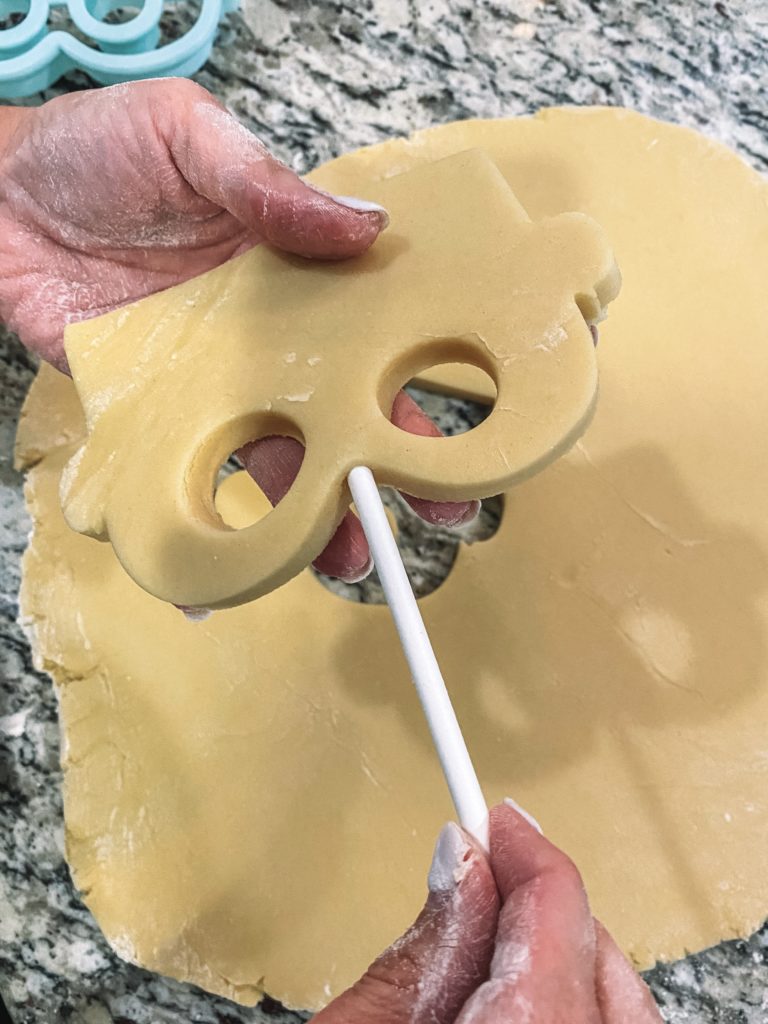
Step 2: Using a cookie stick gently push the stick through the bottom of the cookie between the eye holes. Make sure no stick is showing or poking through the top or the bottom of the cookie.
Step 3: Gently place the cookie on the baking tray. When transferring cookie sticks always pick them up by the cookie, not the stick, this ensures the stick won’t break off. Bake cookie per usual.

Step 1: Outline the face of Frankenstein with green piping icing making sure to add jagged lines for his hair.
Step 2: Fill the green outline portion with black flood icing.
Stop and allow your cookie to dry in front of a fan for 1-2 hours before flooding the next section.
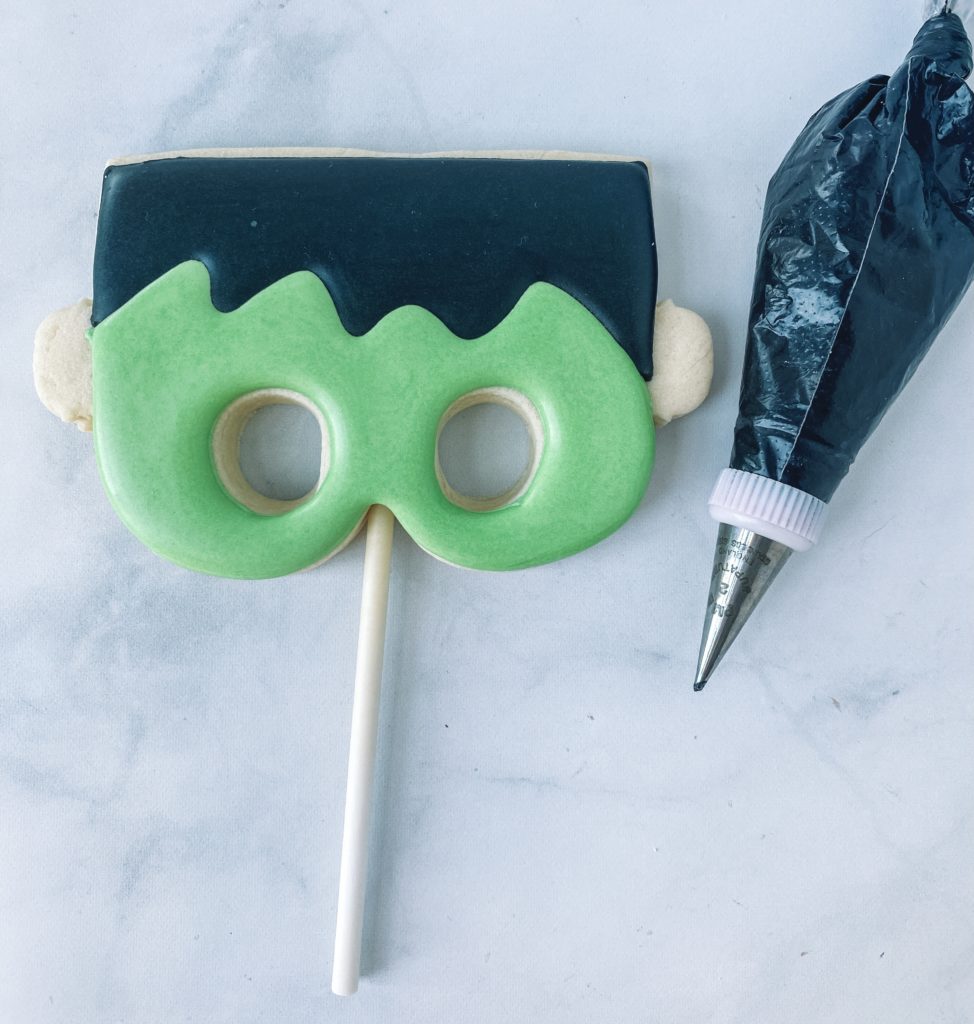
Step 3: Outline the top section of the cookie with black piping icing.
Step 4: Fill in the outlined area with black flood icing.
Stop and allow your cookies to dry in front of a fan for 1-2 hours before flooding the next section.
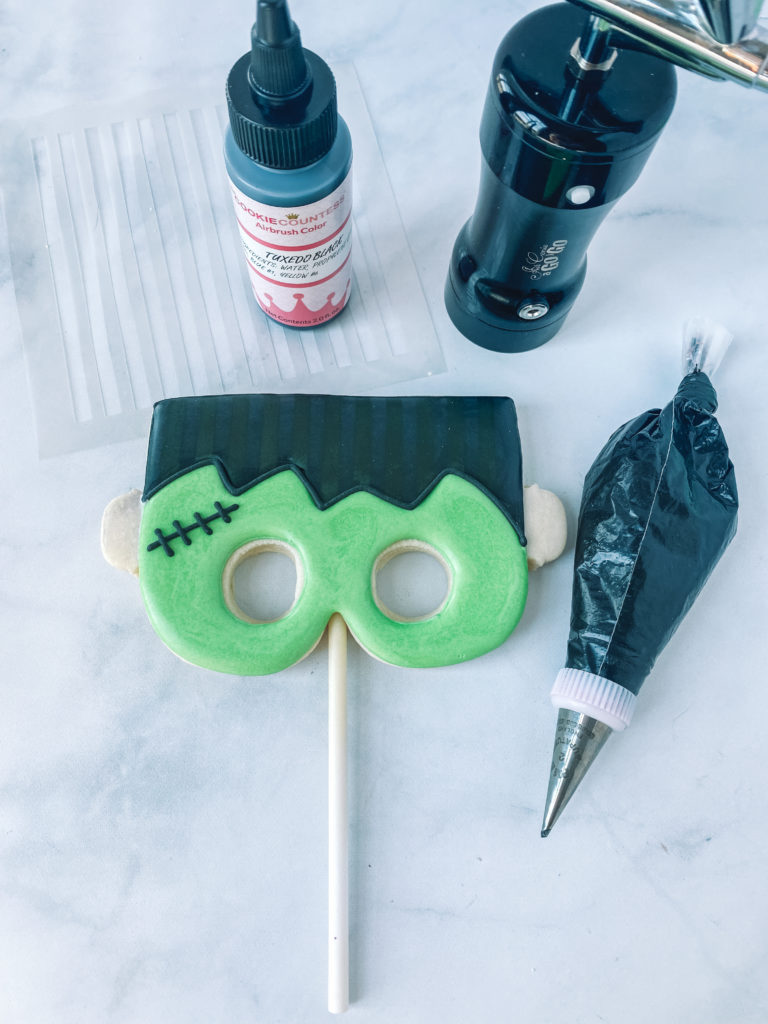
Step 5: Using the thin line stencil from The Cookie Countess and black airbrush color airbrush black lines on Frankensteins hair. This will give dimension to your cookie.

DETAILS
Step 6: Using black piping icing back some “sticking” details on Frank’s face. With the gray piping icing outline the two pieces on the side of Frank’s head. Fill in the outline section with gray flood icing.
As long as you are patient and careful, cookie pops are some of the most fun ways to make cookies and use them in different ways. Handle them with care and pick them up by the cookie itself and you will have great success. I can’t wait to see all the different cookie masks y’all make, share them on Instagram and tag me so I can see them and share all your skills!