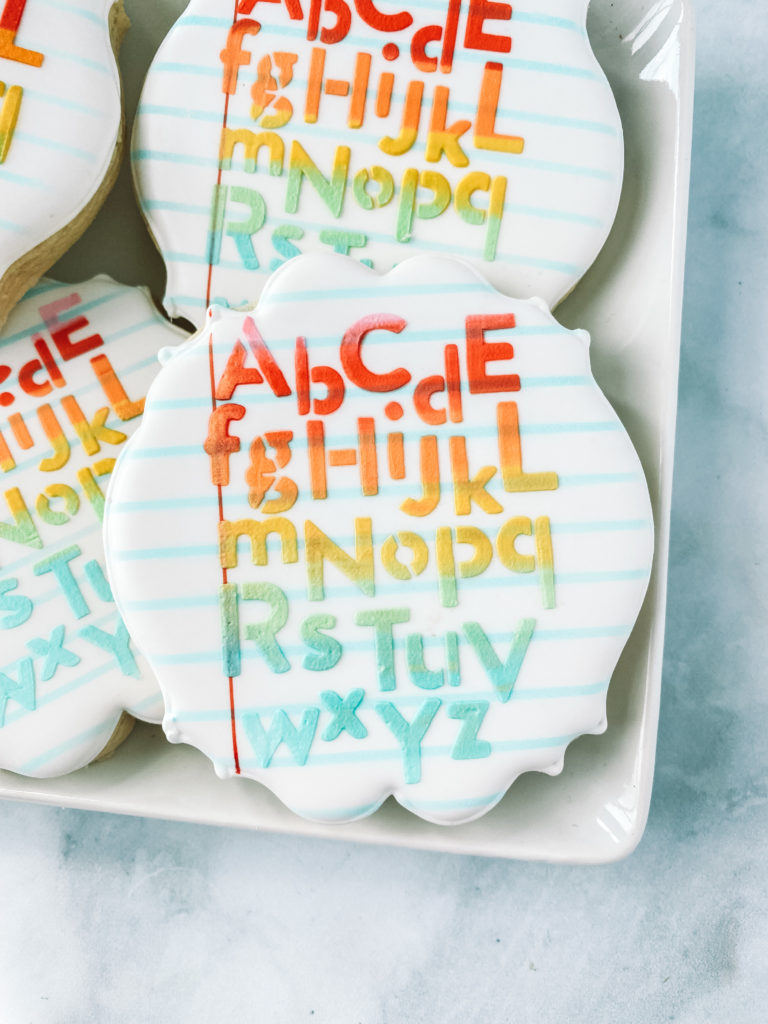
A few nights ago I woke up with this cookie on my brain and I could not stop thinking about it! I knew I had to create it and make a tutorial so you could make a fun rainbow back to school cookie! It’s pretty simple.
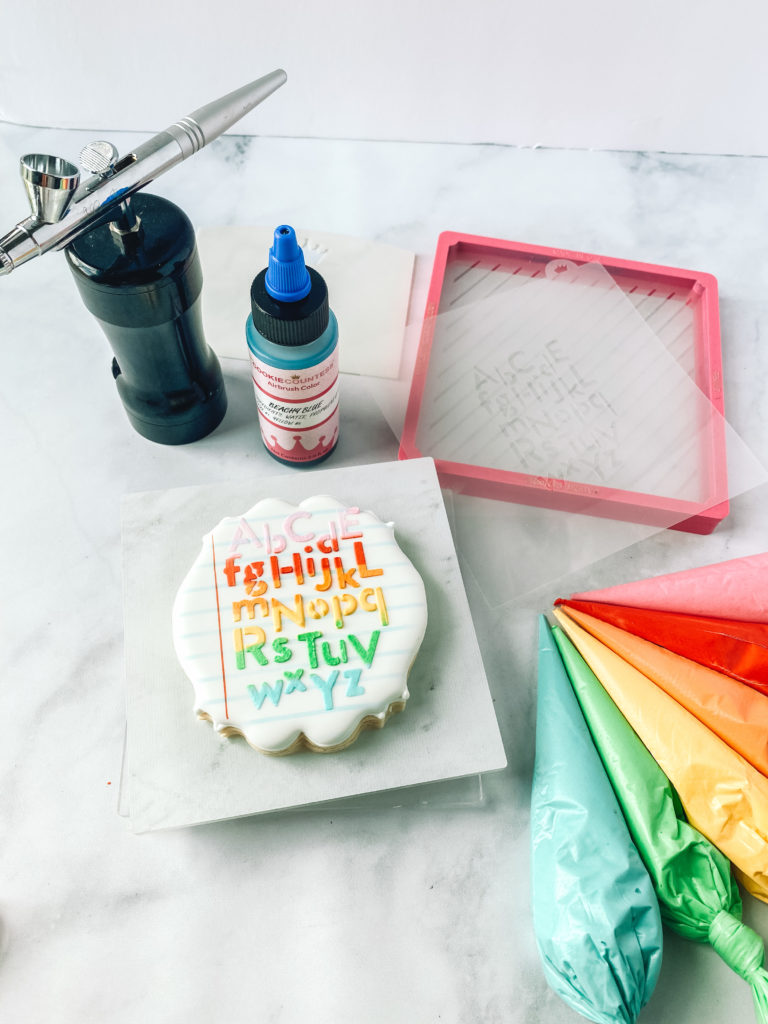
You will need:
Rainbow assortment of piping icing
Cookie Countess alphabet stencil
Cookie Countess thin line stencil
Cookie Countess air brush machine and beachy blue air brush color
Food Doodler Red edible marker
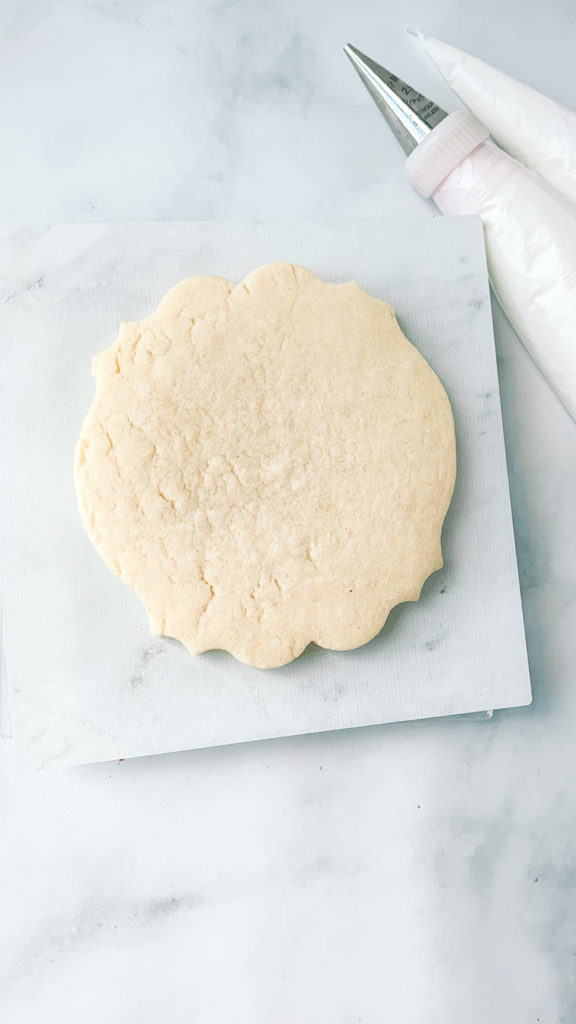
First you want to outline and flood the base of your cookie! Make sure you check the sizing on your stencil and cookie cutter. You want to make sure that all the letters will fit on your cookie.
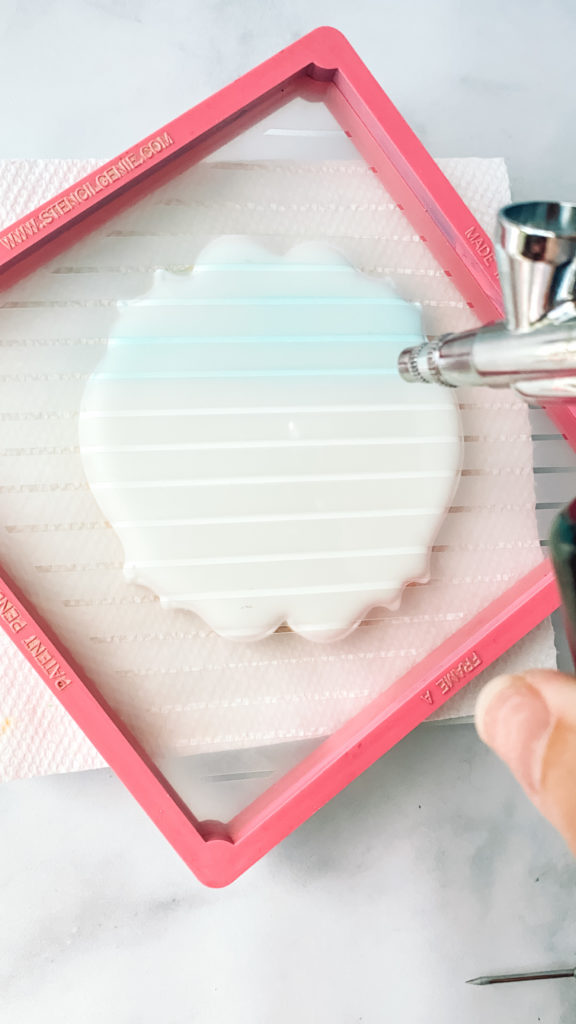
Once you have allowed your white flooded cookie to dry for 8-10 hours you are ready for the next step. Using the thin line cookie countess stencil you will air brush (with beachy blue) lines on your cookie. Remember, airbrushing is all about going slow and applying in layers.
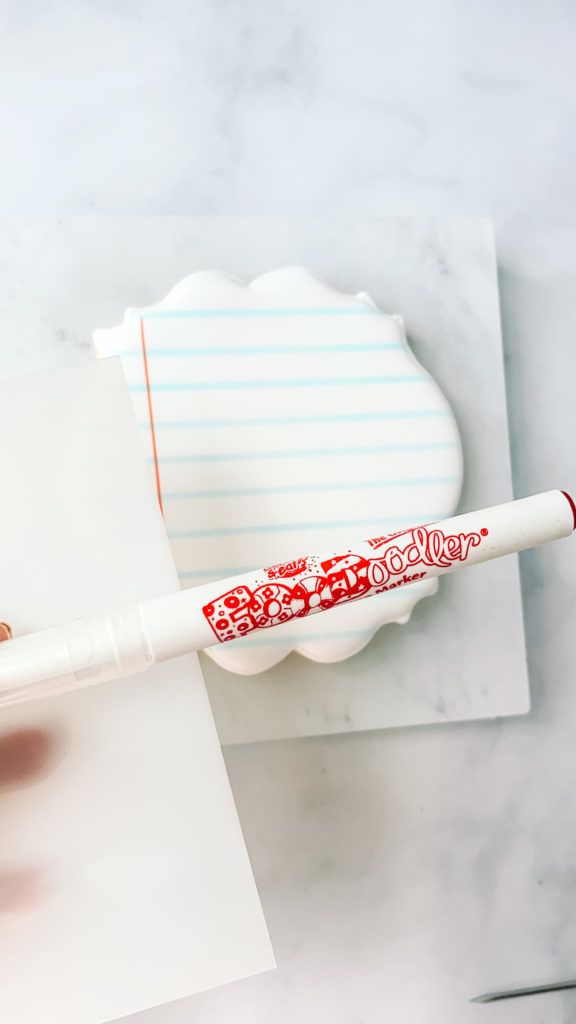
Allow your blue air brushed lines to dry for about 20 min before moving on to the next step. Now it’s time to take a straight edge, it can be anything, and your red food doodler marker. On one side draw a line from top to bottom for your notebook paper.
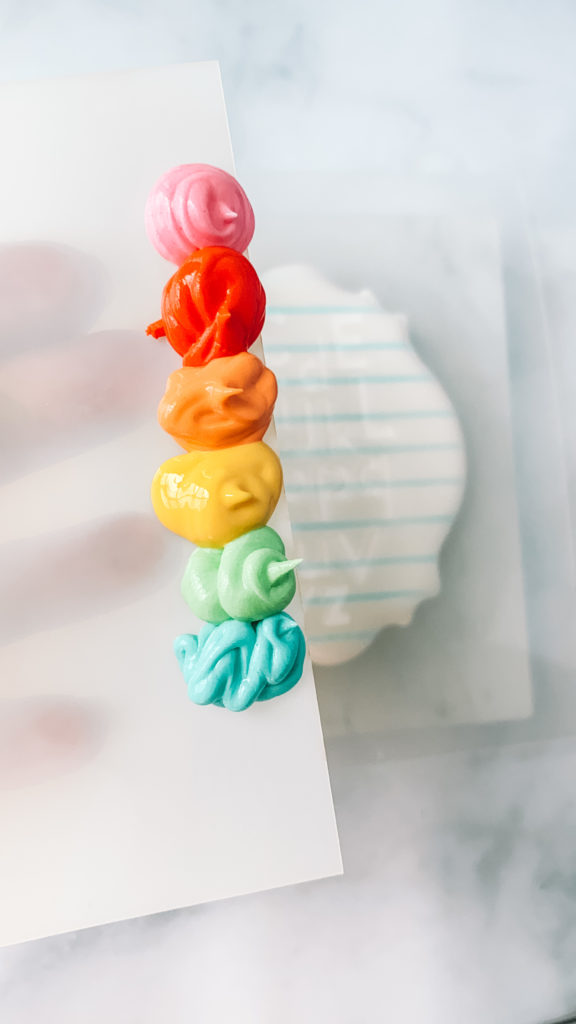
Now comes the fun part! I love the cookie countess scraper because it’s very wide and perfect for this kind of project. Using piping icing in whatever color you choose apply about 2 pea sizes on the edge of the scraper. I do this the whole way down with the colors overlapping.
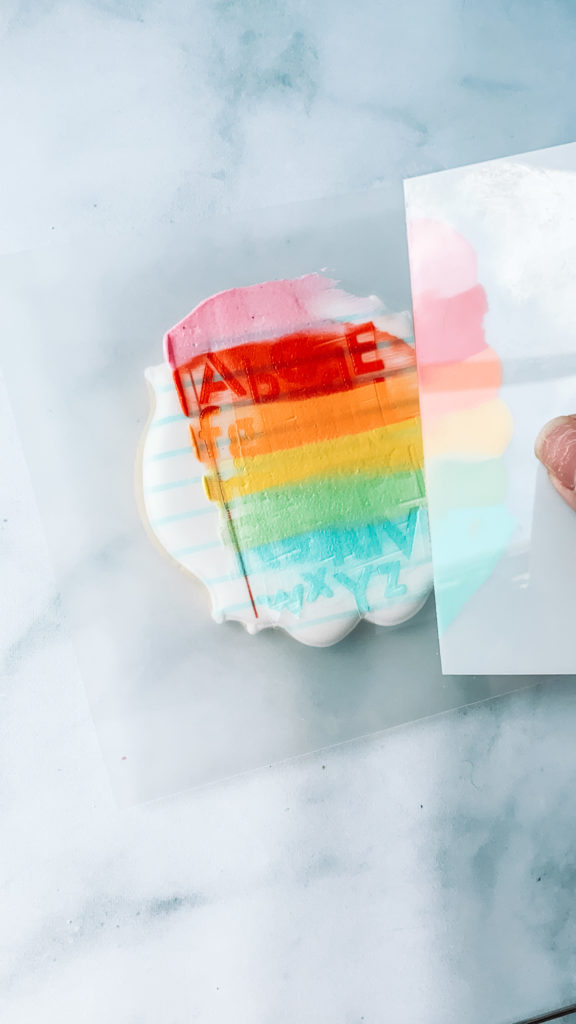
Next you are going to set your alphabet stencil in place. Hold the stencil in place with two fingers from your left hand. Turn your scraper over and start lightly scraping from left to right. The icing might be thick so go over with a few passes but make sure to line it up the same way each time. Once done carefully lift up your stencil and voila, a beautiful rainbow lettered cookie.